Mastering Product Photography for Brand Success
Imagine looking at an online store with blurry product photography. Would you trust buying it? Probably not. Good product photography does more than look nice—they build trust. Studies show bright, clear product photography makes products seem more reliable. This makes people more likely to click "Add to Cart." Listings with many product photography images can raise sales by 65%! Also, 83% of shoppers say product photography affects their choices a lot. Great images aren't just pretty—they're key for good marketing and growing your brand.
Why Product Photography Matters
Building trust with clear and detailed visuals
When shopping online, pictures help you decide what to buy. Clear product photos make you feel sure about your choice. They show details like seeing the item in person. Matching images across your store show you care about quality. Good photos also make your brand look trustworthy. This encourages people to check out your products.
Fun fact: Studies say good product photos build trust. This helps people feel closer to your brand.
Enhancing brand perception through professional imagery
Product photos don’t just show items—they tell your brand’s story. High-quality pictures show your brand cares about being professional. Whether simple or colorful, photos shape how people see your brand.
Styled product photos make your brand stand out.
They help with product pages and ads.
Nice-looking photos grab attention and make people feel happy, studies say.
Finding | What It Means |
|---|---|
Buying Choices | Pretty product photos make people want to buy more. |
Happy Feelings | These photos make shoppers feel good about the products. |
Driving conversions with compelling product photos
Great product photos don’t just look nice—they help sell items. When people see cool pictures, they want to buy faster. Mental imagery theory says people imagine using products based on photos. Backgrounds in pictures make this imagining stronger, boosting sales.
Tip: Show your products in use with lifestyle photos. These help shoppers picture themselves using the item, leading to quicker buys.
SEO benefits of optimized images
Did you know photos can help your site rank higher? Clear, optimized pictures not only look good but also help your site. When you upload sharp, well-sized images, search engines notice. This can bring more visitors to your online store.
Here’s why it matters. Search engines prefer fast websites. Big, uncompressed photos slow your site down. Slow sites hurt rankings. Compressing images makes pages load faster. Faster pages mean better rankings and happy visitors. Tools like TinyPNG or ImageOptim can shrink file sizes without losing quality.
Adding alt text is another helpful trick. Alt text explains what’s in the photo. It helps search engines understand your content. For example, if you sell candles, your alt text could say, “Soy candle in glass jar.” This helps your store show up in searches.
Optimized photos also improve user experience. Fast-loading, clear pictures keep visitors on your site longer. This is super important for online stores. Good visuals help convince shoppers to buy. Better experiences lead to more engagement, which boosts rankings.
So, don’t ignore the power of optimized images. They’re not just pretty—they help grow your brand and reach more people.
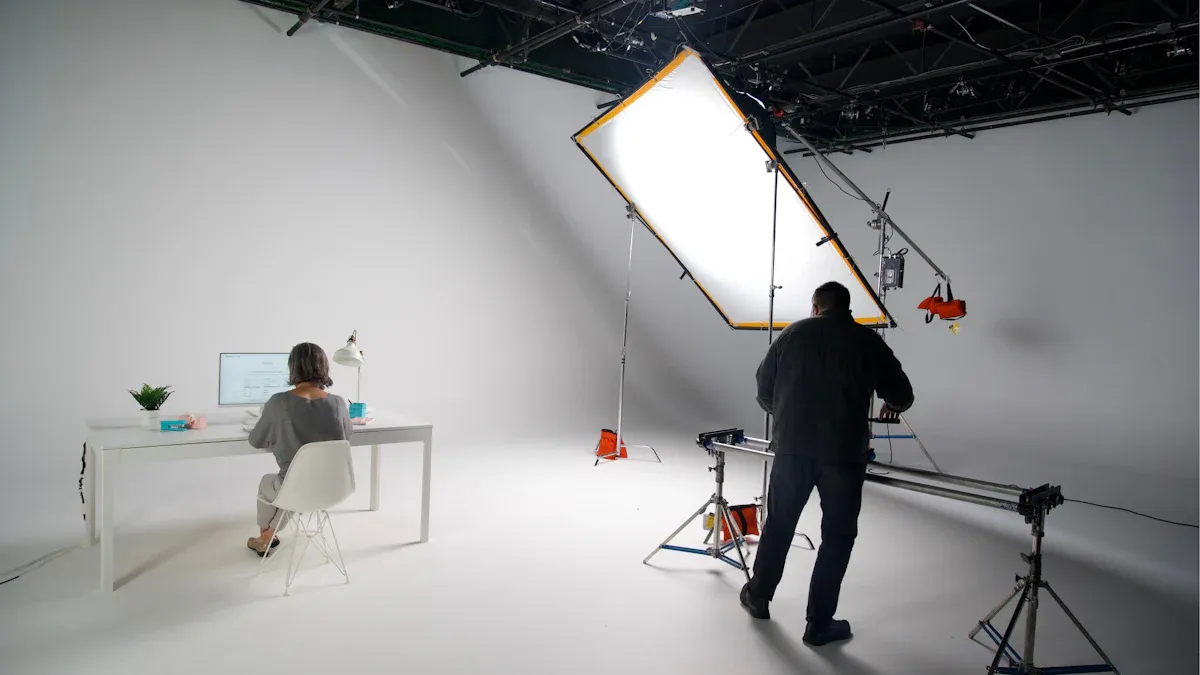
Essential Tools for Product Photography
Choosing between smartphones and DSLR cameras
Picking between smartphones and DSLR cameras depends on your needs. Smartphones are easy to use and great for quick photos. Most people already own one, and they’re good for beginners. Many newer smartphones can shoot in RAW and have editing tools. This makes them a budget-friendly choice.
But smartphones have limits. Their pictures aren’t as sharp as DSLR cameras. If you want better quality, DSLRs are the best option. They let you control settings like aperture and shutter speed. You can also change lenses for close-ups or wide shots.
Feature | Smartphone | DSLR Camera |
|---|---|---|
Ease of Use | Simple and quick | Needs manual setup |
Image Quality | Good for casual photos | Best for professional shots |
Cost | Cheaper | Costs more upfront |
Workflow | Fast editing and sharing | Takes more time to set up |
If you’re new to product photography, a smartphone might work fine. But for better, professional pictures, a DSLR can improve your brand’s look.
Lighting options: Natural light, softbox kits, and LED panels
Good lighting makes product photos look amazing. Without it, even the best camera won’t help.
Natural light is free and works well for many products. It’s soft and flattering, especially during golden hour. This is right after sunrise or before sunset. To avoid harsh shadows, use indirect sunlight or reflectors.
Artificial lighting gives you more control. Softbox kits and LED panels let you adjust brightness and direction. LED lights are great for small items. Advanced setups like three-point lighting add depth to your photos.
Tip: Bright, clear photos can boost sales by 67% and lower returns by 10%.
Here’s a quick guide to lighting:
Natural Light:
Free and easy to use.
Great for soft, even lighting.
Best during golden hour for warm tones.
Artificial Light:
Works anytime, day or night.
Softboxes and LED panels allow adjustments.
Advanced setups make photos look professional.
No matter which lighting you pick, the goal is to make your product look its best.
Tripods for stability and consistency
Tripods are super helpful for product photography. They keep your camera steady and prevent blurry pictures. If you’re taking many shots of the same item, tripods help keep everything lined up.
Holding a camera steady for every photo is tiring. A tripod solves this problem. It’s great for long exposure shots or when using artificial lights.
Note: Tripods aren’t just for DSLR cameras. You can use a mobile tripod for smartphones too.
Why use a tripod?
Stops camera shake for clearer photos.
Keeps framing consistent across all shots.
Makes it easier to try different angles and lighting.
A good tripod is a small investment that improves your product photos a lot.
Backdrops: White seamless paper, vinyl, and DIY solutions
The backdrop you pick is very important for product photos. It makes your product stand out and keeps the focus on it. A neat backdrop removes distractions and looks professional. Let’s check out some popular choices and how to use them well.
1. White Seamless Paper
White seamless paper is loved by many photographers. It’s cheap, simple, and gives a clean background. Its smooth surface avoids wrinkles or textures that might distract.
Why it’s great:
It spreads light evenly, avoiding harsh shadows.
It works for almost any product type.
You can replace it easily if it gets dirty or torn.
Pro Tip: Let the paper roll down and curve naturally. This creates an endless-looking background called the “infinity effect.”
2. Vinyl Backdrops
Vinyl backdrops are strong and reusable. They come in many colors, patterns, and textures, giving you creative options. Vinyl is easy to clean, so it’s great for food or makeup products.
Why vinyl is useful:
It lasts long and saves money over time.
You can choose matte or shiny finishes.
Cleaning spills is quick and easy.
For a polished look, pick matte vinyl. It stops glare and keeps attention on your product.
3. DIY Solutions
Want to save money? Make your own backdrops with things at home. DIY backdrops are cheap and let you try fun designs.
Here are some ideas:
Poster Boards: Use white or colored boards for small items.
Fabric: Plain sheets or textured cloths give a soft look.
Wooden Boards: Great for natural or rustic products.
Tiles or Marble Slabs: Perfect for fancy items like jewelry.
Creative Tip: Layer materials like fabric over wood for a cool, textured look.
Picking the Right Backdrop for Your Product
The best backdrop depends on your product and brand style. Use this guide to choose:
Backdrop Type | Best For | Key Features |
|---|---|---|
White Paper | All products | Clean, simple, versatile |
Vinyl | Food, makeup, or messy items | Strong, easy to clean |
DIY | Small budgets or creative shots | Unique, customizable |
Keep your backdrop simple. It should make your product shine, not steal attention.
Final Thought: A good backdrop doesn’t need to cost much. It just needs to match your product and make it look great. Try different options to see what fits your brand best!
Step-by-Step Guide to Taking the Best Product Photos
Getting your product ready for different photo styles
Preparing your product is key to great pictures. Different photo styles show your product in unique ways. Close-ups show small details like fabric texture or jewelry shine. Medium shots show the product with its surroundings, helping people see its size and use. Long shots set the scene and are great for lifestyle photos.
Here’s how to get your product ready:
Clean your product to remove dust or smudges. This keeps it looking perfect.
Place the product carefully based on the photo style. For close-ups, focus on its best feature. For medium shots, add props to make it look better.
Use stands or holders for small items like jewelry to keep them steady.
Try different angles to find the best look for your product.
Take many photos from different angles. This helps customers see every detail of your product.
Setting up the background for better photos
The background is important for making your product stand out. A messy or busy backdrop can distract people. Use a simple background that matches your product’s style.
Here are tips for a good background:
Pick a white backdrop for a clean and professional look. White spreads light evenly and works for most products.
Try vinyl backdrops for colorful or textured options. These add personality to your photos.
Make DIY backdrops using things like poster boards, fabric, or wood. These are cheap and creative.
Keep the same background for all photos to make your brand look consistent.
Pro Tip: Let white paper curve naturally for an endless look. This makes your product appear polished and floating.
Fixing lighting for better pictures
Lighting makes your product photos look amazing. It sets the mood, shows textures, and makes your product more appealing. Natural light gives warm, real looks, while artificial light lets you control brightness and shadows.
Here’s how to fix lighting:
Use natural light in the morning or golden hour for soft tones. Indirect sunlight stops glare and harsh shadows.
Set up artificial lights like softboxes or LED panels for even brightness. These work well indoors.
Balance shadows and highlights to avoid dark spots or washed-out colors. Shadows can hide details, and too much light can ruin colors.
Change your camera’s exposure settings to match the light. Tap the product to adjust focus and exposure for clear details.
Tip: Good lighting can highlight your product’s best parts, making it more attractive to buyers.
Using a tripod and camera settings effectively
A tripod helps you take clear, sharp product photos. It keeps the camera steady, which is super important for close-ups. Even small hand movements can make pictures blurry without one.
Here’s why tripods are helpful:
They keep your photos steady and detailed.
They work well with slow shutter speeds, which need stability.
They help you keep the same framing for all shots.
Pro Tip: Use a timer or remote to avoid shaking the camera. This makes your photos even clearer.
For camera settings, learn about shutter speed, aperture, and ISO:
Shutter Speed: Use slower speeds to let in more light. Always use a tripod to avoid blur.
Aperture: A higher f-stop keeps the whole product in focus.
ISO: Keep it low for clear, non-grainy pictures.
Using a tripod with the right settings gives you professional-looking photos every time.
Capturing multiple angles and compositions
Taking photos from different angles helps people see your product better. When shopping online, don’t you want to see every detail? Showing multiple views makes buyers feel more confident.
Try these techniques:
Technique | Why It Helps |
|---|---|
Familiarity Of Scale | Show size by placing the product next to familiar items. |
Eye-level Angle | Gives a natural view, great for clothes or accessories. |
High-Angle | Makes the product look easy to use. |
Low Angle | Adds a fancy, high-end feel to the product. |
Isolation | Keeps the focus only on the product, no distractions. |
Center & Symmetry | Creates a balanced, neat look. |
Rule Of Odds | Odd numbers of items make photos more interesting. |
Pattern and Texture | Highlights details like fabric or jewelry designs. |
Tip: Add lifestyle photos to show how the product is used. This helps buyers imagine owning it.
Try different angles and styles to see what works best. More variety makes it easier for customers to connect with your brand.
Editing photos for a polished finish
Editing makes your photos look even better. Even good pictures can improve with small changes. Edited photos look professional and grab attention quickly.
Why edit your photos?
High-quality pictures make your brand look trustworthy.
Edited images are more eye-catching and keep people interested.
A consistent editing style makes your brand memorable.
Did You Know? People remember product info with a photo 65% more after three days compared to just 10% without a picture.
Here’s how to start editing:
Adjust Brightness and Contrast: Make your product stand out by balancing light and dark.
Fix Colors: Match photo colors to the real product for trust.
Remove Imperfections: Clean up dust or scratches in the image.
Crop and Align: Center the product and remove extra background.
Use tools like Adobe Lightroom, Snapseed, or VSCO. These apps are easy to use and improve your photos.
Pro Tip: Compress your photos before uploading them online. Tools like TinyPNG make files smaller without losing quality. This helps your website load faster and rank better.
With simple edits, your photos will look amazing and help your products stand out online.
Optimizing images for online stores
When shopping online, product images are super important. They act like a “preview” of the item. If pictures are blurry or take too long to load, shoppers might leave. Optimizing images makes them clear, fast-loading, and keeps people interested. Let’s learn how to do this.
Why Image Optimization Matters
Optimized images aren’t just pretty—they help your store succeed. Here’s why they matter:
High-resolution images let shoppers zoom in to see details. This builds trust and helps them feel sure about buying.
Consistent image styles and lighting make your store look professional. This makes your brand seem reliable and polished.
Fast-loading images keep visitors on your site longer. Quick pages make shopping easier and more fun.
Quick Fact: Clear, high-quality images can boost trust and increase sales.
Steps to Optimize Your Images
You don’t need special skills to improve your product photos. Follow these easy steps to make your images better:
Pick the Right File Format
Choose formats that balance quality and size. JPEG works well for most photos because it stays clear while compressing. PNG is best for pictures with transparent parts.Resize Images for Speed
Big files slow websites down. Resize pictures to fit your store’s layout. For example, if your site uses 800x800 pixels, don’t upload huge 4000x4000-pixel images.Compress Without Losing Quality
Use tools like TinyPNG or ImageOptim to shrink file sizes. Smaller files load faster but still look sharp.Add Descriptive Alt Text
Alt text helps search engines understand your images. Write clear descriptions like “Handmade ceramic mug with blue glaze” instead of “Image1.jpg.”Keep Styles Consistent
Use the same lighting, angles, and backgrounds for all photos. This makes your store look neat and professional.
Advanced Techniques to Boost Engagement
Want to make your product images even better? Try these ideas to grab attention:
Zoom Features: Let shoppers zoom in to see textures or details. This feels like seeing the product in person.
Lifestyle Photos: Show products being used, like a blanket on a couch. This helps shoppers imagine owning the item.
Videos: Short clips showing how to use the product can be very helpful. Videos give extra info and make buying decisions easier.
Pro Tip: Lifestyle photos and videos make shopping more fun and increase sales chances.
How Optimized Images Help Sales
Optimized images don’t just look nice—they improve your store’s performance. Here’s how they help:
Benefit | Why It’s Important |
|---|---|
Faster Load Times | Keeps shoppers on your site longer and reduces bounce rates. |
Better Search Rankings | Search engines rank fast-loading sites higher, bringing more visitors. |
Higher Engagement | Clear images encourage shoppers to explore your products more. |
Increased Conversions | Professional photos build trust, leading to more purchases. |
Did You Know? Shoppers are more likely to buy when they can clearly see product details and imagine using the item.
By optimizing your images, you’re improving the shopping experience. This keeps customers happy and helps your brand stand out from competitors.
Smartphone Photography Tips
Using the back camera for better pictures
The back camera on your smartphone is great for clear photos. It gives sharper and more detailed images than the front camera. Many new smartphones have cool features like extra lenses and manual settings. These let you change things like focus and brightness for better shots.
If your phone can shoot in RAW, use it. RAW saves more details, making editing easier and improving your pictures. Today’s smartphones can take photos almost as good as professional cameras. With practice, you can take amazing pictures that show off your products well.
Tip: Always pick the back camera for sharper, clearer photos.
Changing settings like color balance and brightness
Fixing your camera settings can make your photos look great. Start with the white balance. This helps colors in your photo match the real product. Use a white object to adjust the balance until it looks natural. You’ll see how much better the colors look.
Next, check the brightness. Too much light can hide details, and too little makes the product hard to see. Adjust the brightness to find the right level. These small changes can make your photos stand out and look professional.
Pro Tip: Test these settings before taking pictures. It saves time editing later and makes your photos look polished.
Keeping the lens clean for clear photos
A dirty lens can mess up your photos. Dust or smudges make pictures blurry and unprofessional. Before taking photos, wipe the lens with a soft cloth. This simple step keeps your pictures sharp and clear.
Quick Reminder: Clean your lens every time you take photos. It’s an easy habit that improves photo quality a lot.
Practical techniques for professional smartphone photography
Taking professional-looking photos with your smartphone is easier than you think. With a few simple techniques, you can make your product images stand out and look polished. Here’s how you can do it:
Use Gridlines for Perfect Composition
Turn on the gridlines in your camera settings. These lines divide your screen into nine equal parts, helping you follow the “rule of thirds.” Place your product along these lines or at their intersections for a balanced and visually appealing shot.Tap to Focus
Always tap on your product on the screen before taking a photo. This ensures the camera focuses on the right spot, making your product sharp and clear.Experiment with Angles
Don’t stick to just one angle. Try shooting from above, at eye level, or even from a low angle. Different perspectives can highlight unique features of your product and make your photos more dynamic.Use Natural Light Wisely
Position your product near a window for soft, even lighting. Avoid direct sunlight, as it can create harsh shadows. If the light is too strong, use a white curtain or sheet to diffuse it.Steady Your Hands or Use a Tripod
Shaky hands can ruin a great shot. Hold your phone with both hands or use a smartphone tripod for stability. You can also use the timer feature to avoid any movement when pressing the shutter button.
Pro Tip: Use portrait mode for products with depth. It blurs the background slightly, making your product pop.
Clean the Lens Before Shooting
A quick wipe of your camera lens can make a huge difference. Dust and smudges can make your photos look blurry or dull.Edit Like a Pro
After taking your photos, use editing apps like Snapseed or Lightroom. Adjust brightness, contrast, and sharpness to make your product look its best.
By following these techniques, you’ll turn your smartphone into a powerful tool for professional product photography. Give them a try and see the difference!
Editing and Optimizing Photos
Best editing tools: Adobe Express, Lightroom, and VSCO
Editing tools make product photos look amazing. Adobe Express, Lightroom, and VSCO are great choices. Each tool has features to improve your photos and grab attention.
Adobe Express: Easy to use for quick edits. It has filters, templates, and text options. Adjust brightness, contrast, and colors to make photos stand out.
Lightroom: Offers detailed controls like exposure and shadows. Use presets for a consistent photo style across your brand.
VSCO: Famous for filters that create moods. It’s simple and works well for lifestyle product photos.
These tools are beginner-friendly. Try them to see which fits your brand best.
Techniques for enhancing photo quality
Editing isn’t just about adding filters. Small changes can make photos look better. Brightness and contrast adjustments help products look vibrant.
Fix colors to match the real product. This builds trust with shoppers. Cropping removes distractions and keeps focus on the product.
Sharpening highlights textures and edges, making photos look professional. These steps make your product photography shine.
Tip: Edit all photos the same way for a consistent brand look.
Image compression tools like TinyPNG
Big image files slow websites down. Tools like TinyPNG shrink photos without losing quality. This makes your site faster and improves user experience.
Slow-loading pages frustrate visitors and hurt rankings. Compressing images reduces file sizes and speeds up your site. Faster pages keep users happy and improve SEO.
Choose the right format too. JPEG is good for most photos, while PNG works for transparent parts. Compression and resizing keep photos sharp and quick to load.
Quick Fact: Fast websites rank higher and keep visitors longer.
Improving website performance and SEO with optimized images
Did you know better photos can speed up your website? They also help your site rank higher on search engines. Fast-loading pages keep visitors happy and improve visibility. Here’s how to make it happen:
1. Resize Your Photos
Big photo files slow websites down. Resize them to fit your store’s needs. For example, if your images show at 800x800 pixels, don’t upload huge 4000x4000-pixel files. Smaller files load faster and keep your site smooth.
2. Compress Without Losing Quality
Use tools like TinyPNG or ImageOptim to shrink file sizes. These tools keep photos sharp while making them smaller. Faster pages mean happier visitors and better rankings.
3. Use the Right File Format
JPEG is great for most product photos because it balances quality and size. PNG works best for pictures with clear or see-through parts. Picking the right format helps your images look good and load quickly.
4. Add Descriptive Alt Text
Alt text helps search engines understand your photos. Write clear descriptions like “red leather wallet with gold zipper.” Avoid generic terms like “image1.jpg.” This improves your chances of showing up in searches.
Pro Tip: Use the same style for all product photos. This makes your store look neat and reliable.
Optimizing photos doesn’t just help your website run better. It also gives shoppers a better experience and boosts your search rankings. Everyone wins!
Creative Photography Ideas
Lifestyle shots to show products in action
Lifestyle photos show how products fit into daily life. Instead of just showing the item, they tell a story. For example, a blanket on a couch or a watch on a wrist makes the product feel real. These pictures help people imagine using the product themselves.
Lifestyle photos are great for social media. They look nice and get shared more often. This gives your brand more attention. Seeing products in use also builds trust. People feel sure about the product’s quality when they see it in action.
Tip: Use real-life settings to make lifestyle photos feel natural.
Macro photography for close-up details
Tiny details can make a big difference. Macro photos zoom in on small features like leather texture or gemstone sparkle. This style works well for jewelry, gadgets, or finely made items.
Close-ups show materials clearly, helping buyers see what they’re getting. These photos make products look high-quality and trustworthy. When shoppers see details up close, they feel confident about buying.
Fun Fact: Close-up photos often lead to more sales because they show quality clearly.
Styled setups for creative looks
Styled photos turn simple product pictures into art. Props, lighting, and angles make images look amazing. For example, angled shoulder poses add depth and make products stand out.
Models help styled photos too. Seeing how clothes fit or how bags look when carried helps buyers imagine owning them. Using the same poses and looks keeps photos consistent and strengthens your brand.
Pro Tip: Try different props and poses to mix creativity with professionalism.
Cool ideas like action poses and floating product shots
Want your product photos to look amazing? Action poses and floating shots can make them unique and exciting. These ideas are not only fun but also great for showing off your products in fresh ways.
Action Poses: Adding Life to Your Pictures
Still photos can seem boring. Action poses add movement and energy to your pictures. For example, if you’re taking photos of clothes, ask the model to walk, spin, or lean naturally. These actions show how the product looks when used.
Here’s how to try action poses:
Add props: Use a chair, ladder, or swing for fun effects.
Try different angles: Shoot from above or below for a cool look.
Catch natural moments: Let the model move freely and snap photos mid-motion.
Tip: Action poses are great for items like clothes, bags, or sports gear. They help people imagine using the product in real life.
Floating Shots: Making Products Look Weightless
Floating shots are perfect for grabbing attention. Hang your product in the air to make it look like it’s floating. This works well for light items like shoes, bags, or jewelry.
How to do floating shots:
Use clear thread or fishing line: These are hard to see and easy to edit out later.
Hang the product in front of a plain background: A white or solid color keeps the focus on your item.
Play with lighting: Shadows can add drama, or soft light can keep it simple.
Pro Tip: Floating shots are awesome for social media. They grab attention and make people want to share your photos.
Action poses and floating shots aren’t just fun—they’re unforgettable. They make your products stand out and help your brand shine. Try them out and see the difference in your photos!
How Product Photography Can Increase Sales
Making shopping easier with clear product pictures
When you shop online, what catches your eye first? It’s the pictures! Good product photos help you understand what you’re buying. They make shopping simple and fun.
Nice pictures do more than look pretty. They build trust by showing products clearly. Videos can explain tricky details, while photos of products in use show how they fit into daily life. These things make customers happy and feel sure about their choices.
Example Description | How It Helps Customers |
|---|---|
Videos explain hard-to-understand details | Makes products easier to understand |
Real-life product use shows benefits | Builds trust and shows value |
Sharp photos make brands look professional | Grabs attention and keeps interest |
When your photos look great, buyers feel confident. This confidence means fewer returns and happier customers.
Making your brand look professional
Product photos aren’t just for selling—they show off your brand. Clear, sharp pictures make your brand look trustworthy and professional. They show you care about quality and details.
Blurry or dark photos can make people doubt your product. But bright, clear images make your brand stand out. They show reliability and professionalism that shoppers like.
Pairing good photos with customer reviews makes this even better. Reviews show people trust your brand. When shoppers see polished pictures and read positive feedback, they’re more likely to pick your products over others.
Helping customers buy faster with great pictures
Did you know good photos can speed up buying? Clear, nice pictures help customers imagine using the product. This makes them want to buy it sooner.
Lifestyle photos are super helpful. They show products in real life, like a blanket on a couch or a watch on a wrist. These pictures make products feel more personal and appealing.
Good pictures grab attention fast. They keep shoppers looking longer, which increases sales chances. Investing in great product photos doesn’t just show your items—it creates a shopping experience that boosts sales and makes customers happy.
Boosting store traffic with better product photos
Did you know your product pictures can do more than look nice? They can help bring more people to your online store. Better photos make your website faster, rank higher on search engines, and attract more visitors. Let’s see how.
First, fast-loading pictures keep people on your site longer. Shoppers hate waiting for slow pages. If your photos load quickly, visitors will stay and explore more. This gives them a chance to find your products and like your brand.
Second, search engines prefer clear, optimized photos. Adding descriptive alt text helps search engines understand your pictures. For example, instead of naming a file “IMG1234.jpg,” use “blue coffee mug.” This helps your store show up in searches when people look for similar items.
Lastly, good photos make shopping easier. Clear, sharp pictures show every detail of your products. This builds trust and makes customers feel sure about buying. Happy shoppers might even share your store with friends, bringing in more visitors.
So, don’t ignore the power of great product photos. By improving them, you’re not just making your site better—you’re also growing your audience and building your brand.
Good product photos are super important for your brand’s success. They help people understand your products and trust your brand. Clear and matching pictures tell a story and connect with buyers. They also increase sales by showing quality and care. Use these tips now to improve your product photos and get noticed.
Need help showing off your products? Yoycol provides print-on-demand services to make your designs look amazing. With sharp images and great quality, you’ll impress your customers every time.
FAQ
How can I make my product photos look professional?
Use good lighting, simple setups, and editing tools. Natural light or softbox lighting works best for clear pictures. Keep the background neat and plain. Edit photos to fix brightness, contrast, and sharpness. Apps like Lightroom or Snapseed are helpful.
Tip: Tripods keep your camera steady for better photos.
Do I need a DSLR camera for product photography?
No, you don’t! Many smartphones take great pictures. For advanced features like changing lenses or manual settings, a DSLR camera is better.
Smartphone | DSLR Camera |
|---|---|
Easy to use | High-quality photos |
Cheaper option | Costs more upfront |
What’s the best way to optimize images for my website?
Make images smaller and faster to load. Use tools like TinyPNG to compress files. Add alt text to describe the photo for better SEO. Pick JPEG for most pictures and PNG for see-through parts.
Quick Fact: Faster-loading images make websites easier to use.
How do lifestyle photos help sell products?
Lifestyle photos show items in everyday use. They help people imagine owning the product. For example, a mug on a desk or a blanket on a couch makes the product feel real.
Pro Tip: Use props like books or plants for natural looks.
Can I take good product photos without expensive equipment?
Yes, you can! Use your smartphone, sunlight, and simple backdrops. Clean your lens and hold your phone steady. Apps like VSCO or Snapseed can improve your pictures.
Essentials:
Smartphone
Natural light
Plain backdrop
See Also
10 Effective Strategies for Crafting Compelling Product Descriptions
Essential Techniques for Excelling in Shopify Email Marketing
Effective Strategies for Sustained Sales Growth on Etsy