

What is Yoycol personalizer and how it works?
Let your customers design print-on-demand products on their preferences!
Personalization feature will make a differece on improving your customers' buying experience. Personalization feature allows you to make Yoycol products designable in your store. Here is the guide to help you learn how to set it.
*Notice: New feature only works for Shopify store.
Content:
1. Set personalization setting for one design
2. Publish the design with personalization settings
3. Check in your store
4. View the product in your store frontend
5. Fulfiill the personalized order
1. Set personalization setting for one design
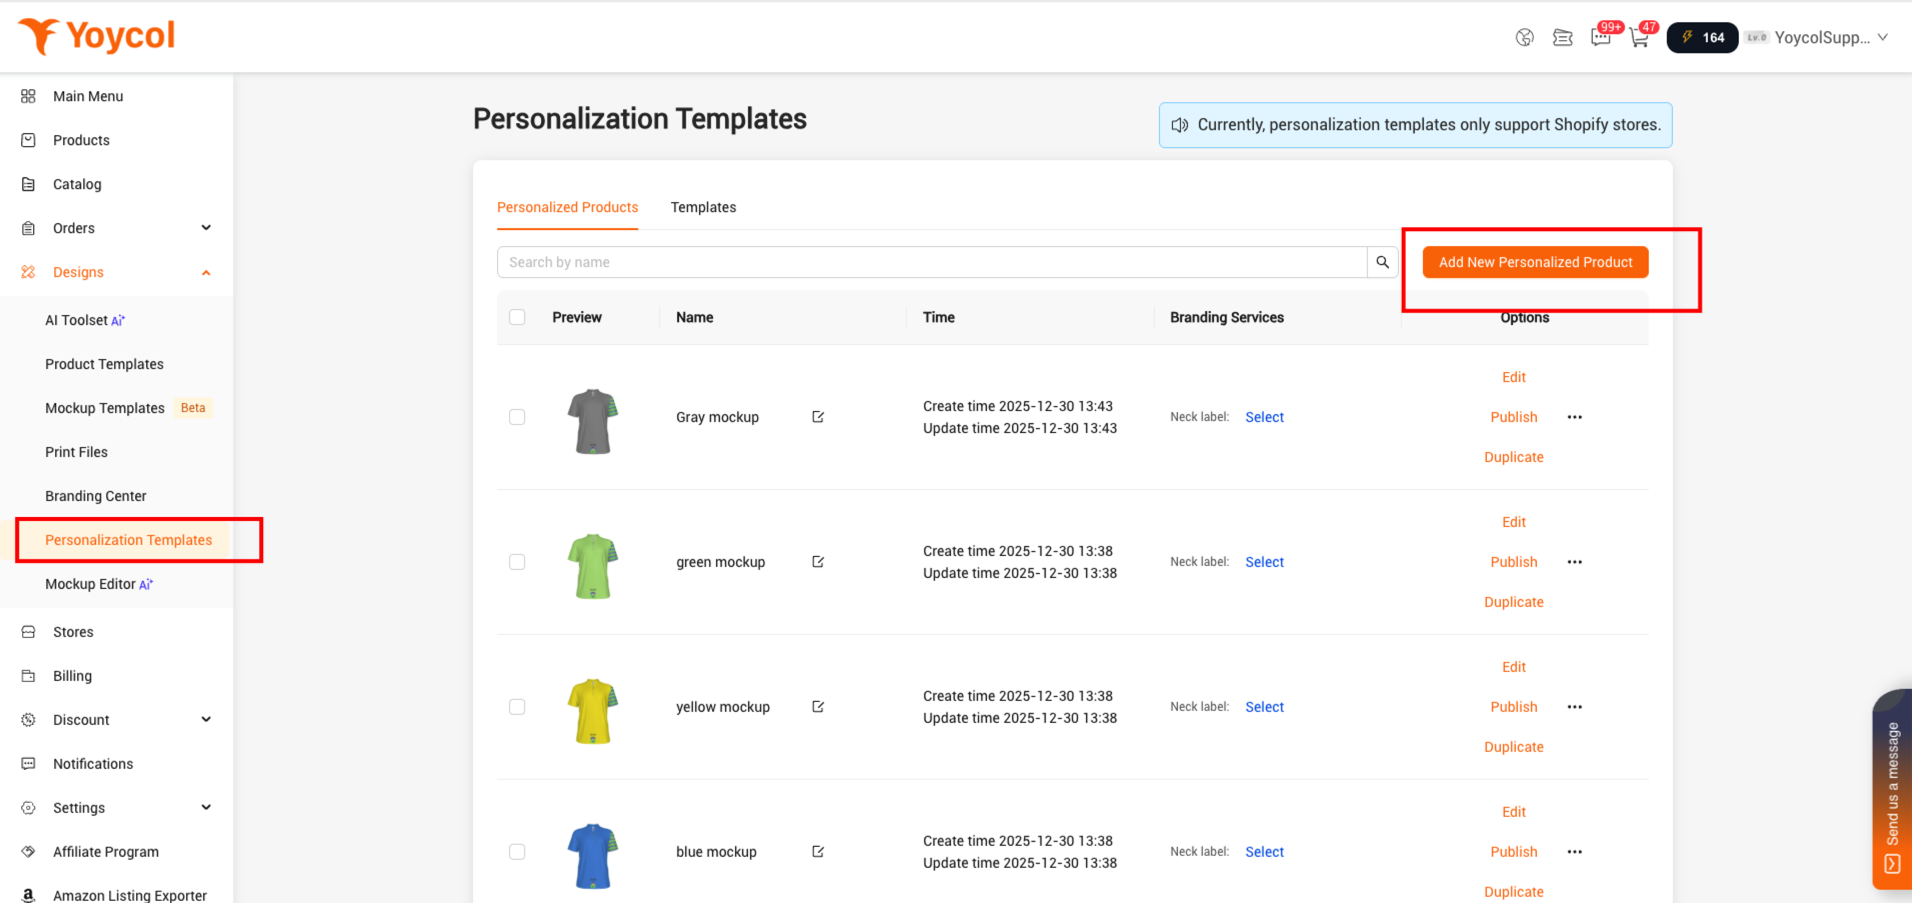
1.1 Go to "Personalization Templates",and click "Add New Personalization"
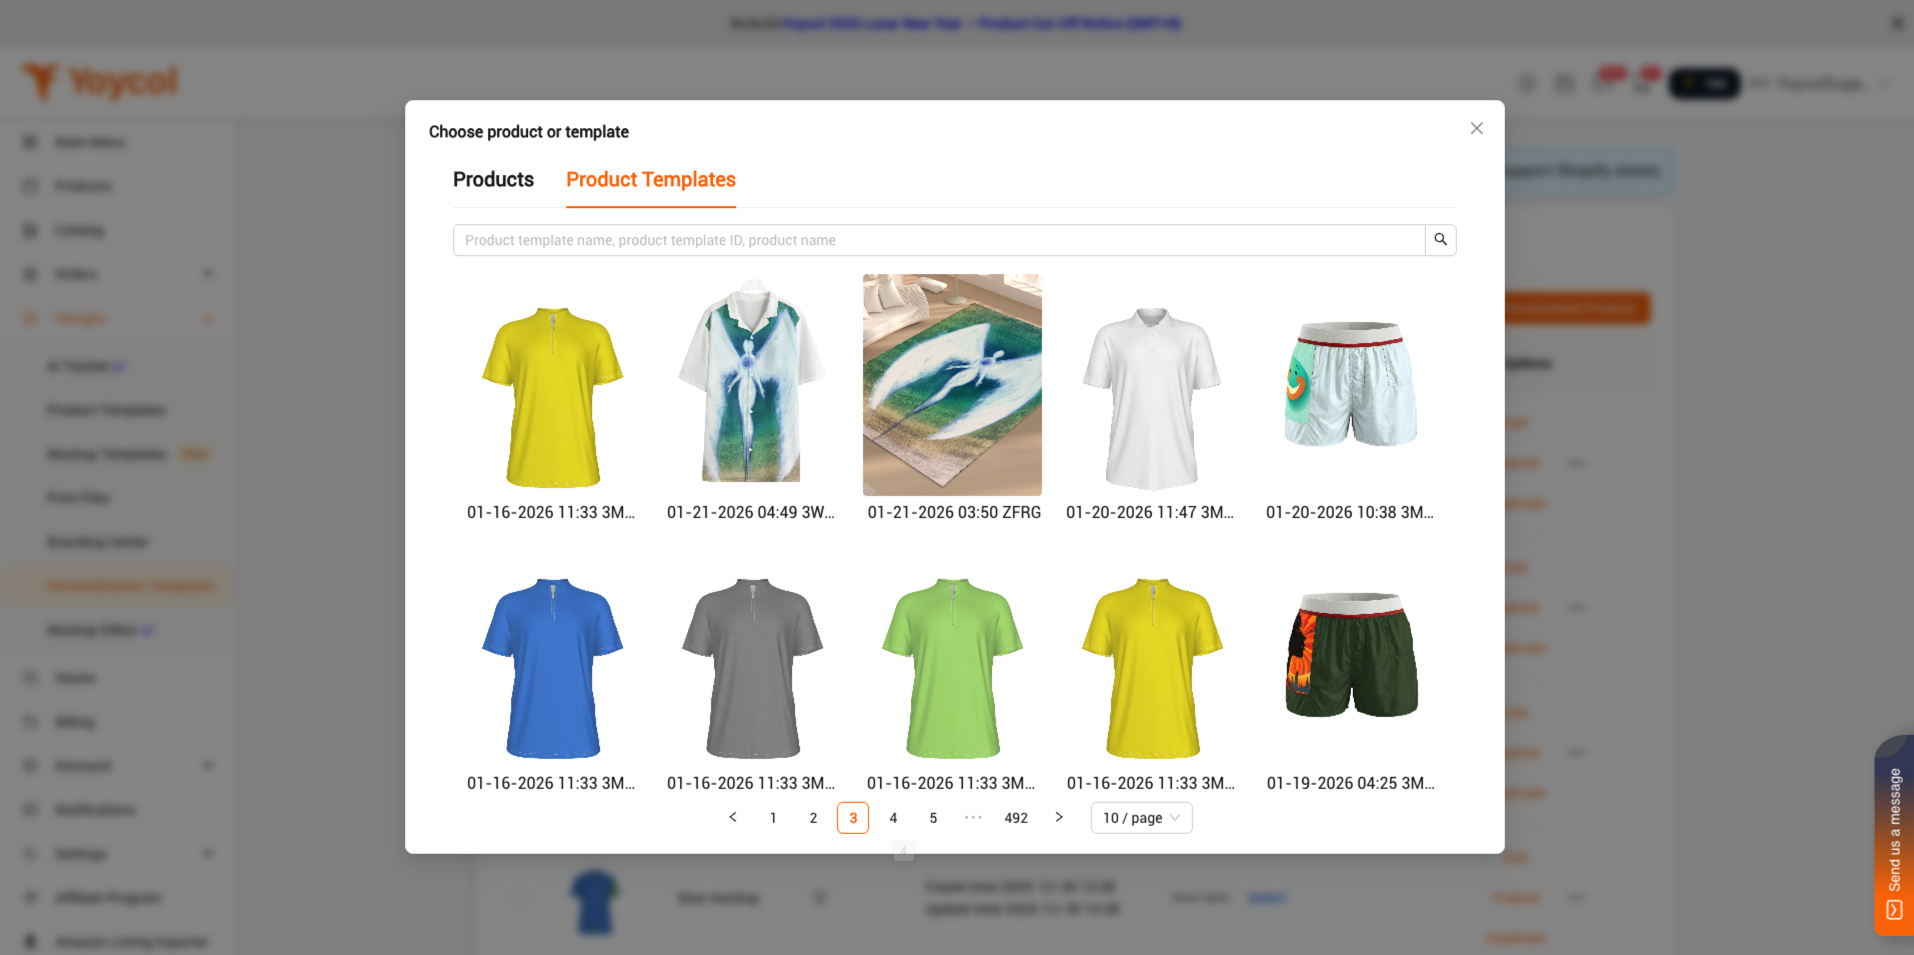
1.2 In the pop-up window, switch to "Product Templates" tab, choose the design you want to add personalization.
1.3 In personalization setting page, you will find 4 areas - title bar, preview area, setting area, tutorial area.
1) Title bar
There are design name and mockup.

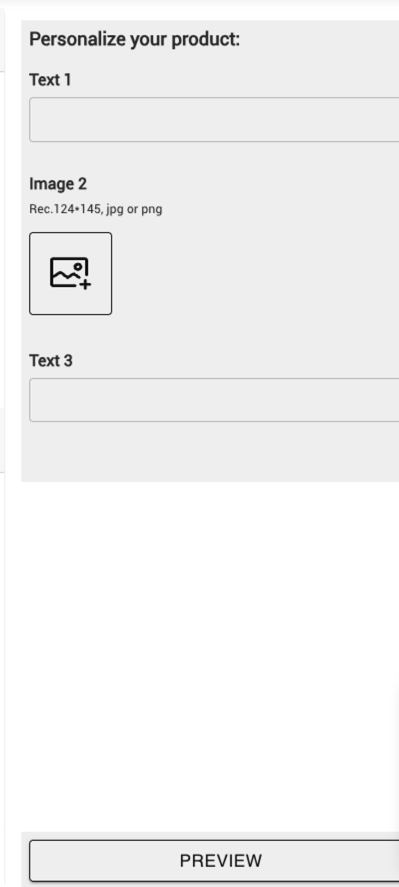
2) Preview area
In this area, you will see how the product would be designable in your store after finishing personalization setting.
3) Setting area
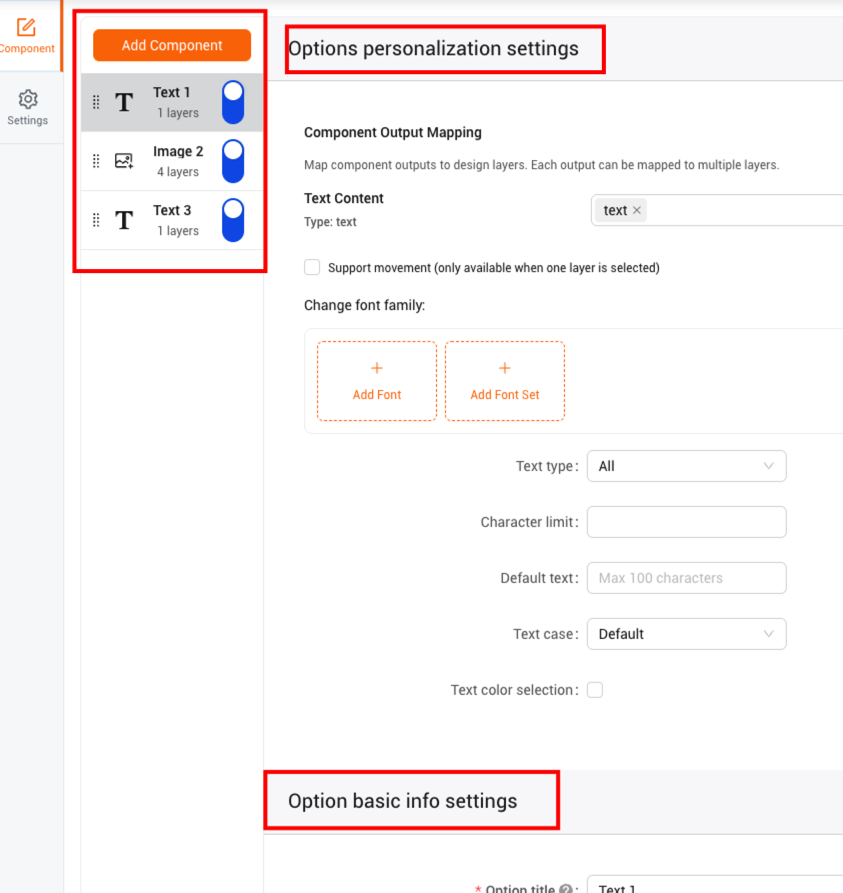
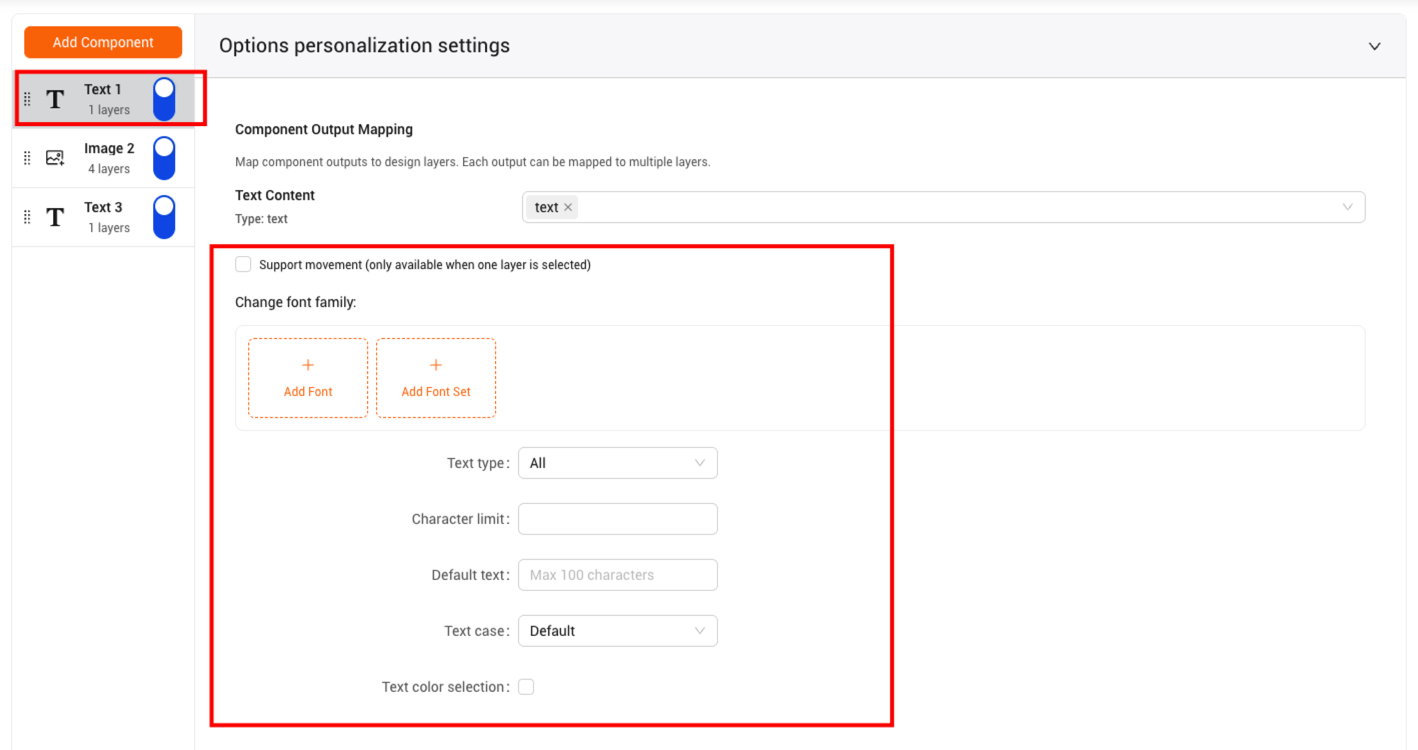
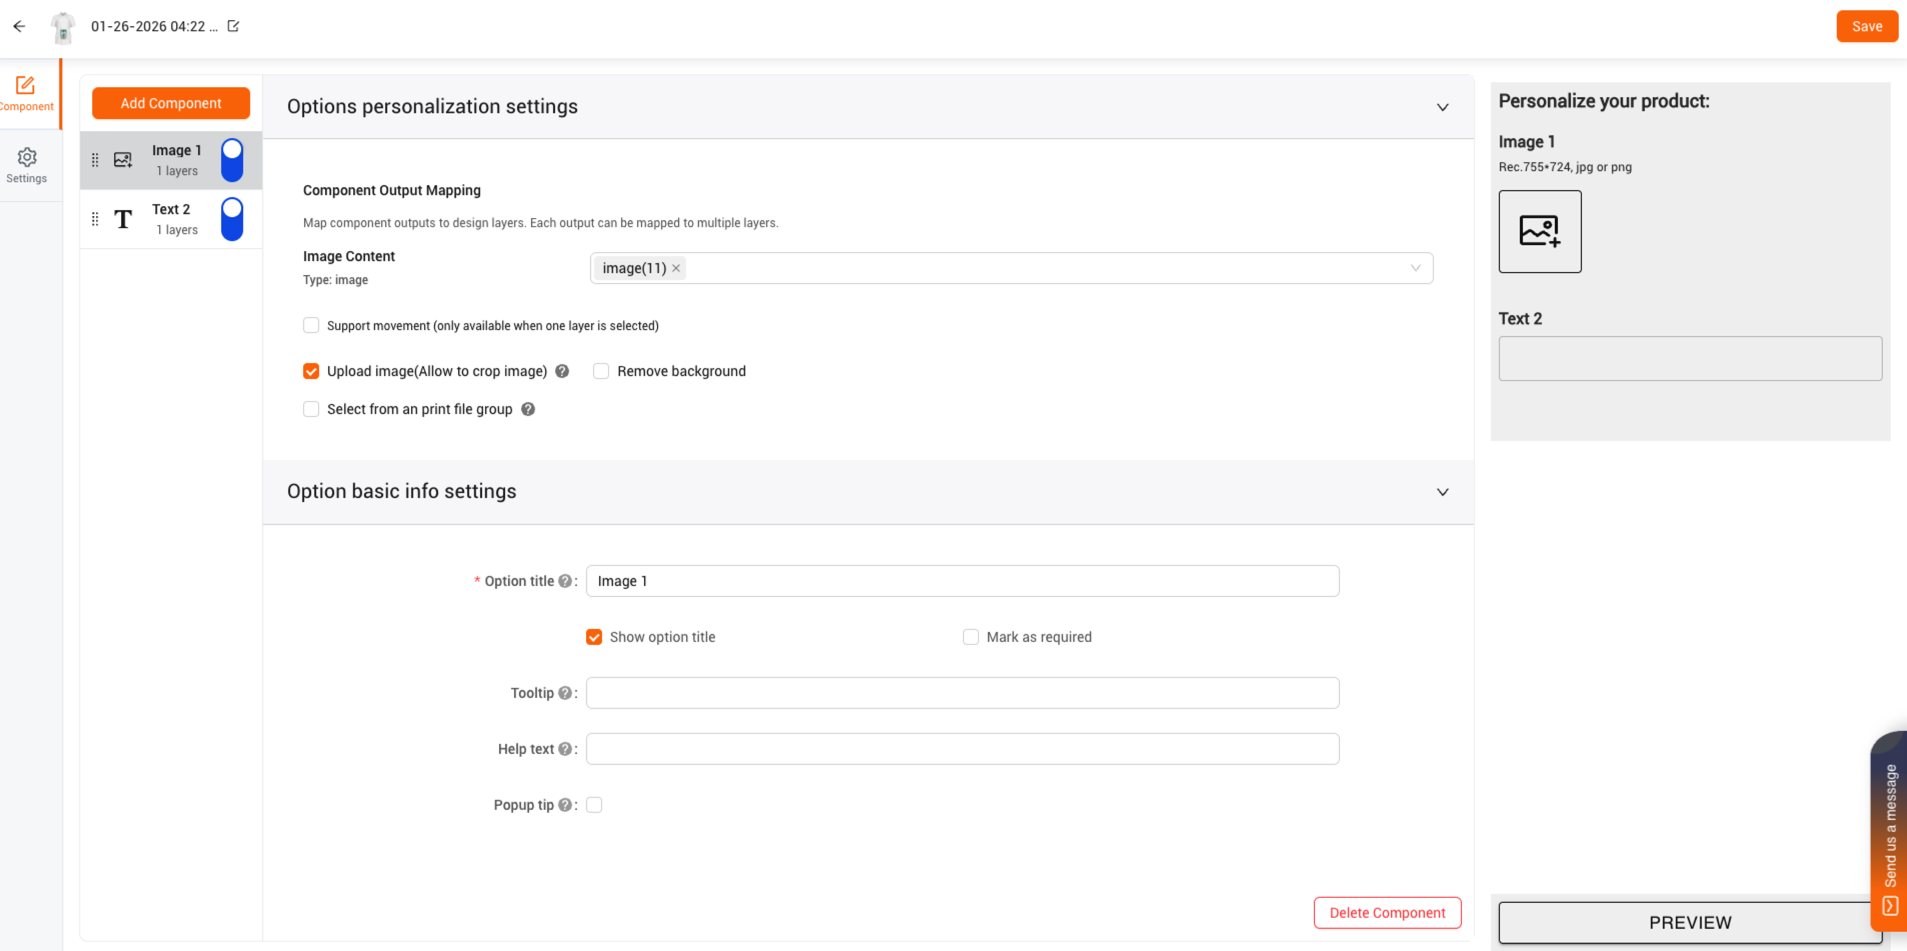
In this area, you can choose whether the design can be personalized by your customer, what design parts can be personalized and the way they could be personalized.
Personalization options ( Also calld component)
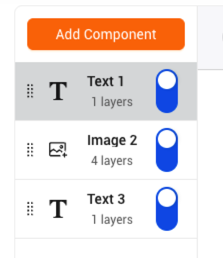
Personalization options are not like variant options, and can't be linked to inventory. Personalization options won't show in your product variant options, which means you can't edit them in your store. Yoycol generate Personalization options automatically when you finish a design. Each print file and text will be set as personalization options. It means your customers can design their own products by changing these personalization options. So, actually, your customers personalize the products in the form you designed.
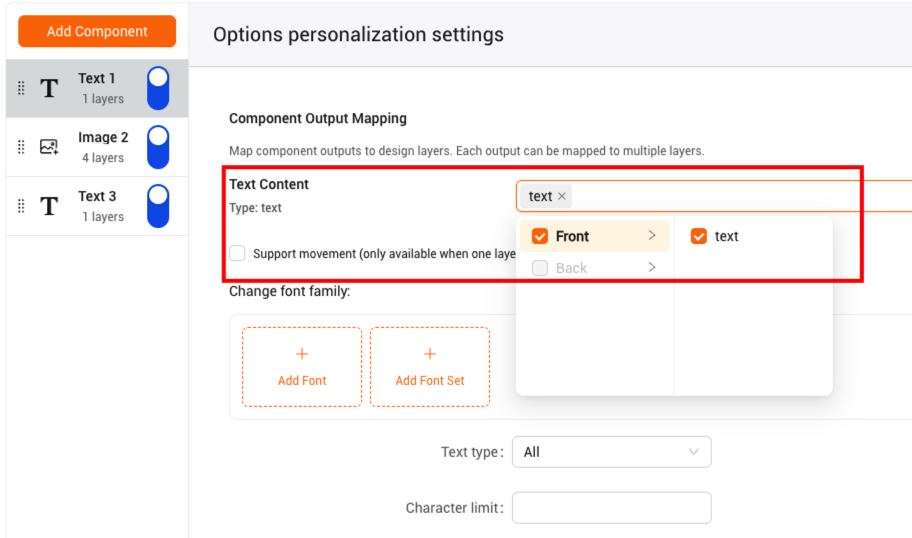
Output mapping
- Selected design layers will be used to personalization. Design layers not selected won't change after personalization.
- One personalization option can be mapped to multiple design layers. If different layers used one print file, these layers will be mapped with one personalization option autimatically.
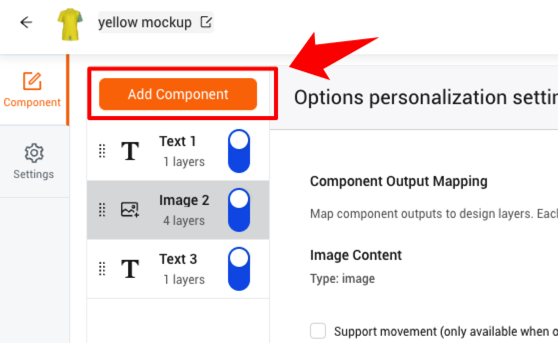
Create a new personalization option
Sometimes, even though one print file is used in different layers, you still want your customers to personalize them separately. You can achieve this by following the steps below.
- Remove the original mapping.
- Create a new personalization option by clicking "Add Component".
- Map new personalization option to the layer.
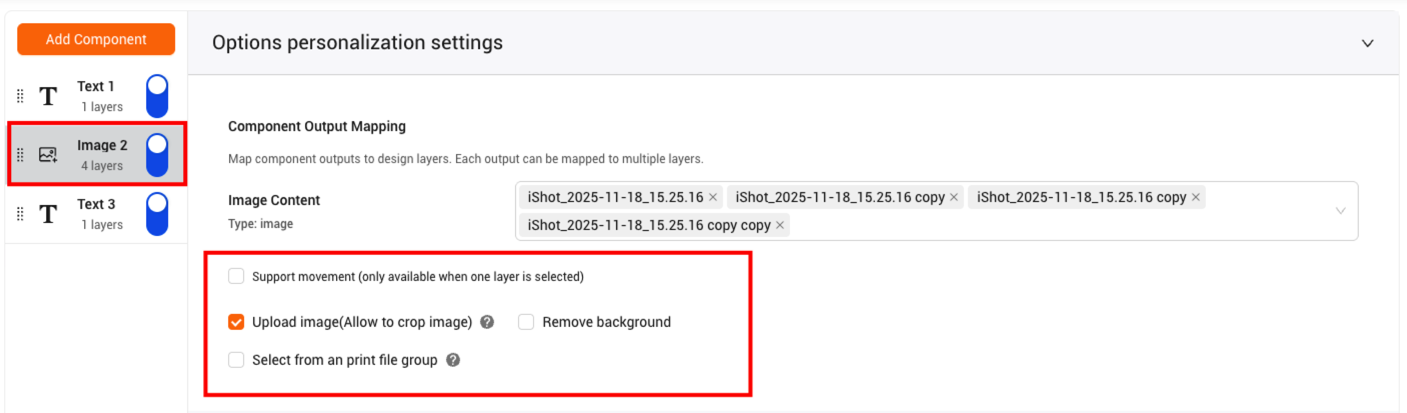
How to personalize?
For image personalization options, your customers can upload or select from altenative options to complete personalization.
And for text personalization options, your customers can personalize by inputing their own text.
You can enable some additional features for image and text personalization options for customers.
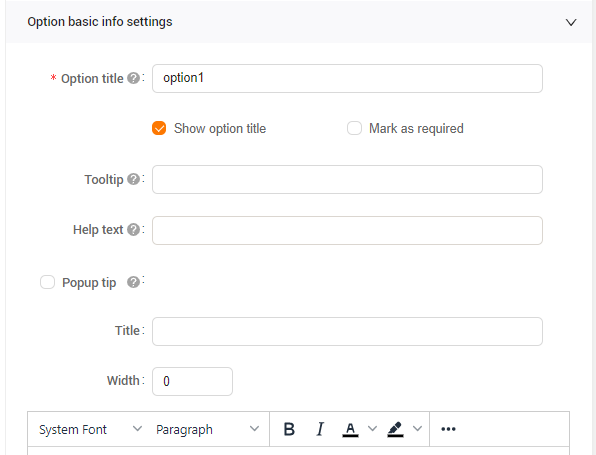
Option basic info settings
In this part, you can set some description to help your customers to learn how to personalize, like option title, tooltip...
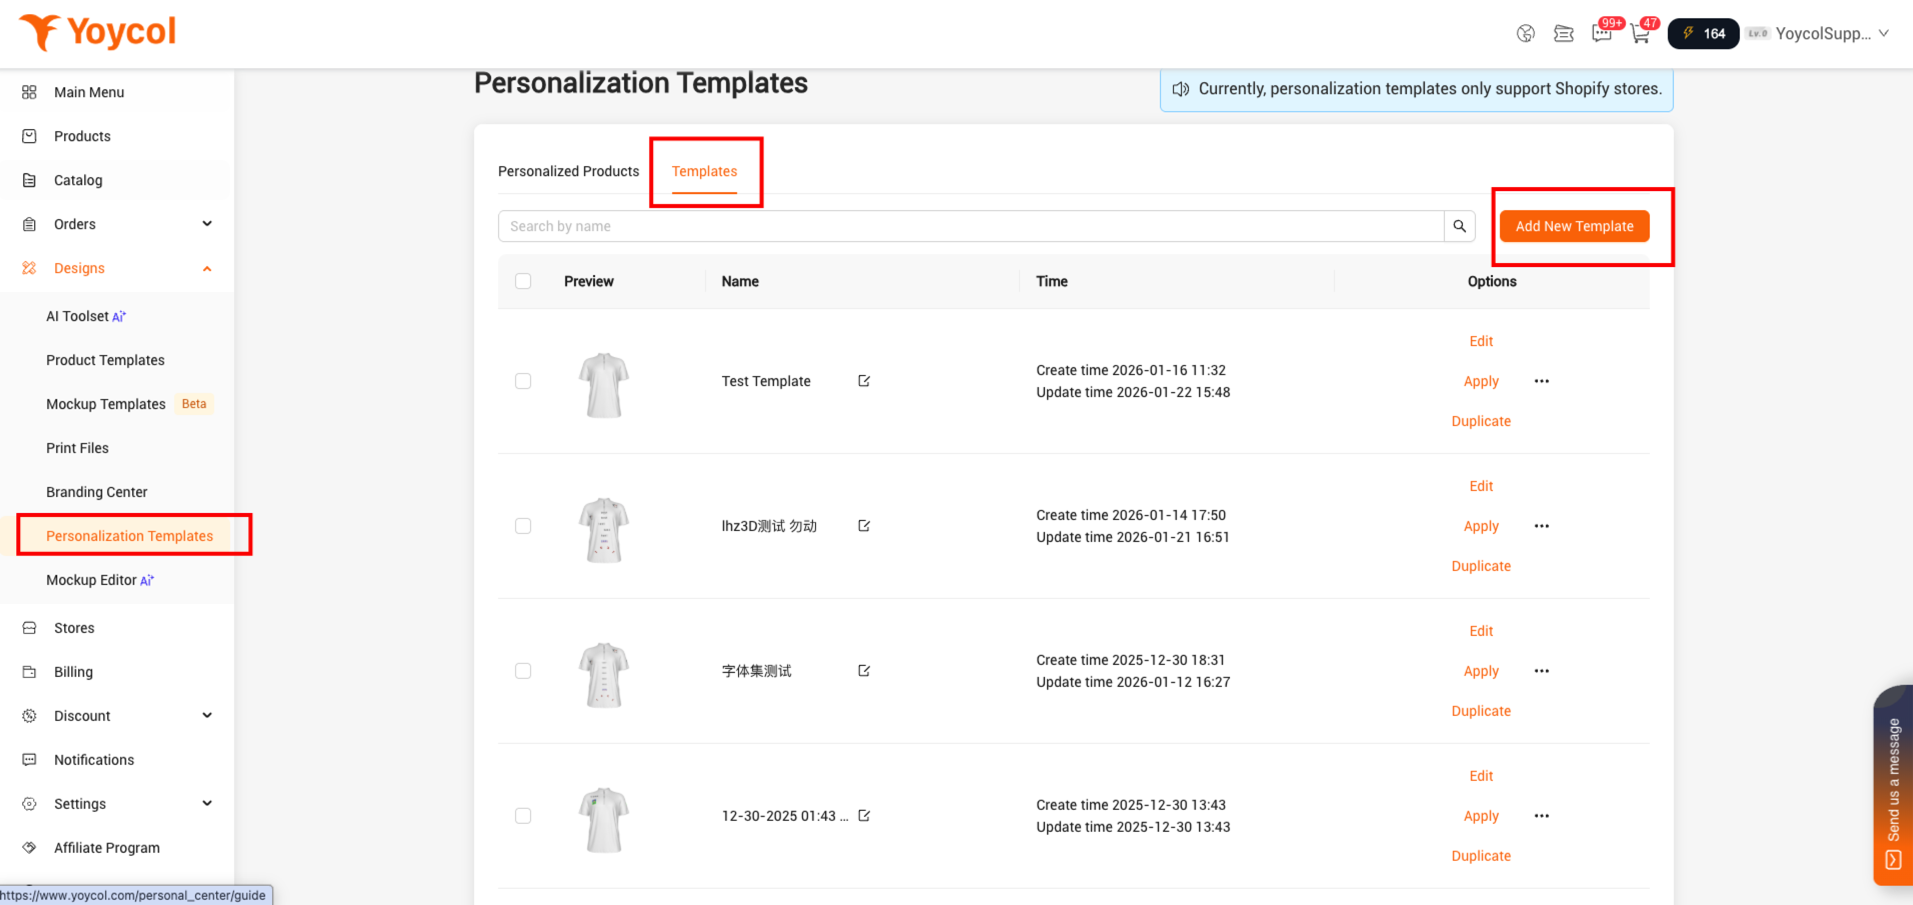
1.4 If the personalization options can be appled to multiple designs, you can create an optons templates first and apply it.
1) Go to "Personalization Templates", and switch to "Templates" tab. Click "Add New Template"
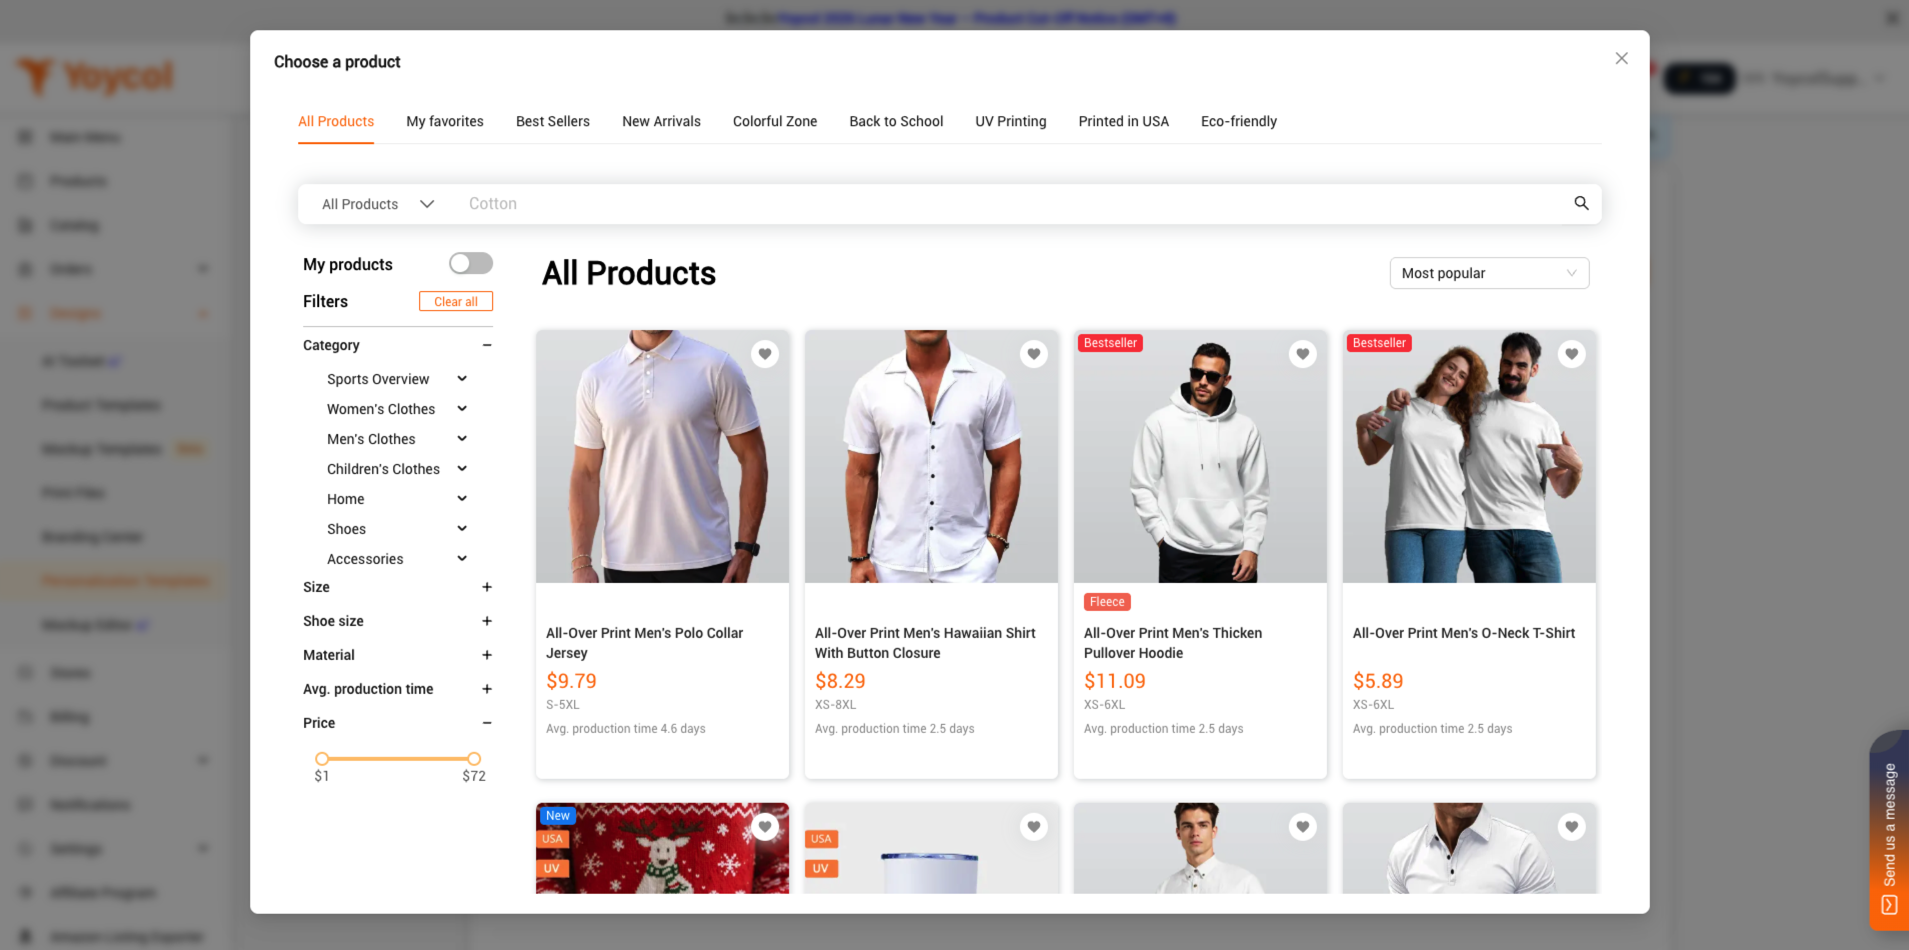
2)Choose the product that is also used for your design.
3)In the designer, add the image and text layers that you want customers to personalize, and click "Continue". 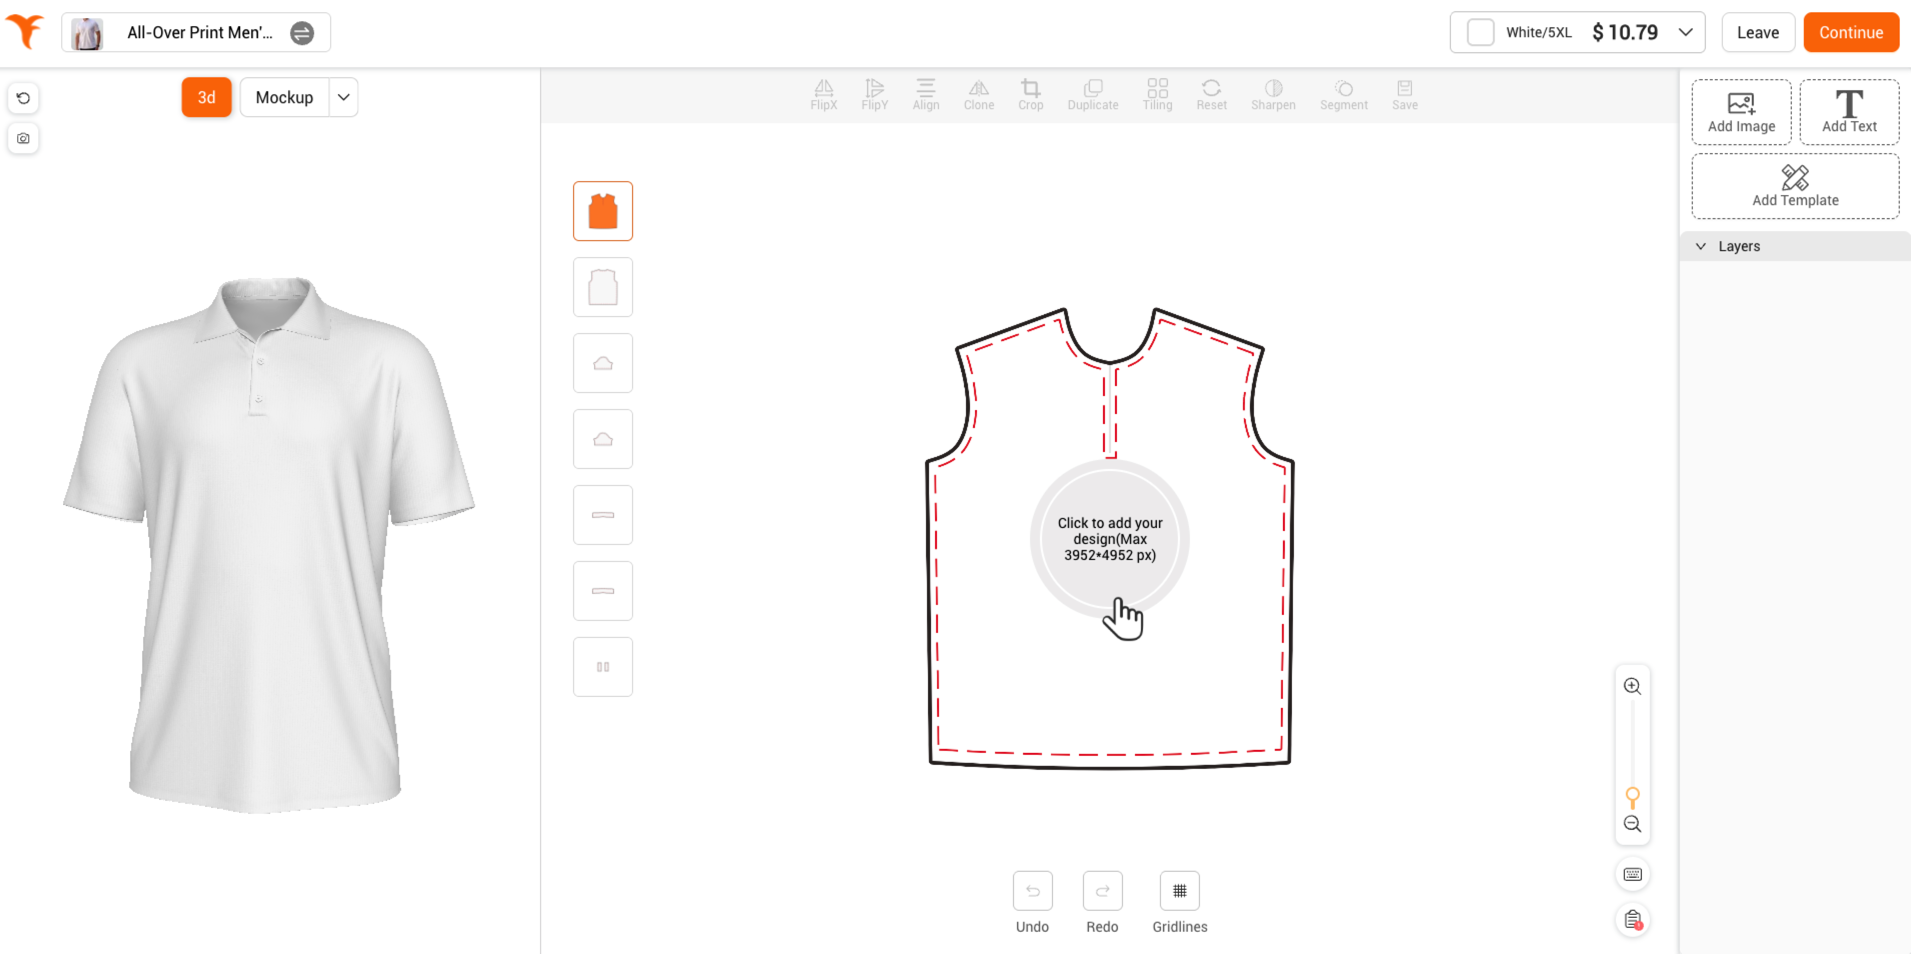
For image layers, it’s recommended to use transparent images.
For text layers, it’s recommended to leave the input blank.
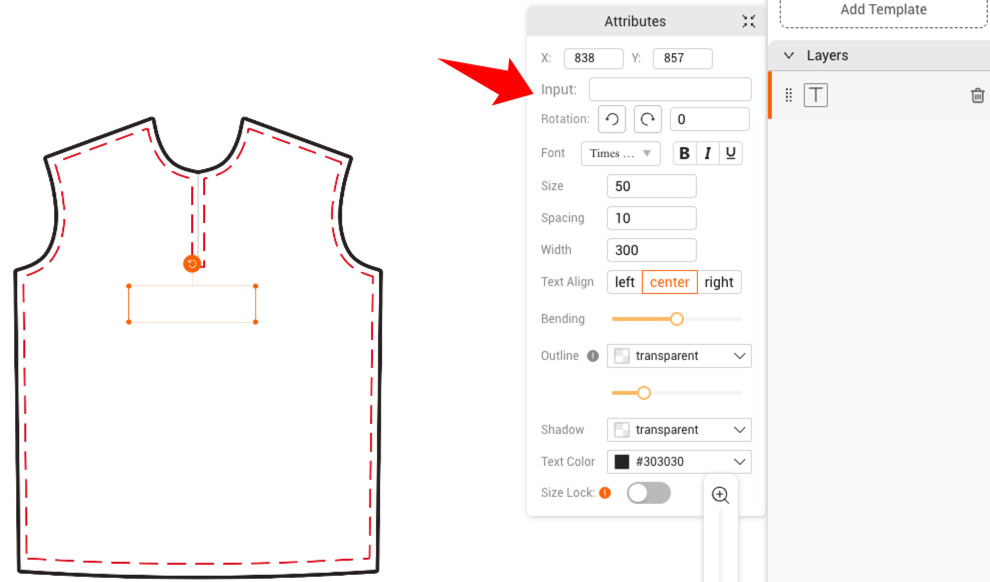
4) Update personalization setting and click "Save". After finishing this step, an option template will be created.
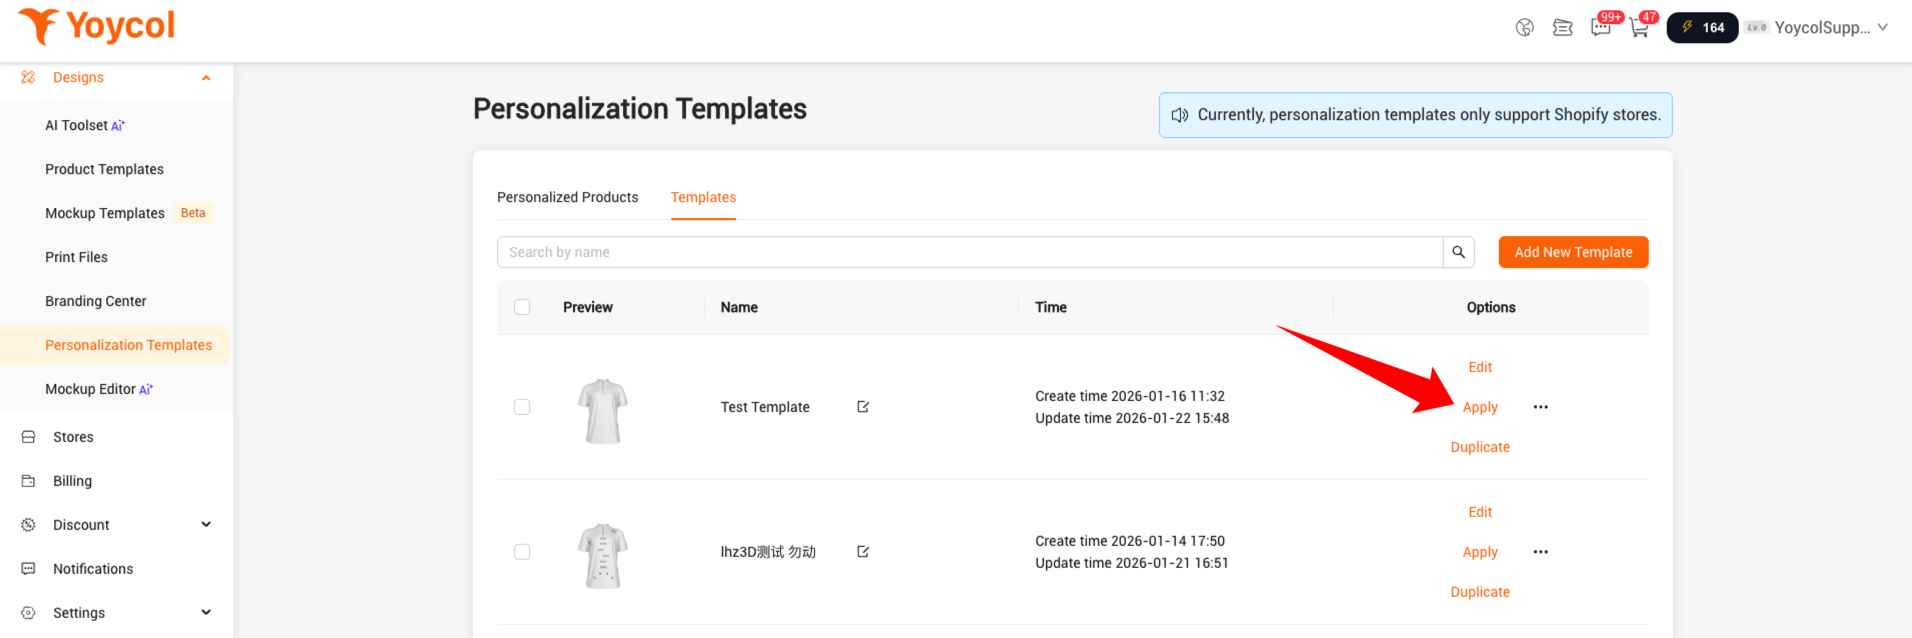
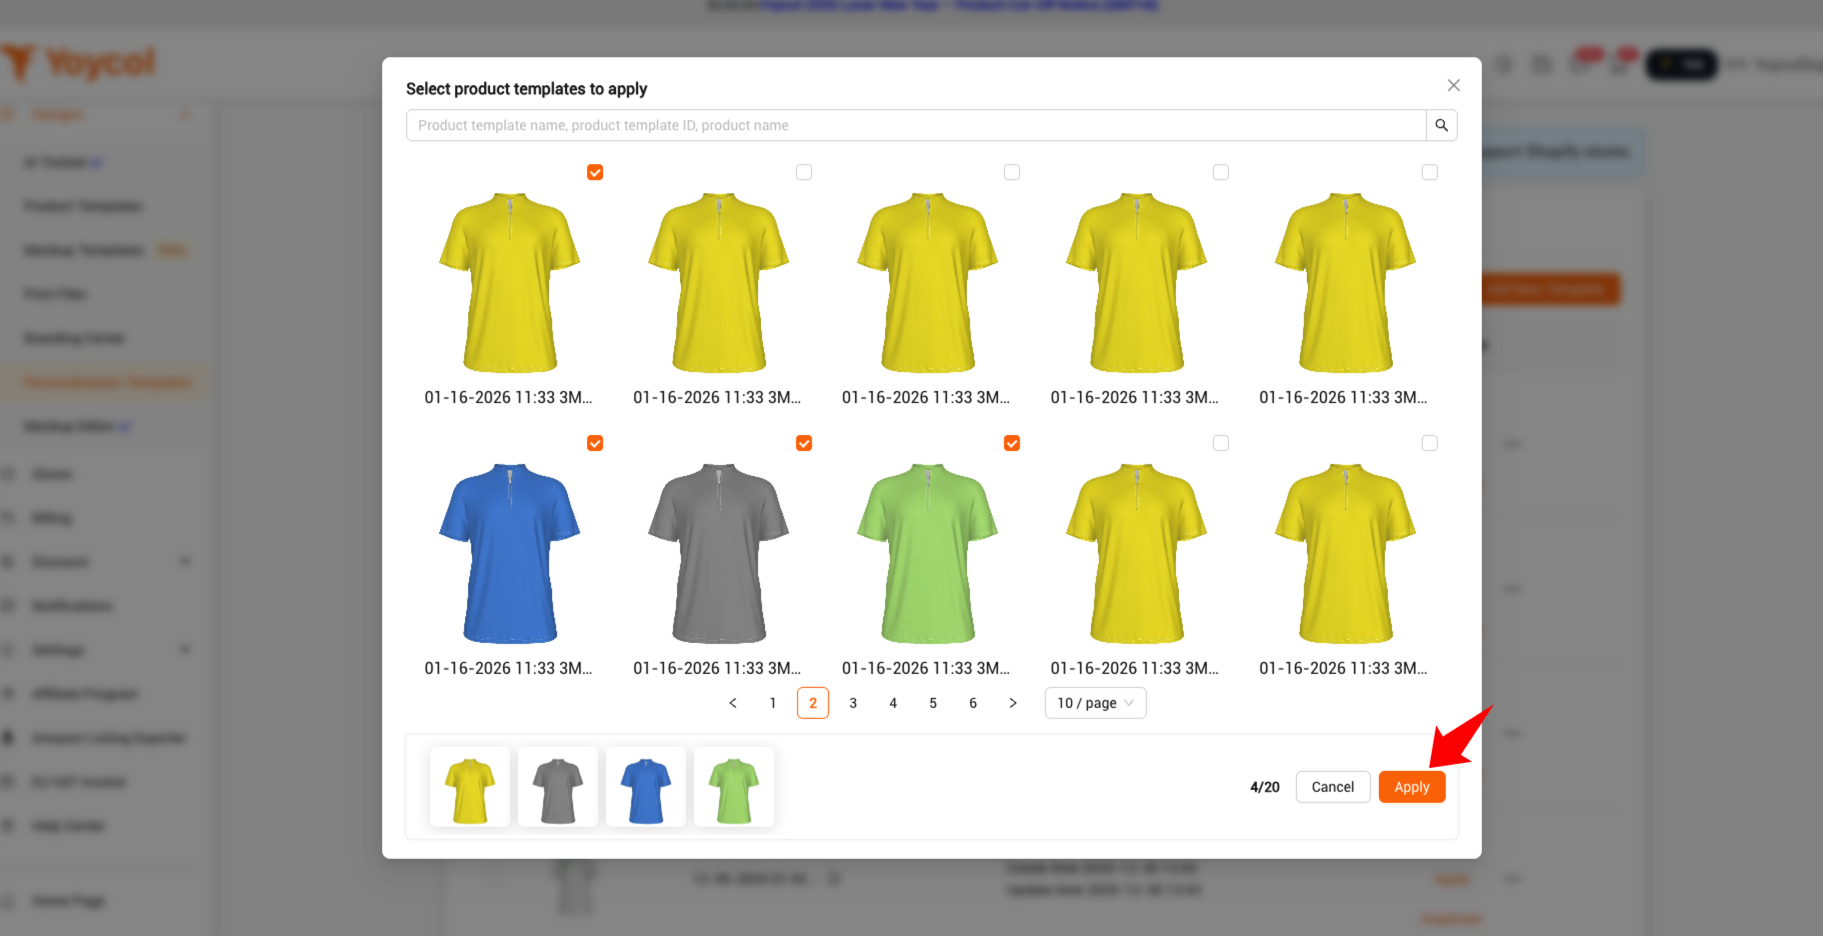
5)Find the template you just created, and click "Apply".
6) In the pop-up window, search and select all the correct designs, the click "Apply".
2. Publish the design with personalization settings
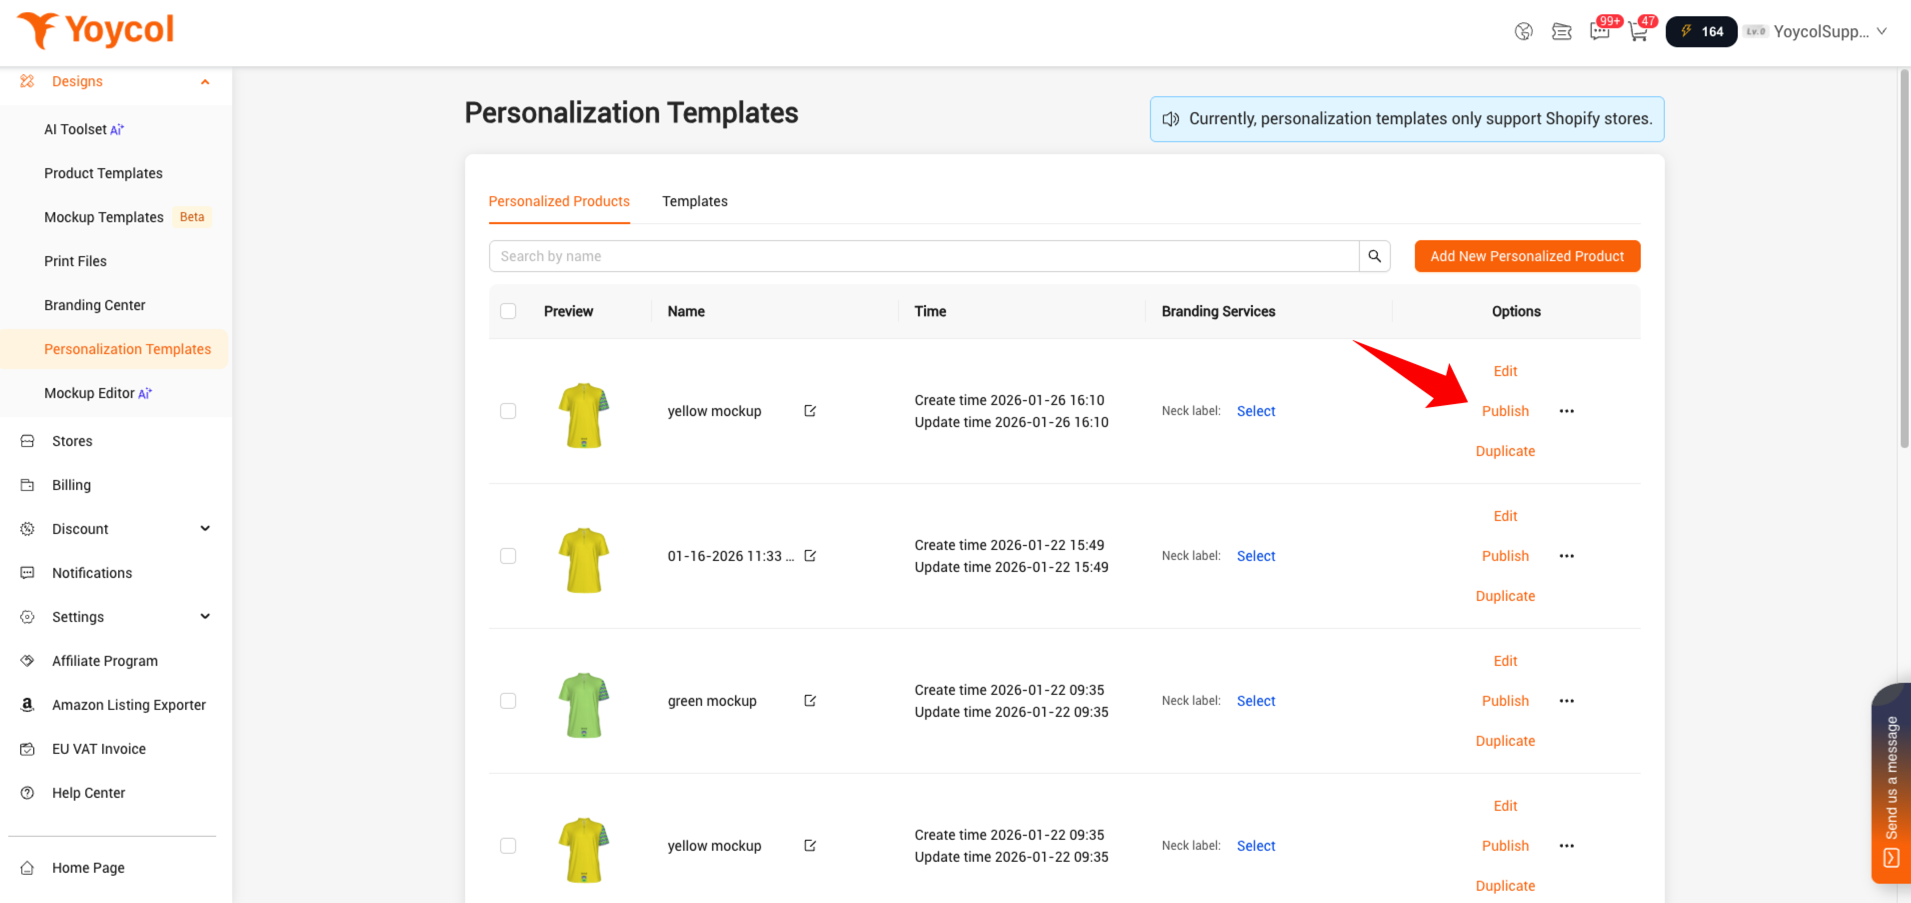
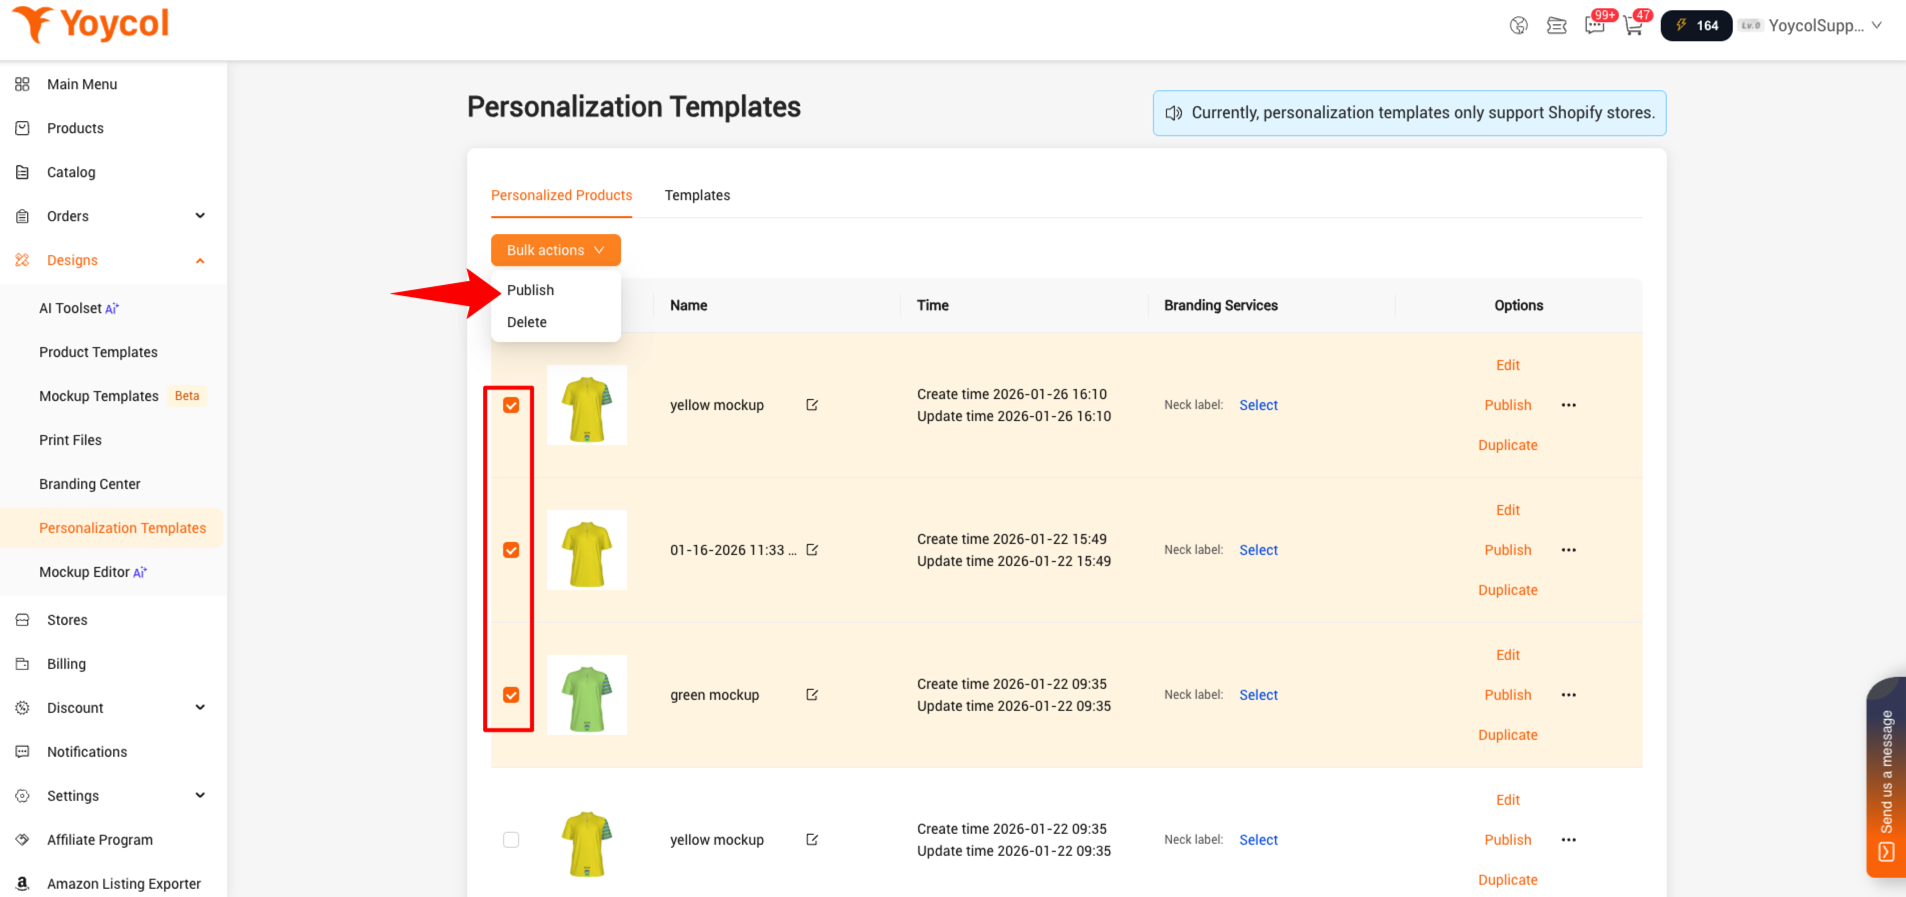
Go to "Personalization Templates", and switch to "Personalized Product" tab.
- Publish one design: Find the design and click "Publish".
- Publish multiple design at the same tim: select these designs and click "Bulk Publish"
3. Check in your store
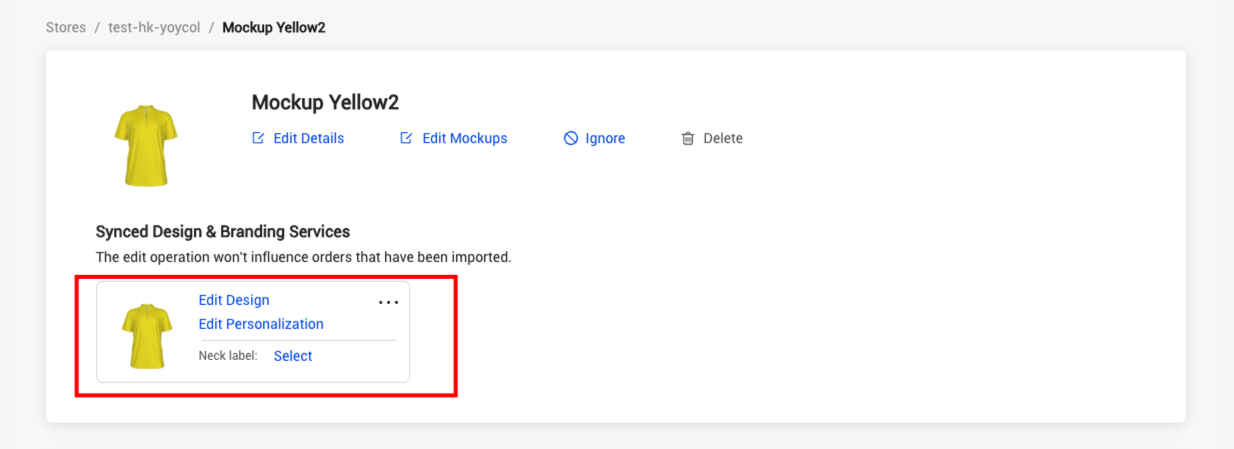
After publishing, you will find personalization setting in sync variants page and you can change it at any time. But please note, you are recommended to make the product in draft status before you editting them.
4. View the product in your store frontend
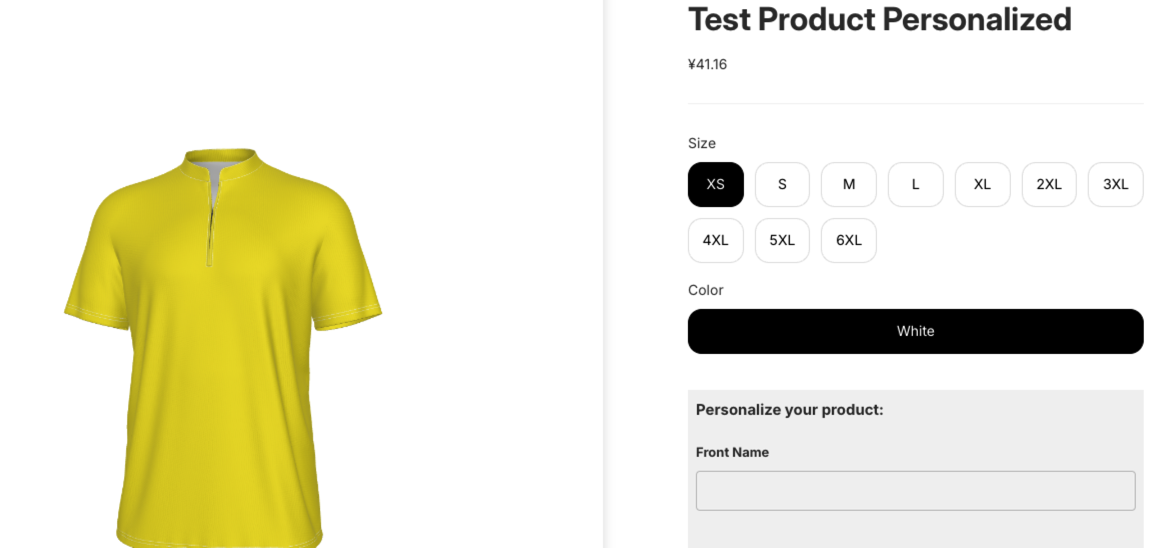
Now try the new feature and see what happened to your products.
5. Fulfill the personalized order
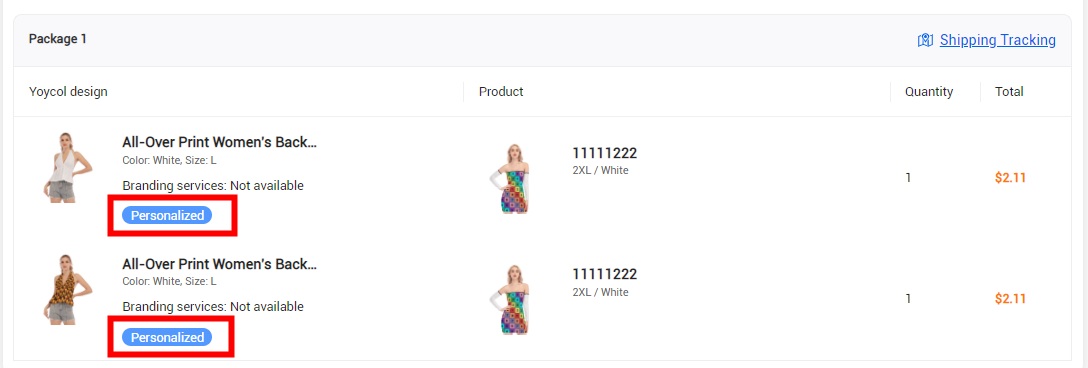
Once your customers finished their designs and pay the order, the order will be sent to Yoycol and Yoycol will transfer the design to personalized one automatically. You don't need to do anything but make sure your customers upload a good print-quality picture.
If you got any problems in using the new feature, please feel free to contact us.