

How to enable Yoycol's personalization feature in Shopify?
If you have already added the personalization feature to your Yoycol dashboard but it is not active on your Shopify store, you can follow the two solutions below to set up the Shopify side (Shopify has recently updated this feature to support dual setup methods).
Step 1: Choose “Online Store” from the side menu in the Shopify dashboard and then click "Customize".
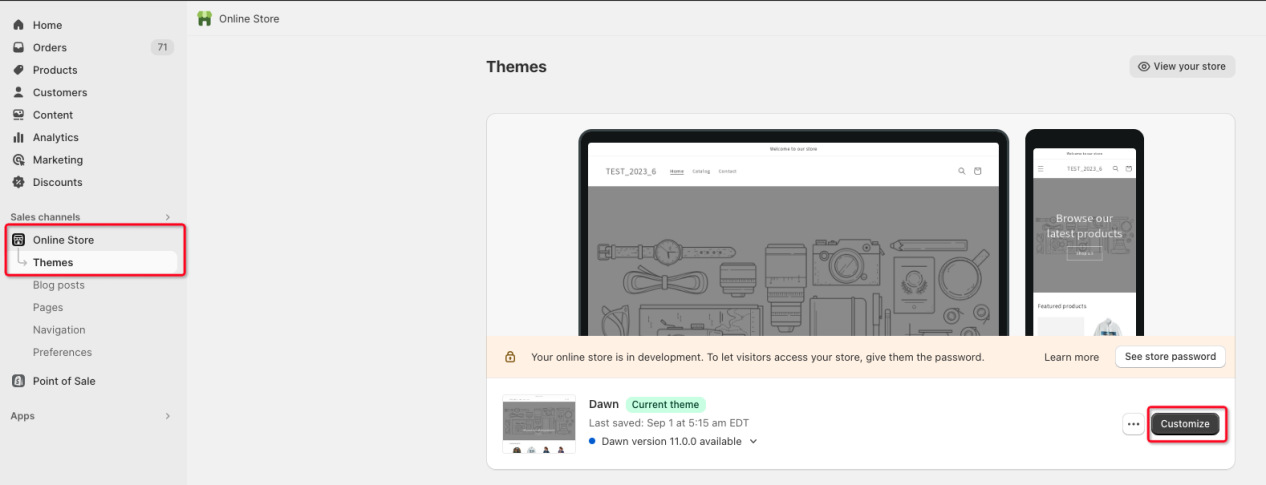
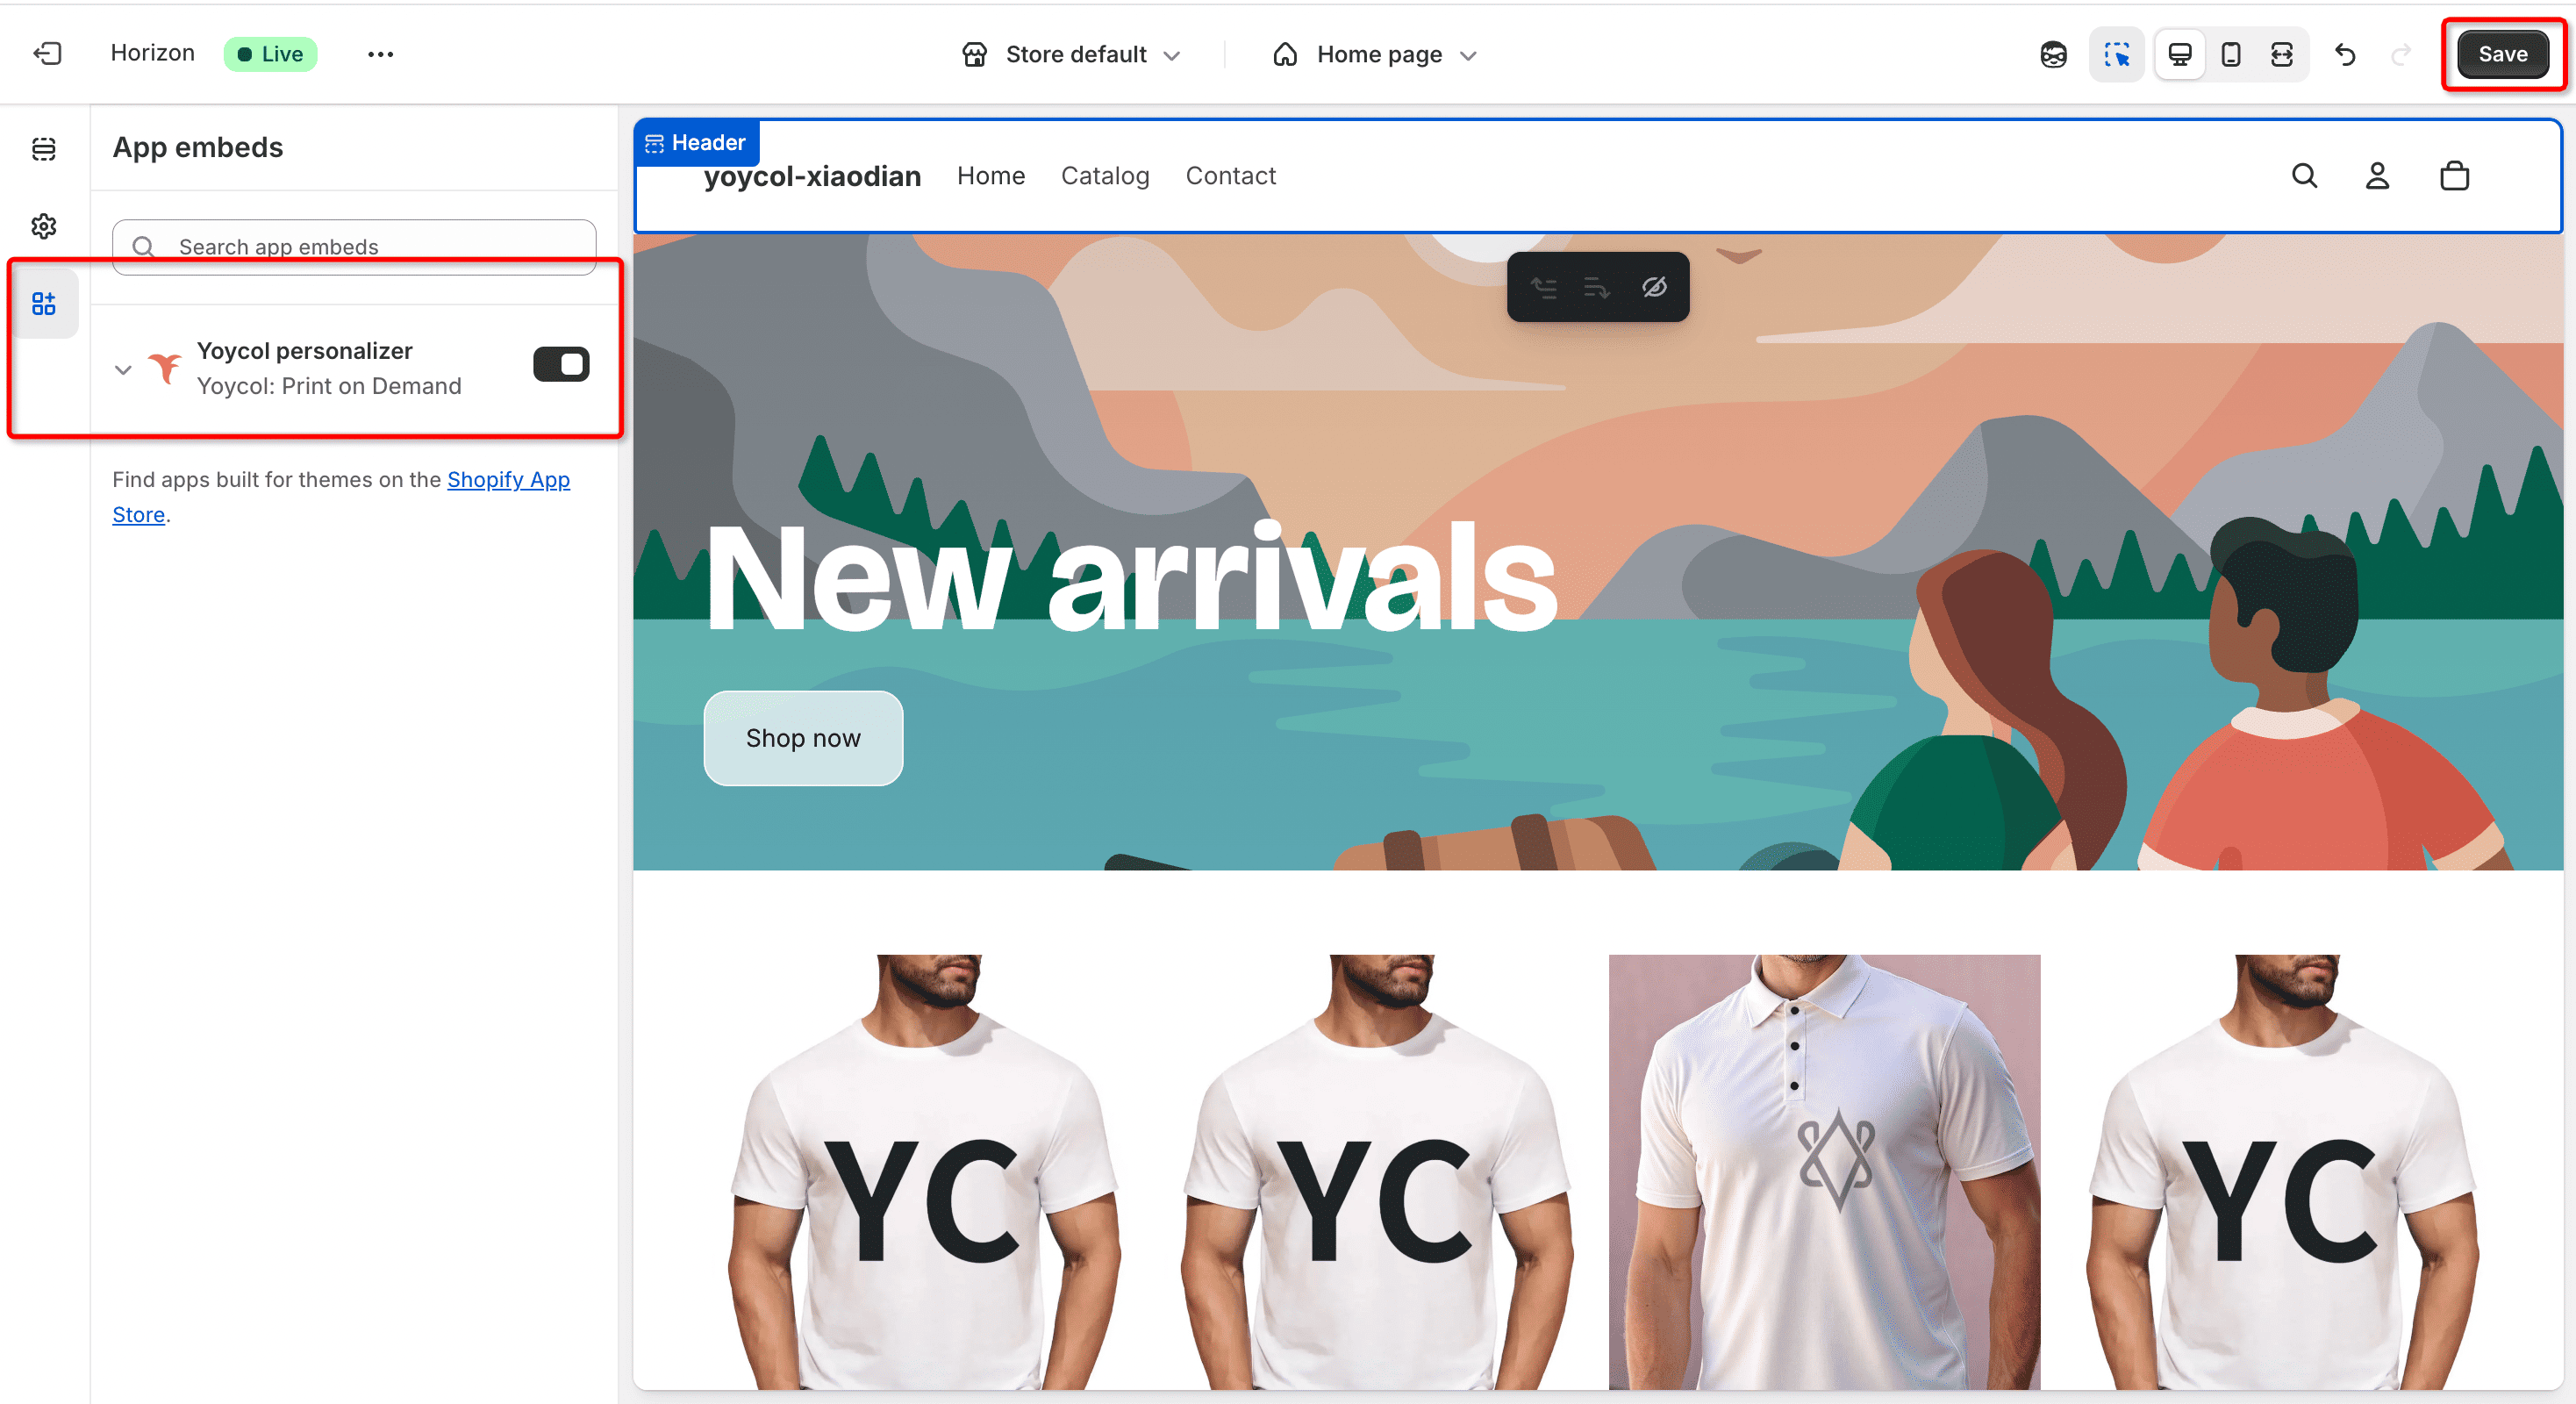
Step 1: Choose “Online Store” from the side menu in the Shopify dashboard and then click "Customize".
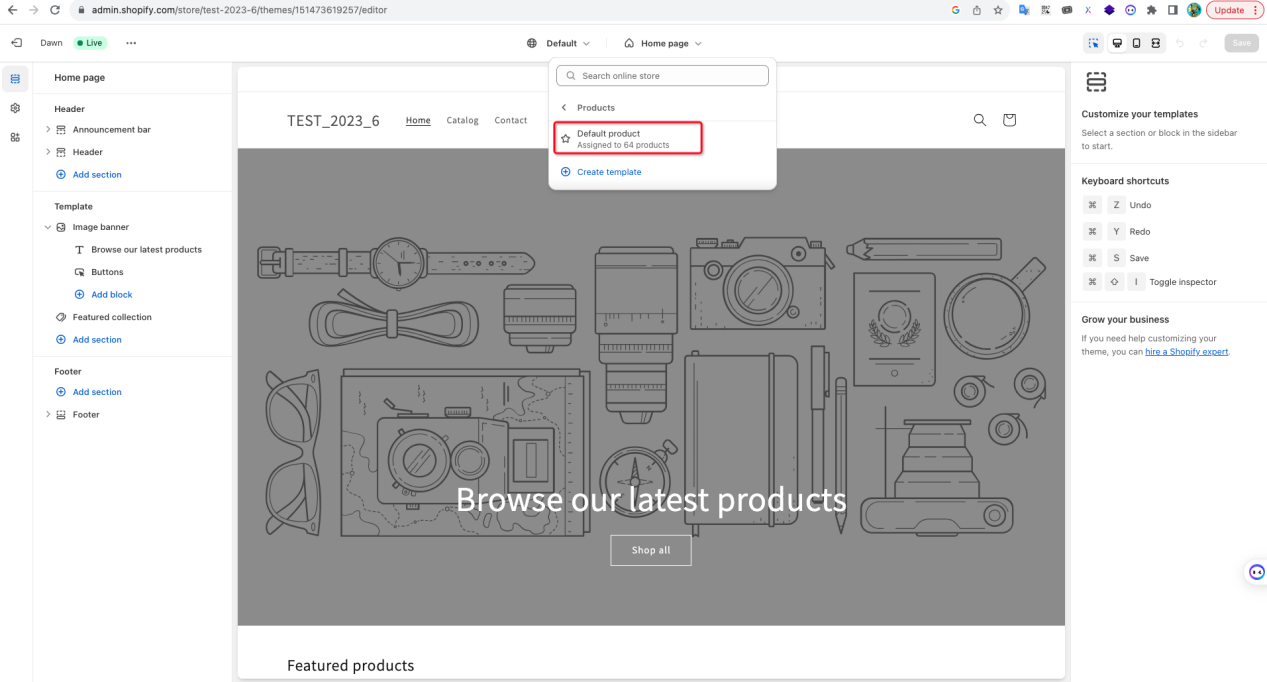
Step 2:Choose "Home Page" from the top menu bar and then click "Default Products".
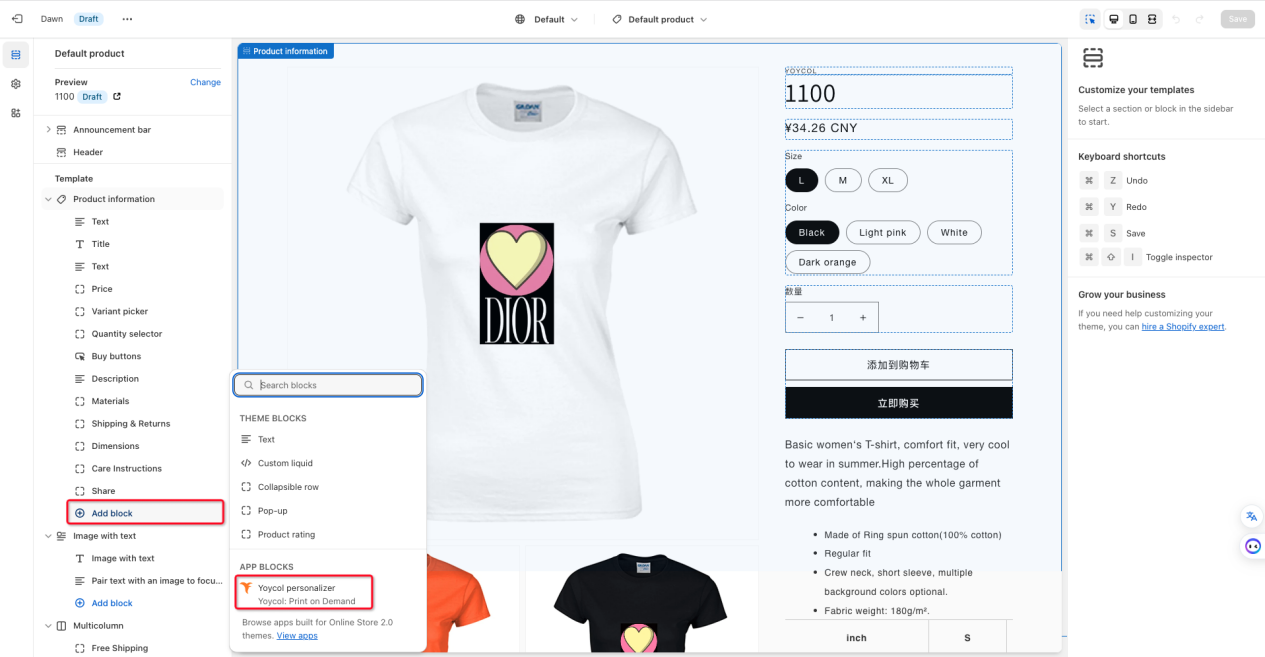
Step 3: Select "Product information" from the left menu bar and click "Add Blocks". Then click "Yoycol personalizer" in the pop-up window that appears.
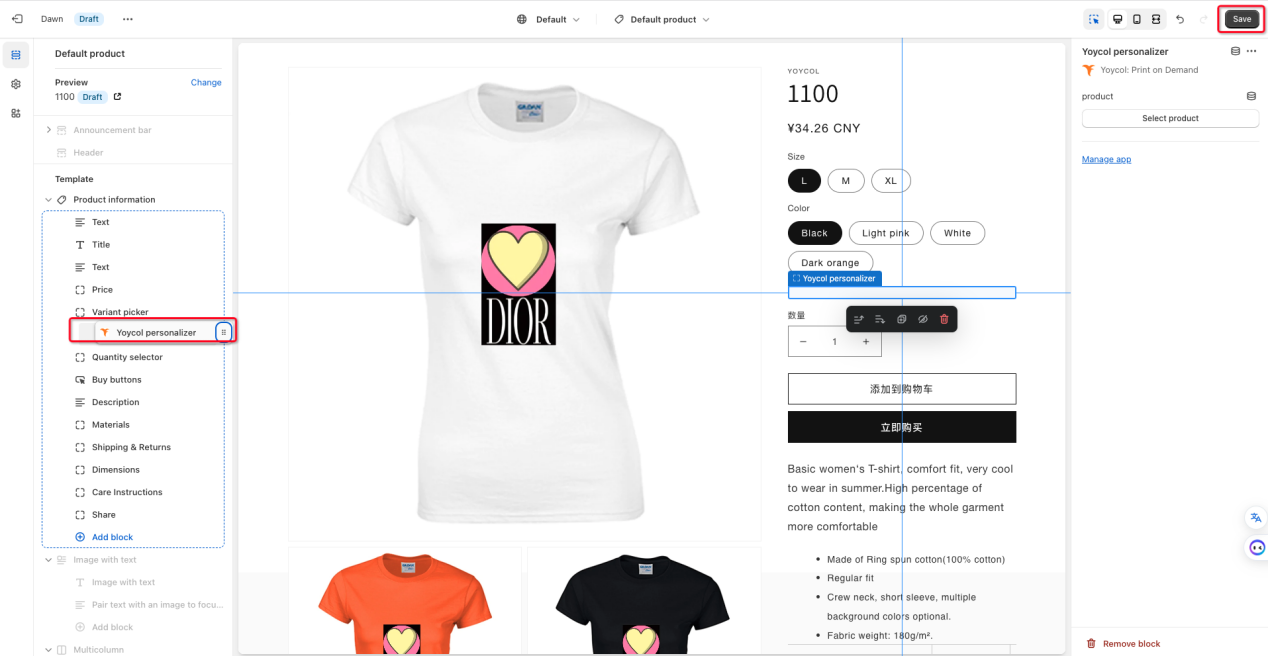
Step 4: Now the "Yoycol personalizer" will appear in the left menu bar. Drag and drop it to the position you prefer, and we suggest placing it below the “Variant picker” option. Finally, click "Save".
Once you've completed these setups, the personalization feature is ready to use on your Shopify store. Just remember that if you decide to remove this Yoycol Personalizer option, you'll need to go through the steps again to continue using this feature.
If you encounter any issues during the setup process, feel free to contact our support team at yoycol@support.com for assistance.