

How to publish a multi-color AOP product?
If you want to publish a multi-color product, this article will guide you through the process.
1. Publish single-color products first.
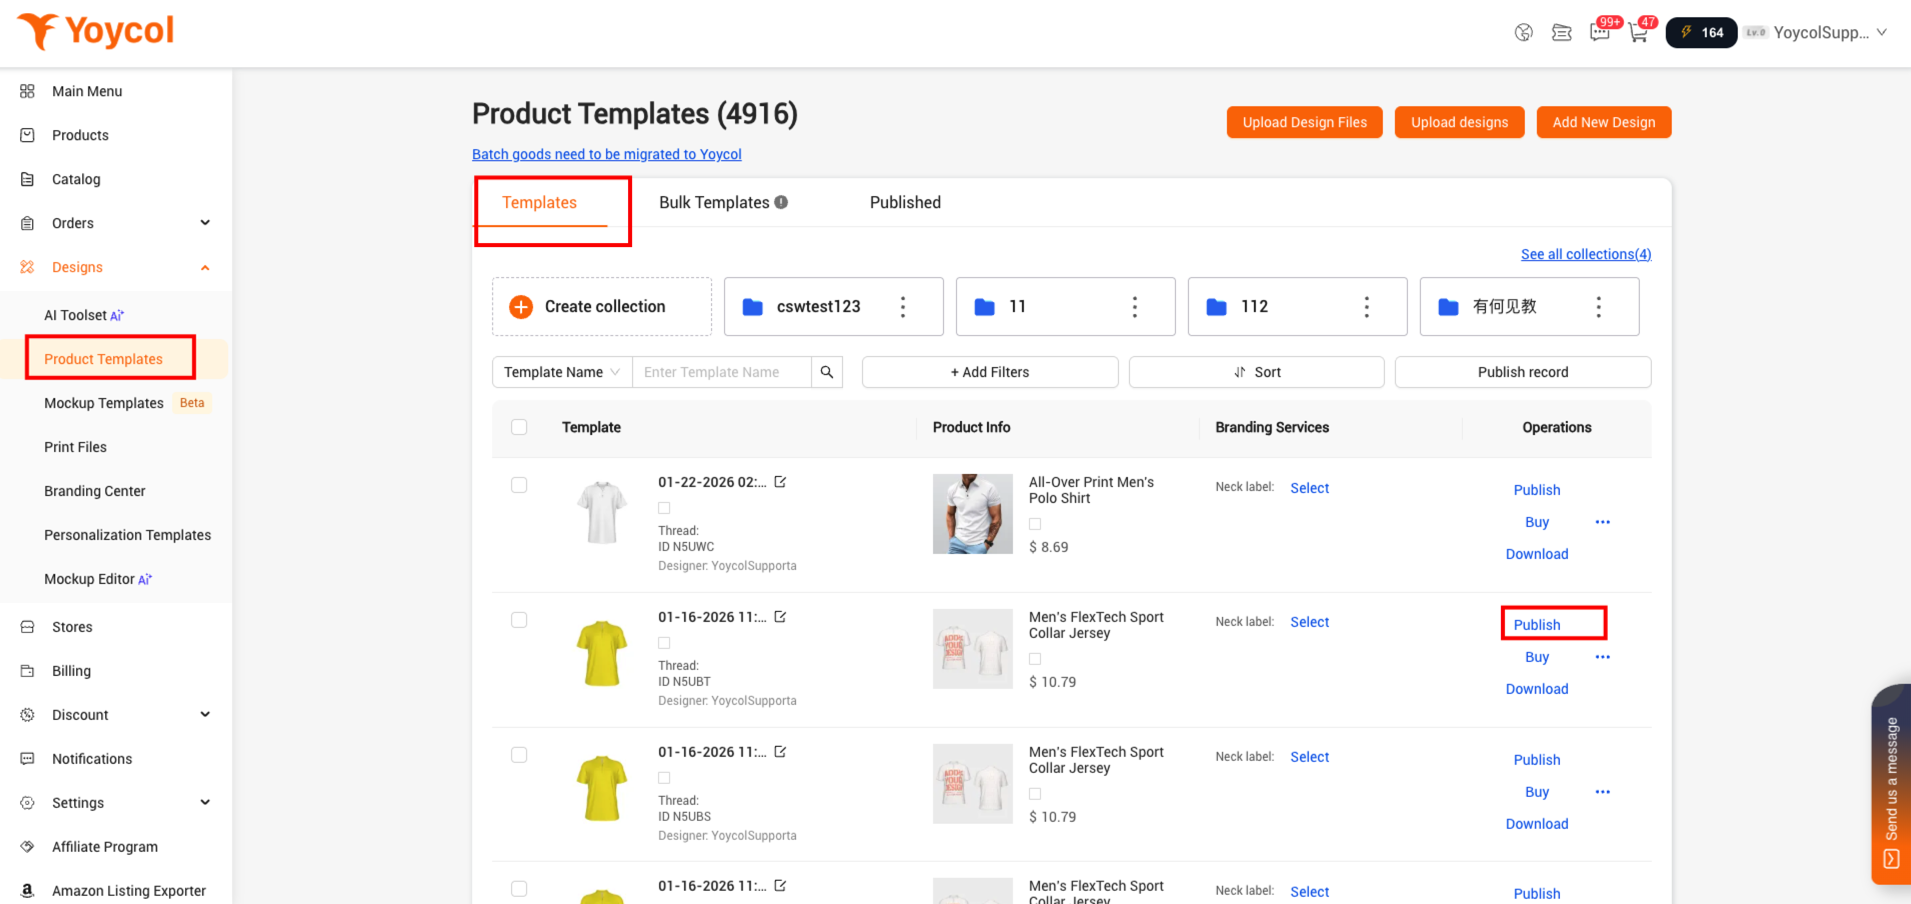
1.1 If it is a non-personalized product, go to Product Templates → Templates, find the product you want, and click “Publish”.
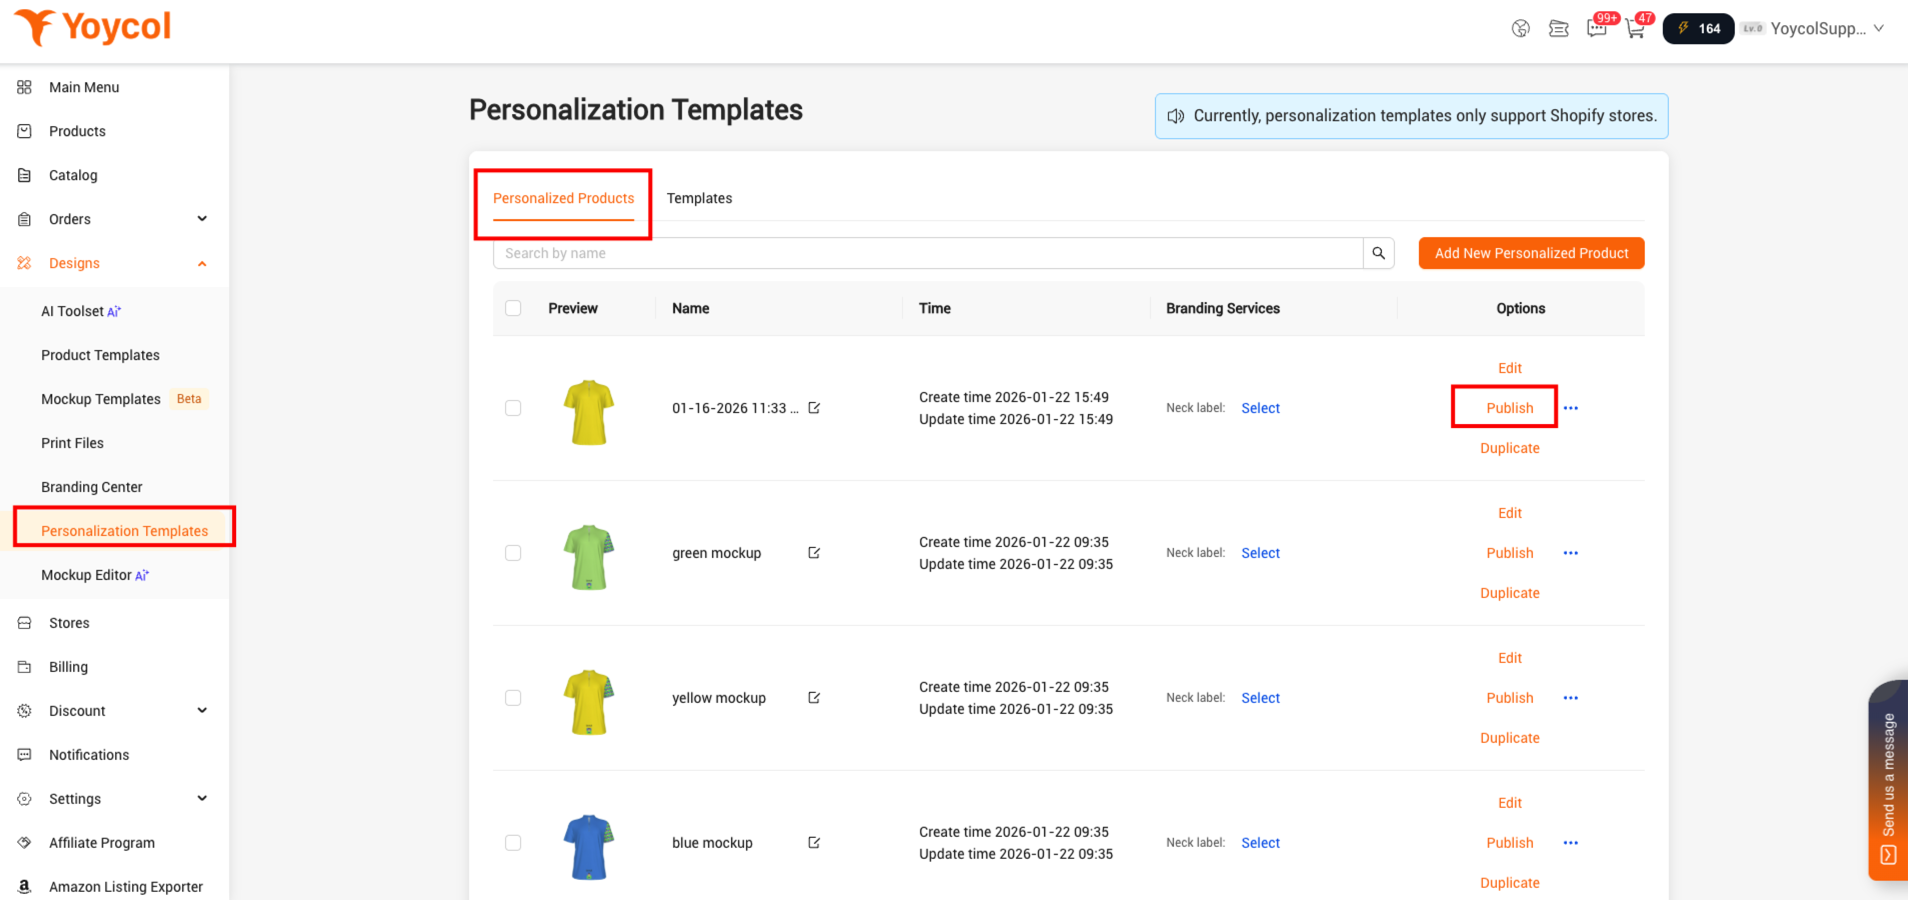
1.2 If it is a personalized product, go to Personalization Templates → Personallized Products, find the product you want, and click “Publish”.
2. Open the “Product Templates” menu, go to the “Published” tab, and select your store.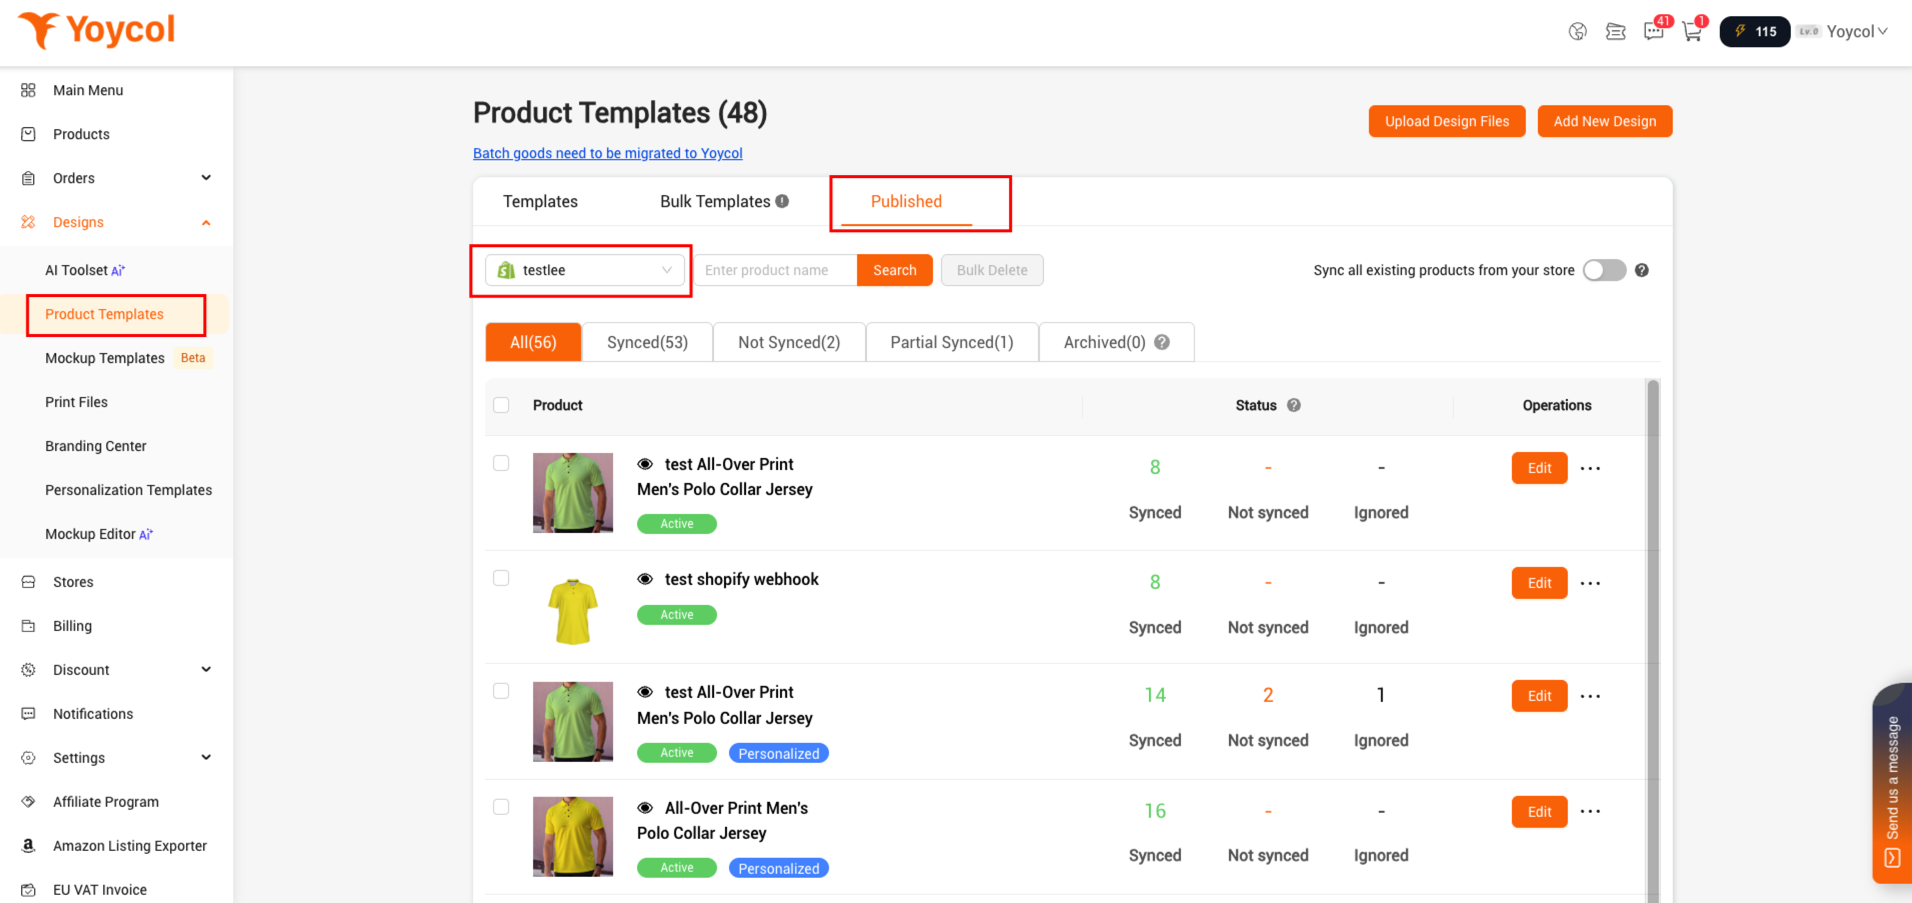
2. Find the product that you want. Click ‘edit’.
If the product is going to be achived, you could find it in 'Archived'.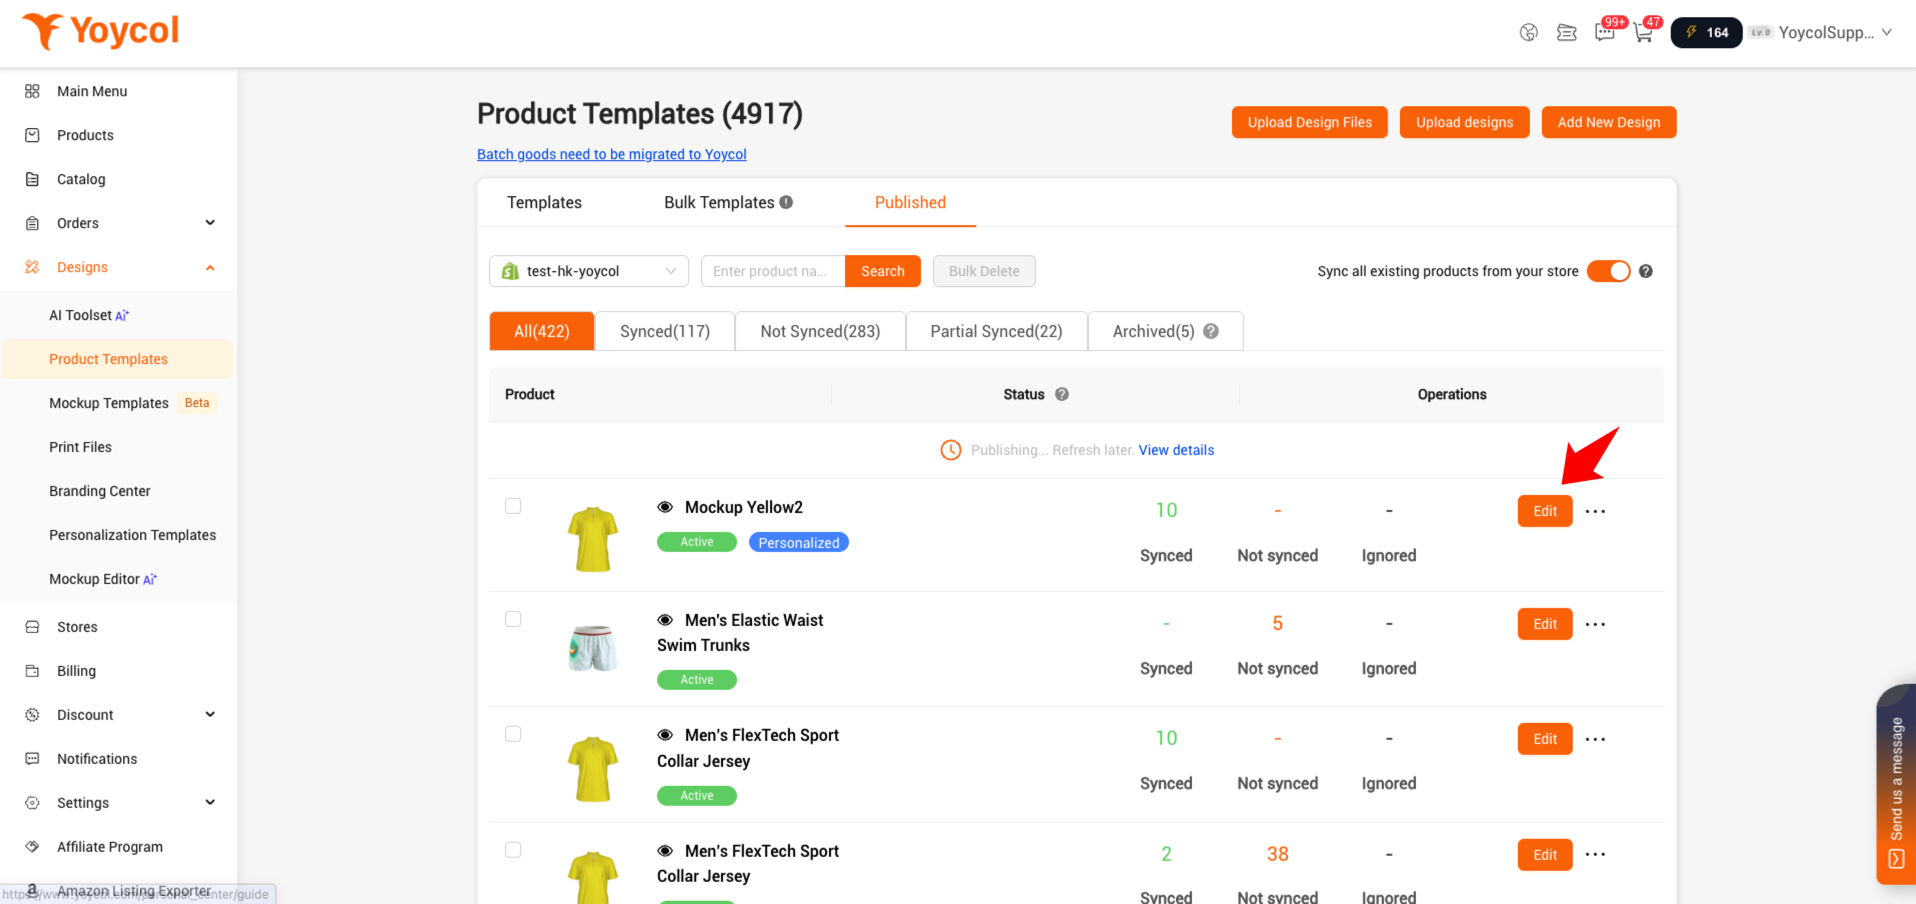
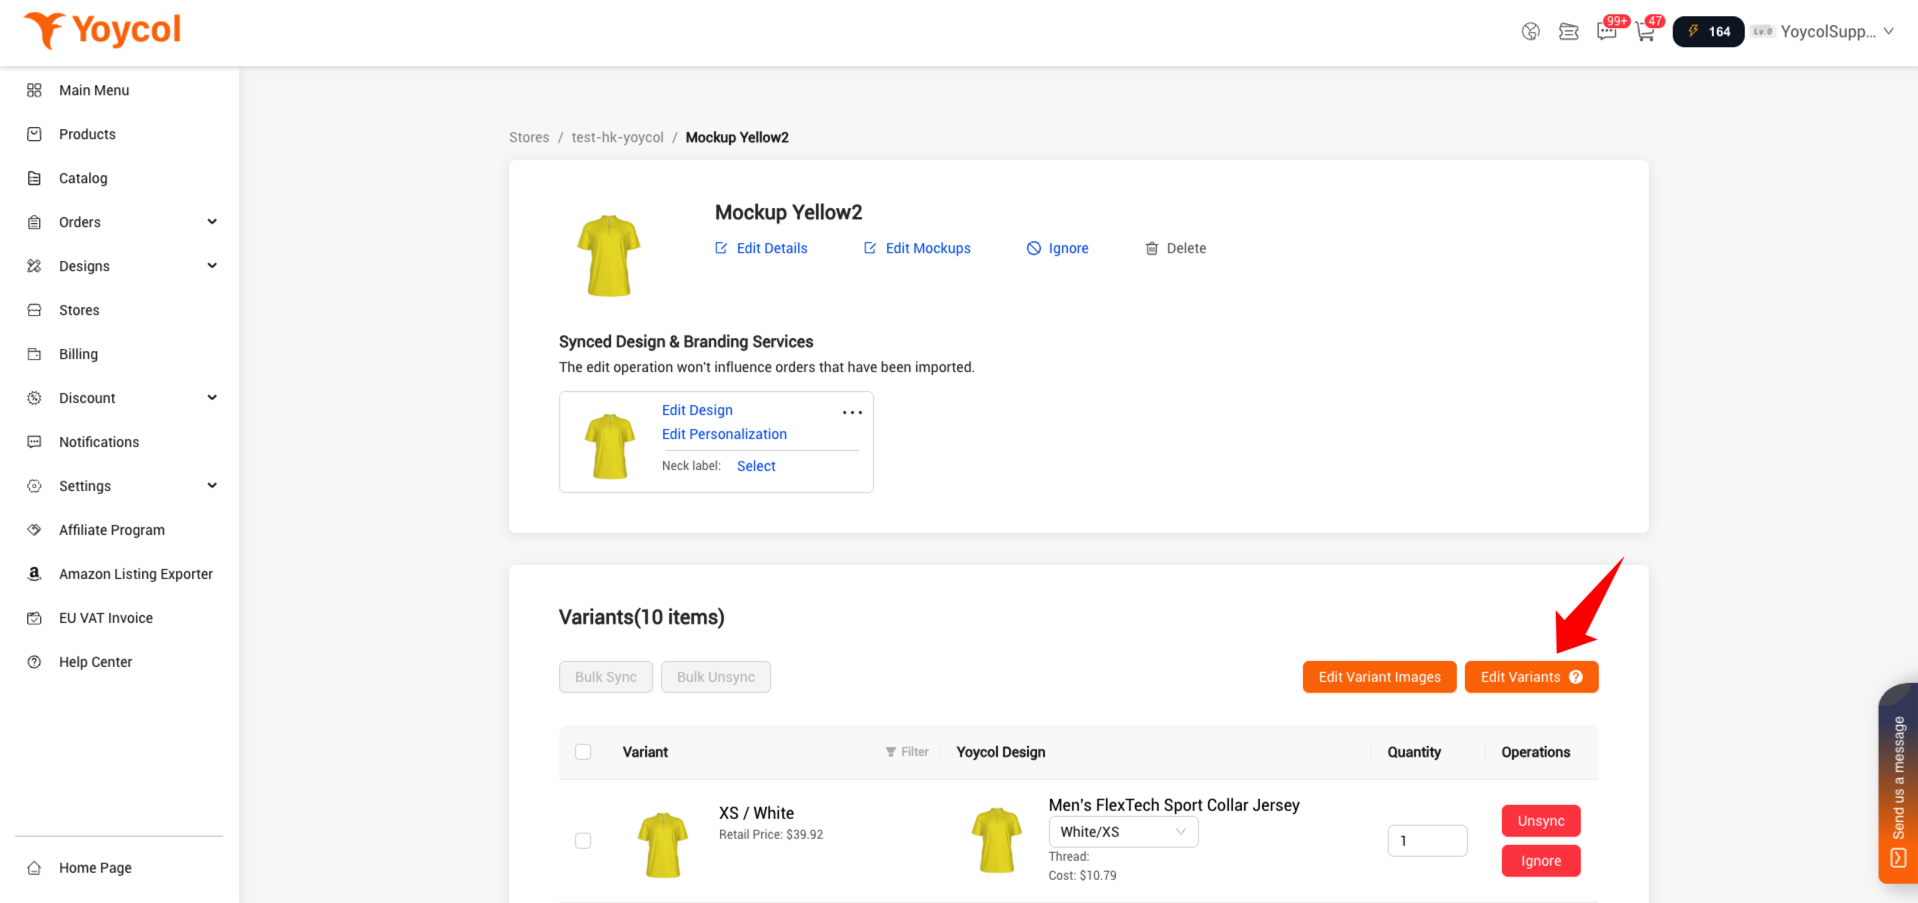
3. Update variants
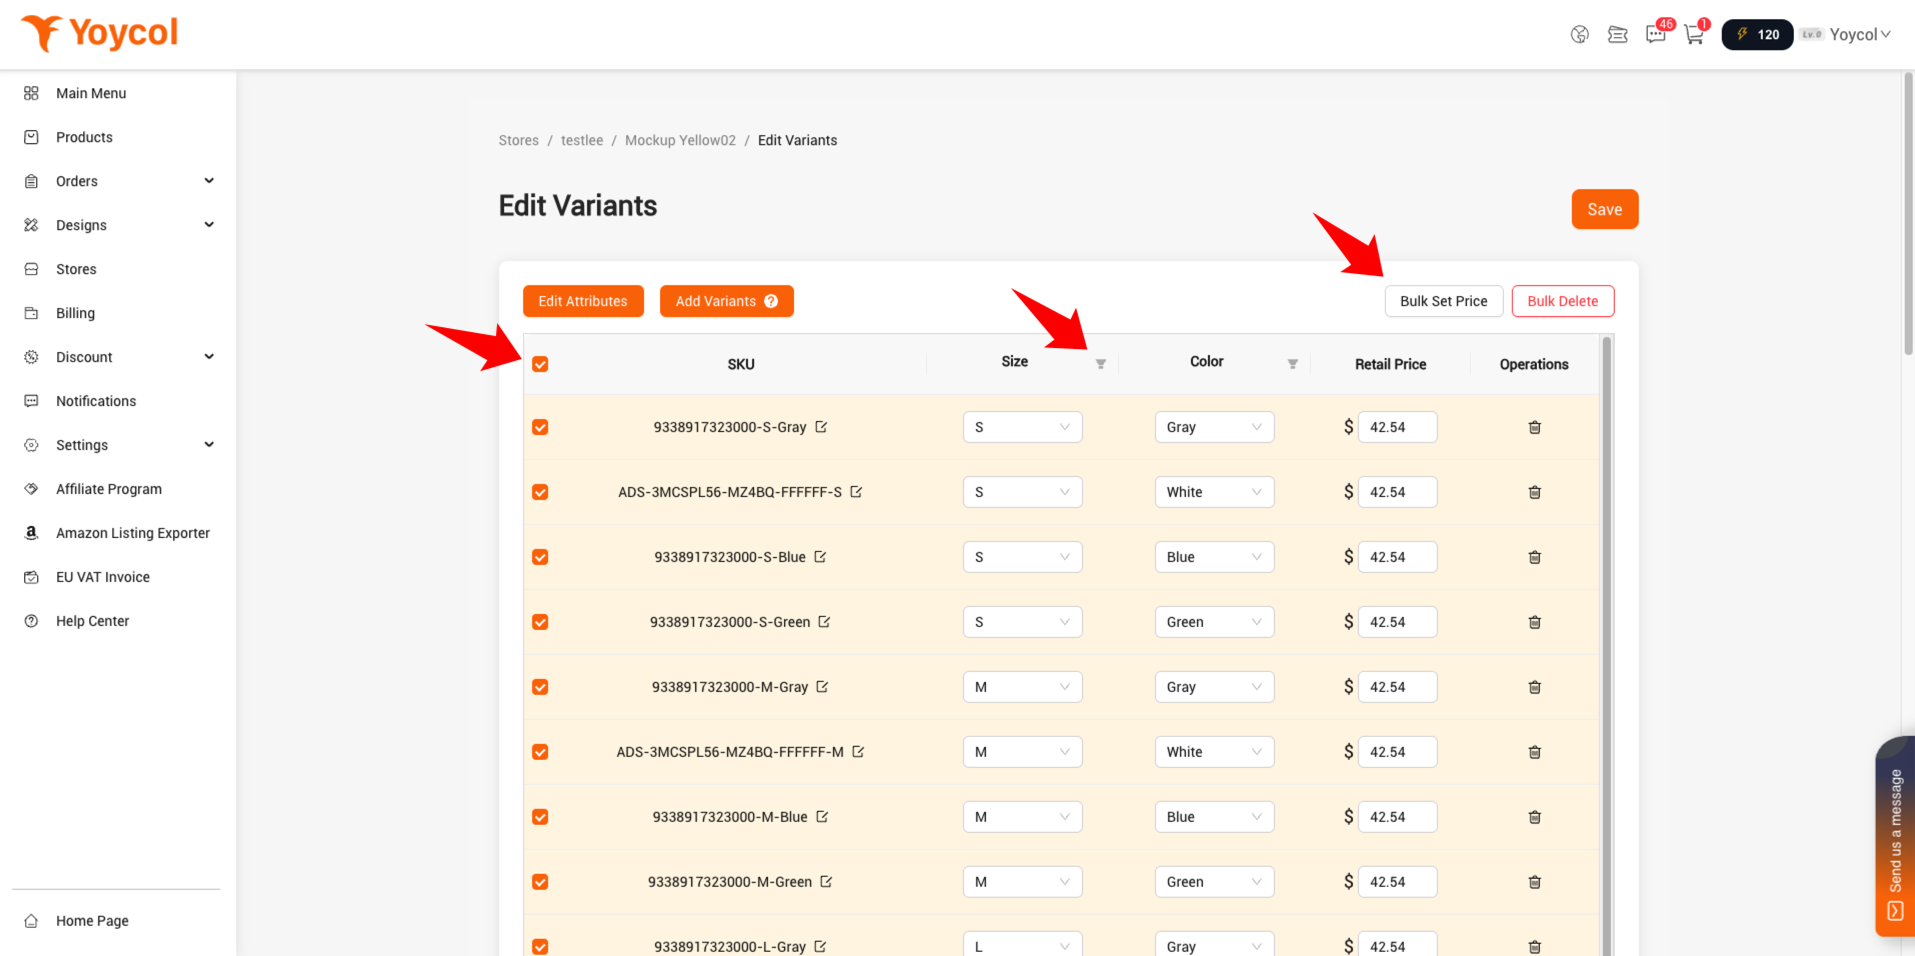
3.1 Click 'Edit Variants'
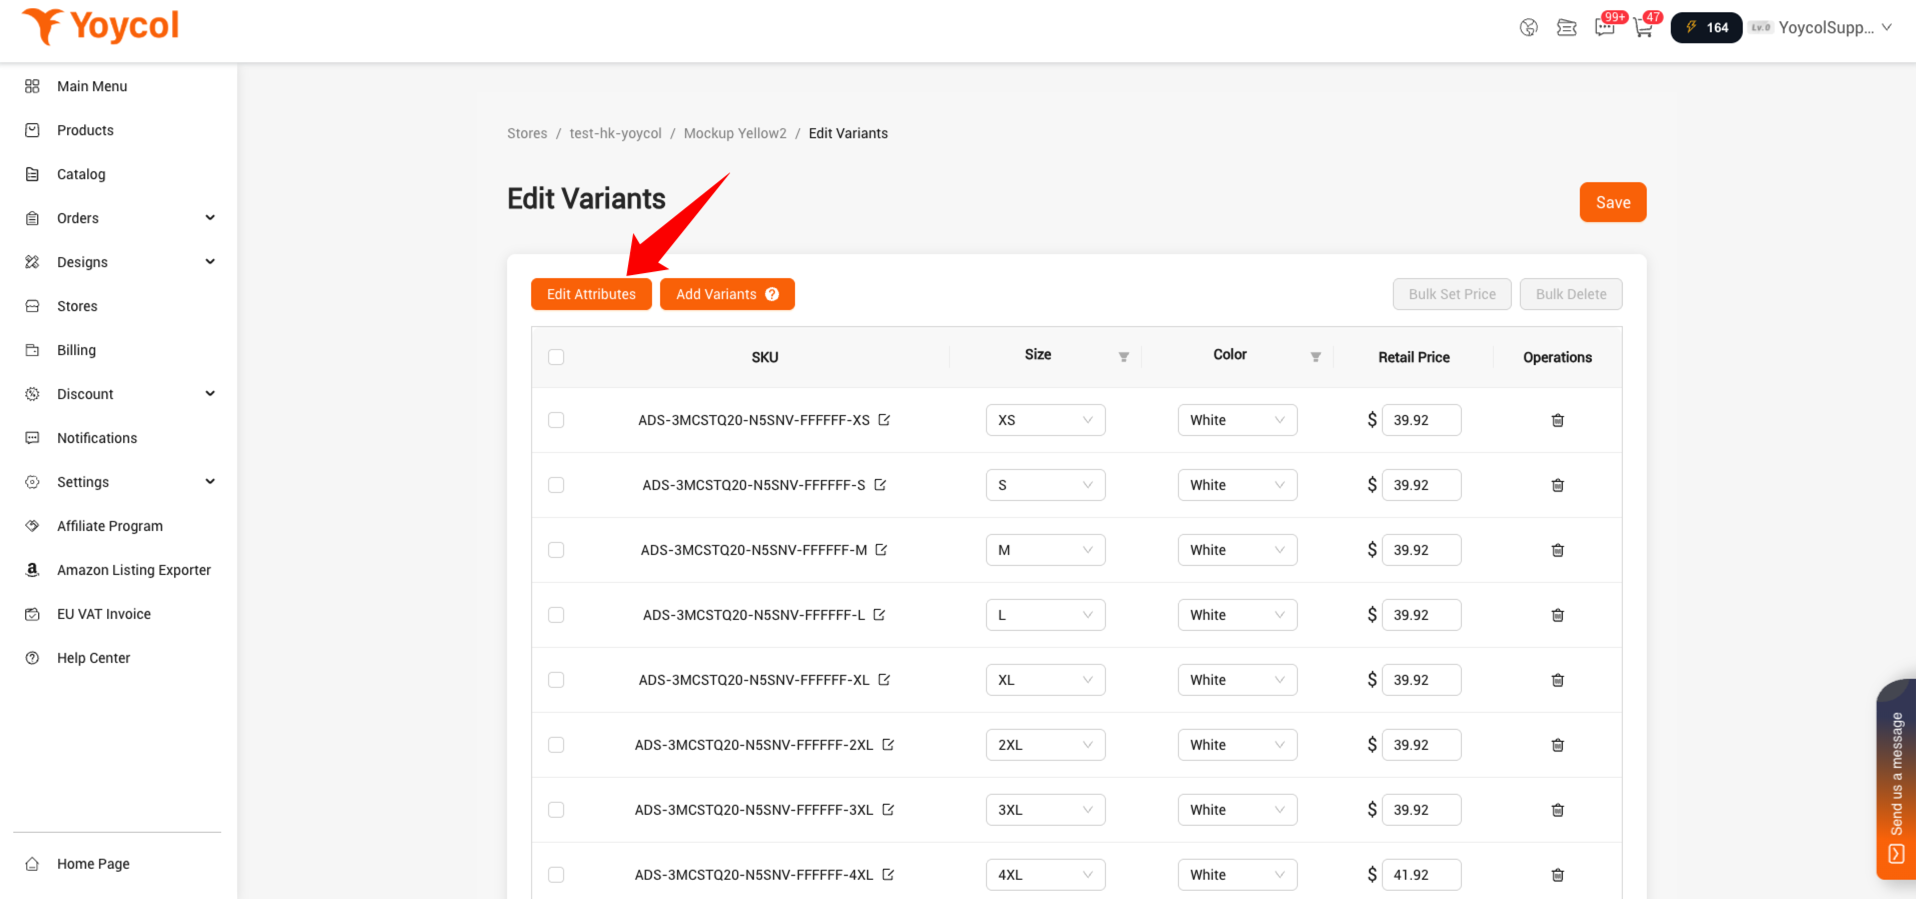
3.2 Click 'Edit Attributes'
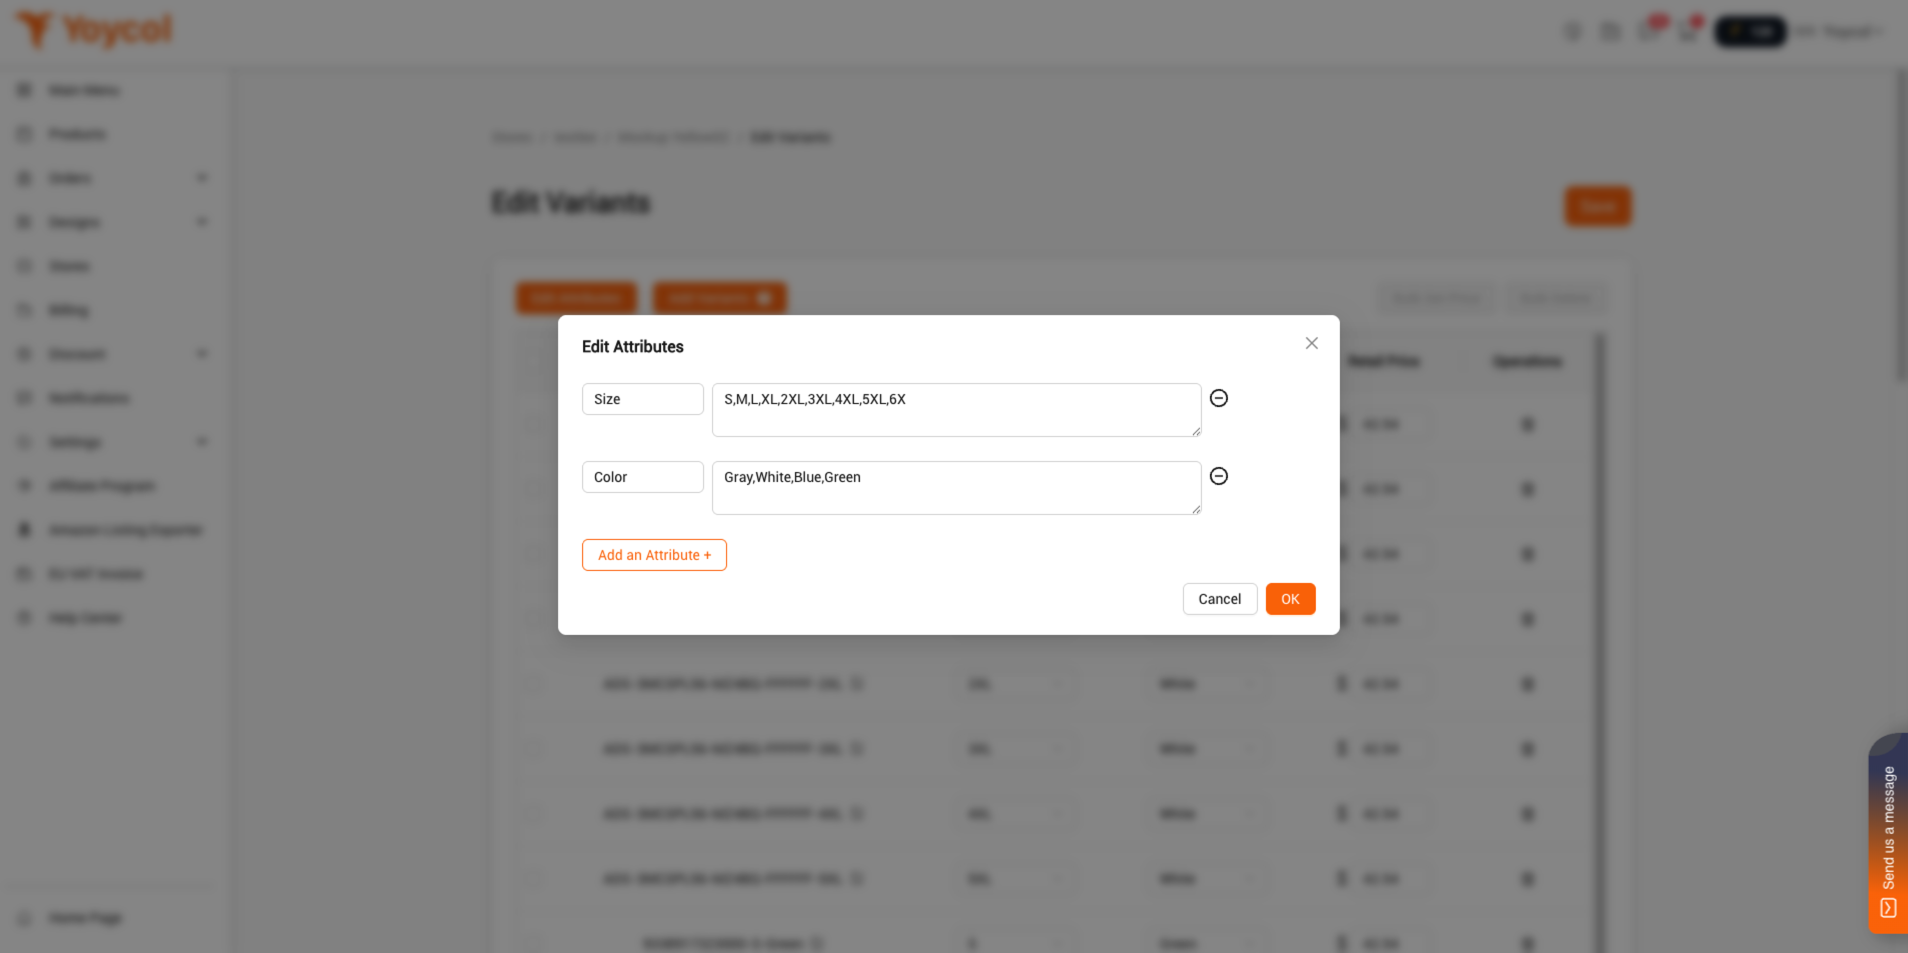
3.3 Update the attribute and attribute values in the popup, then click 'OK'. Variants will be generated based on the latest attribute values.
1) You can add colors to the existing attribute. You need to separate the attribute values with commas.
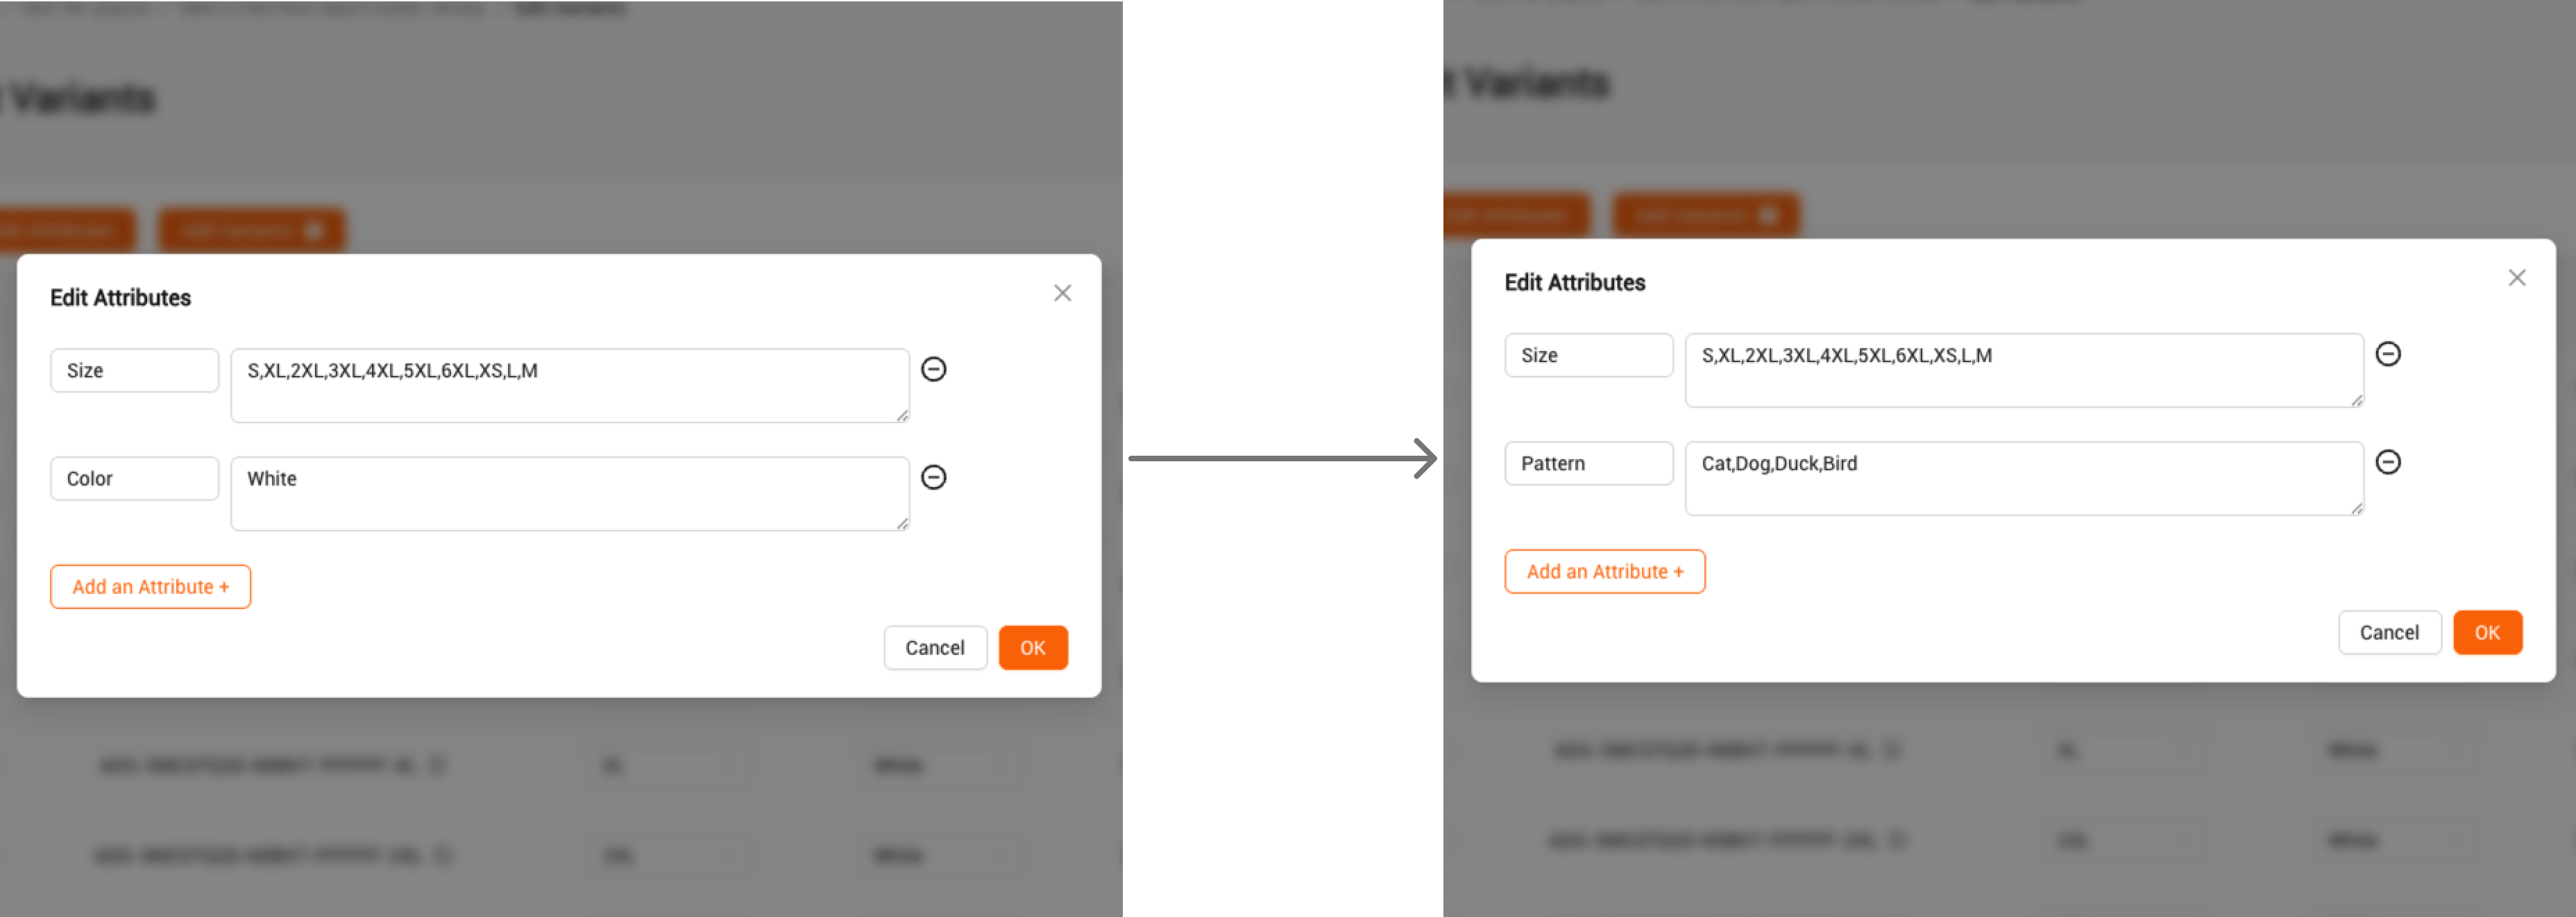
2)You can also delete the original attributes, click 'Add an Attribute', then add new attributes and attribute values. For example, you can delete attribute 'Color', and add attribute 'Pattern'
3.4 Update prices
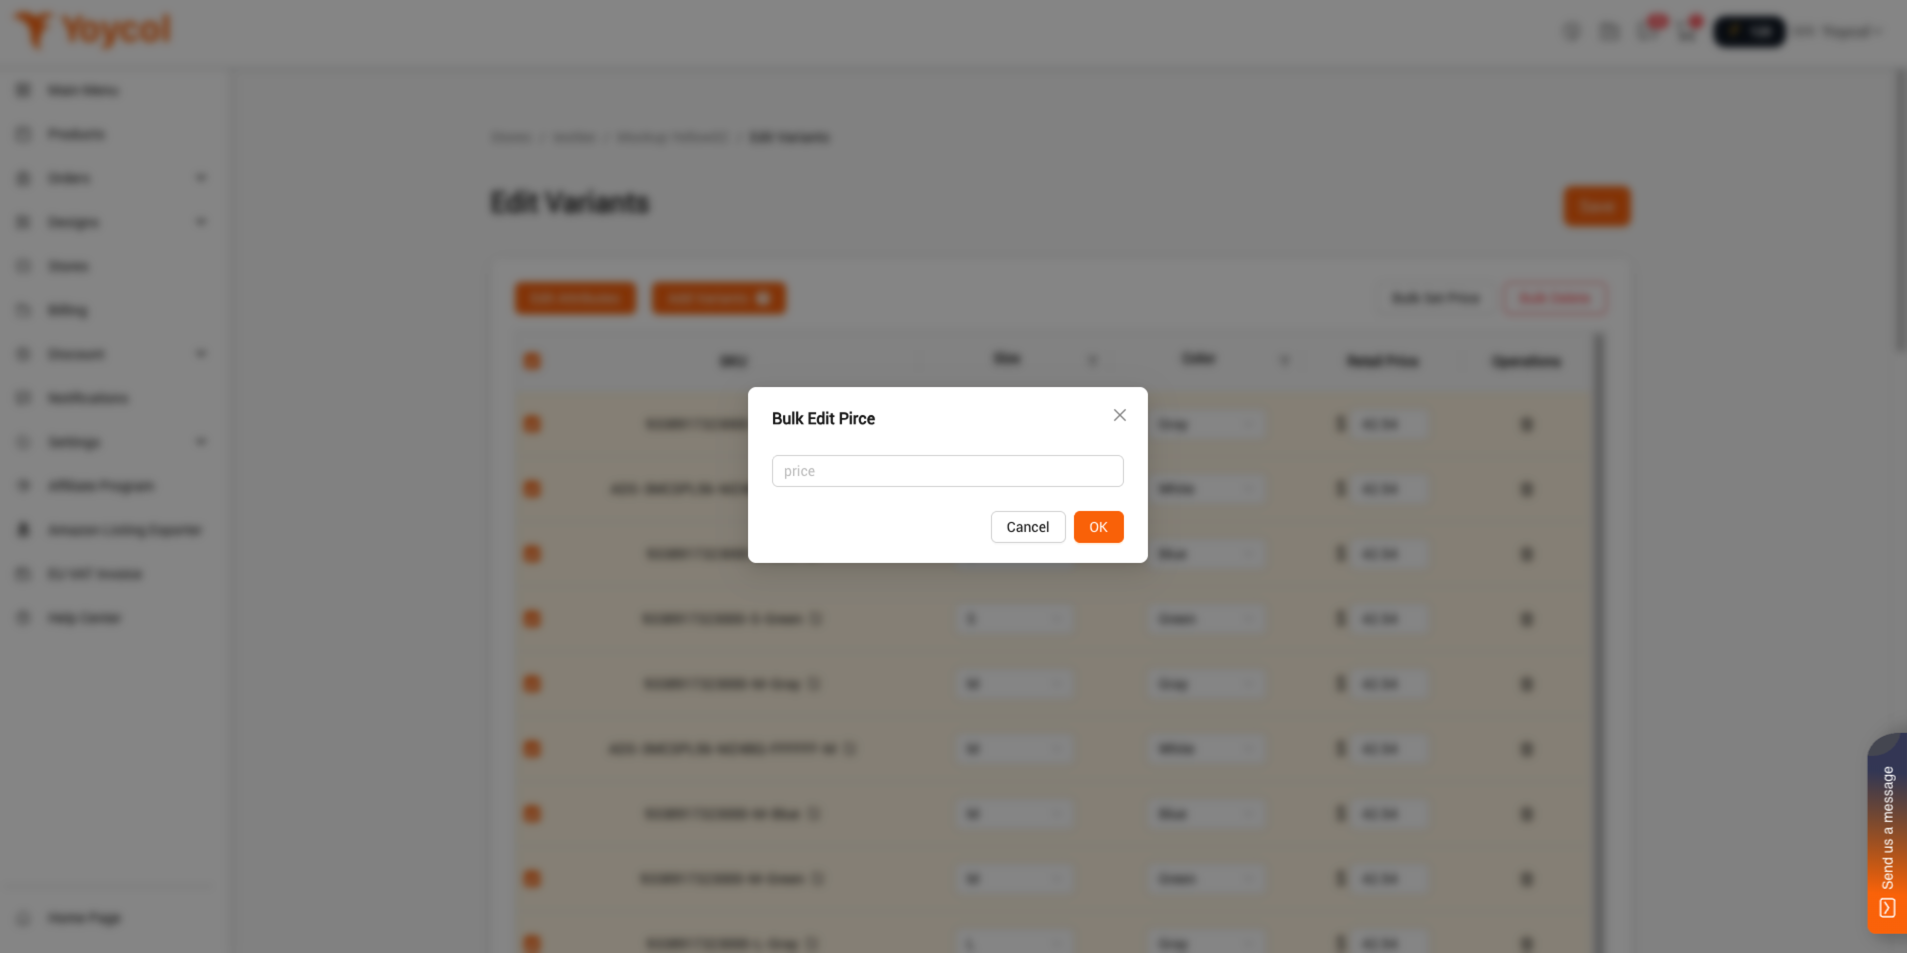
If all variants share the same price, you can select all variants and click “Bulk Set Price”. Enter the price in the popup and click "OK".
If the variants have different prices, you can filter by attributes first, then select all filtered variants, click “Bulk Set Price”. Enter the price in the popup and click "OK".
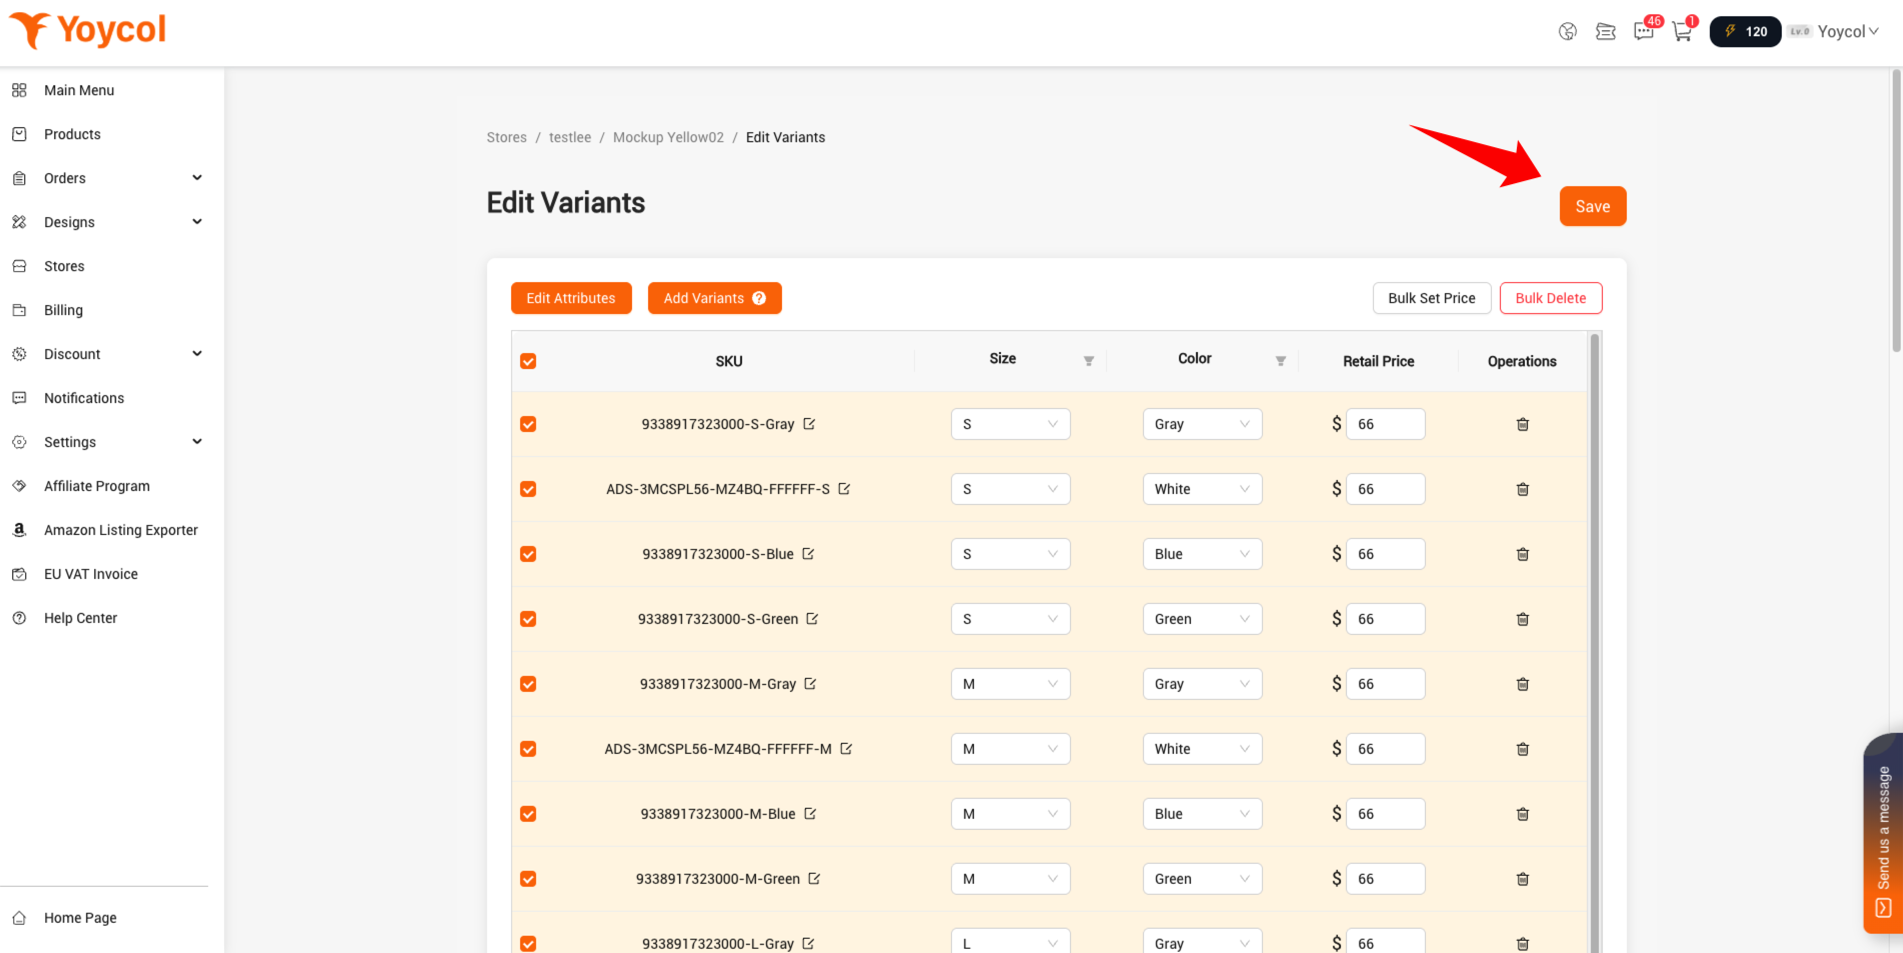
After setting the price, click “Save”.
4. Sync design for new variants
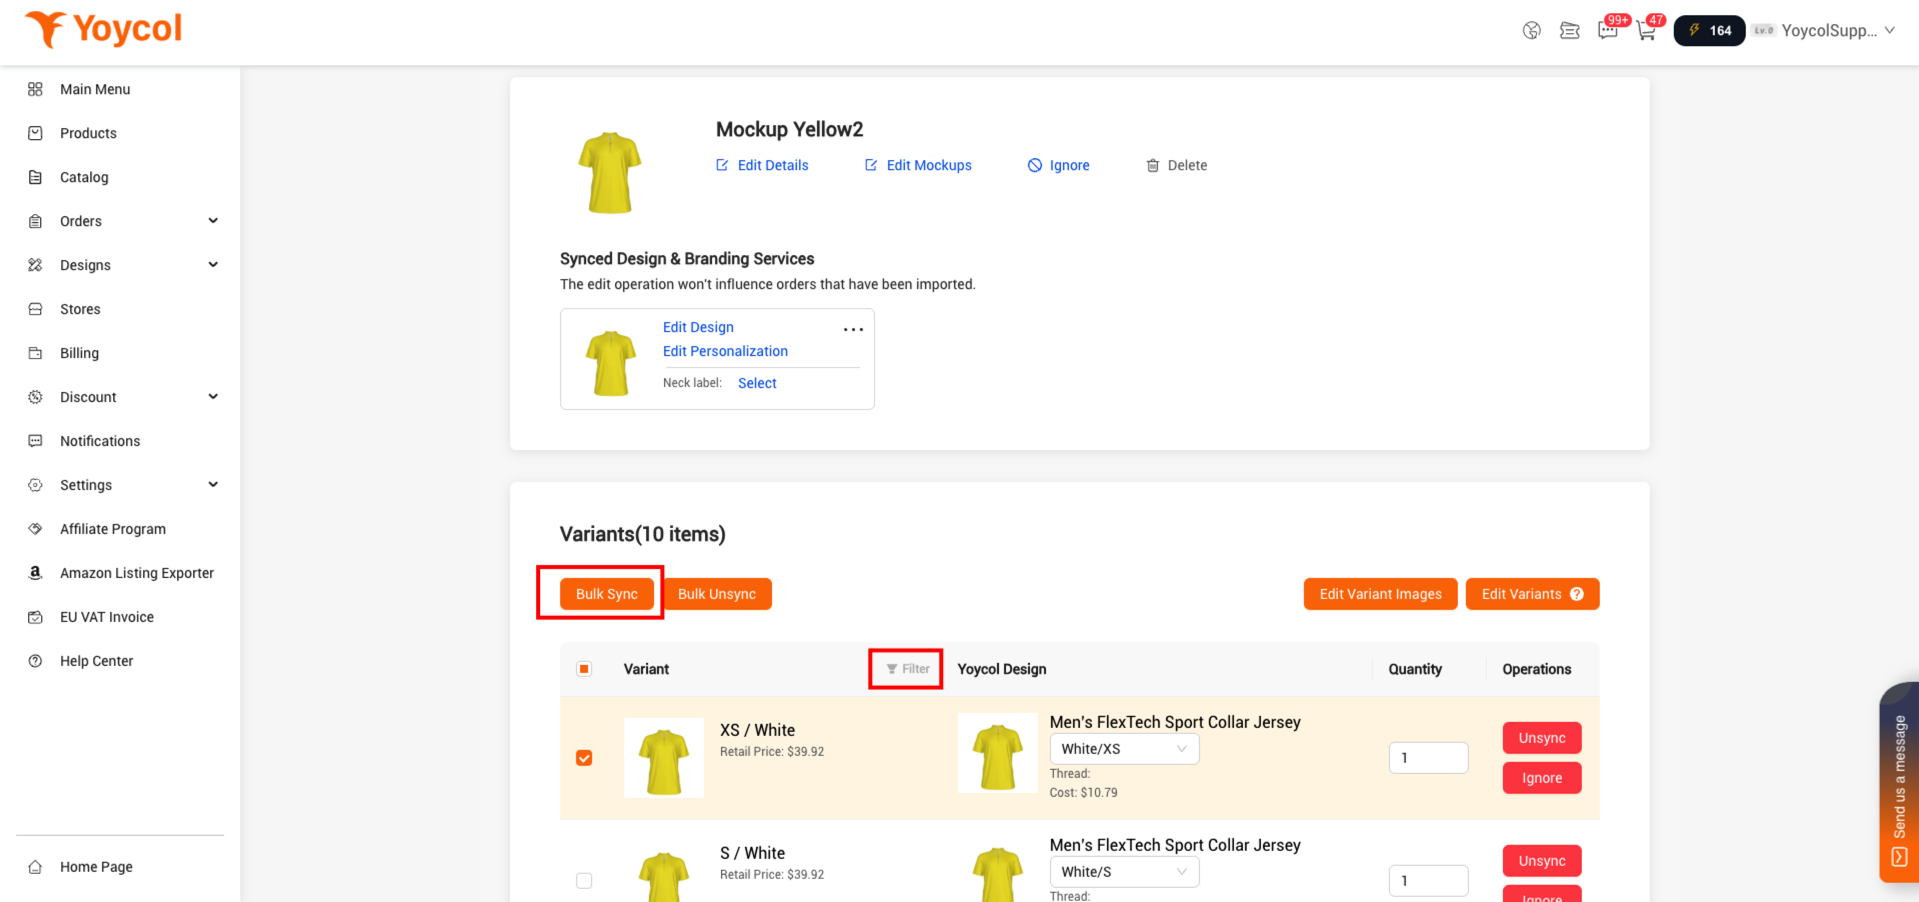
4.1 Filter the variants that need to be synced with the same design, then select the filtered variants and click “Bulk Sync”.
4.2 Select Design in the popup
1)If it is a non-personalized product, switch to "Product Templates" tab, find the design you want.
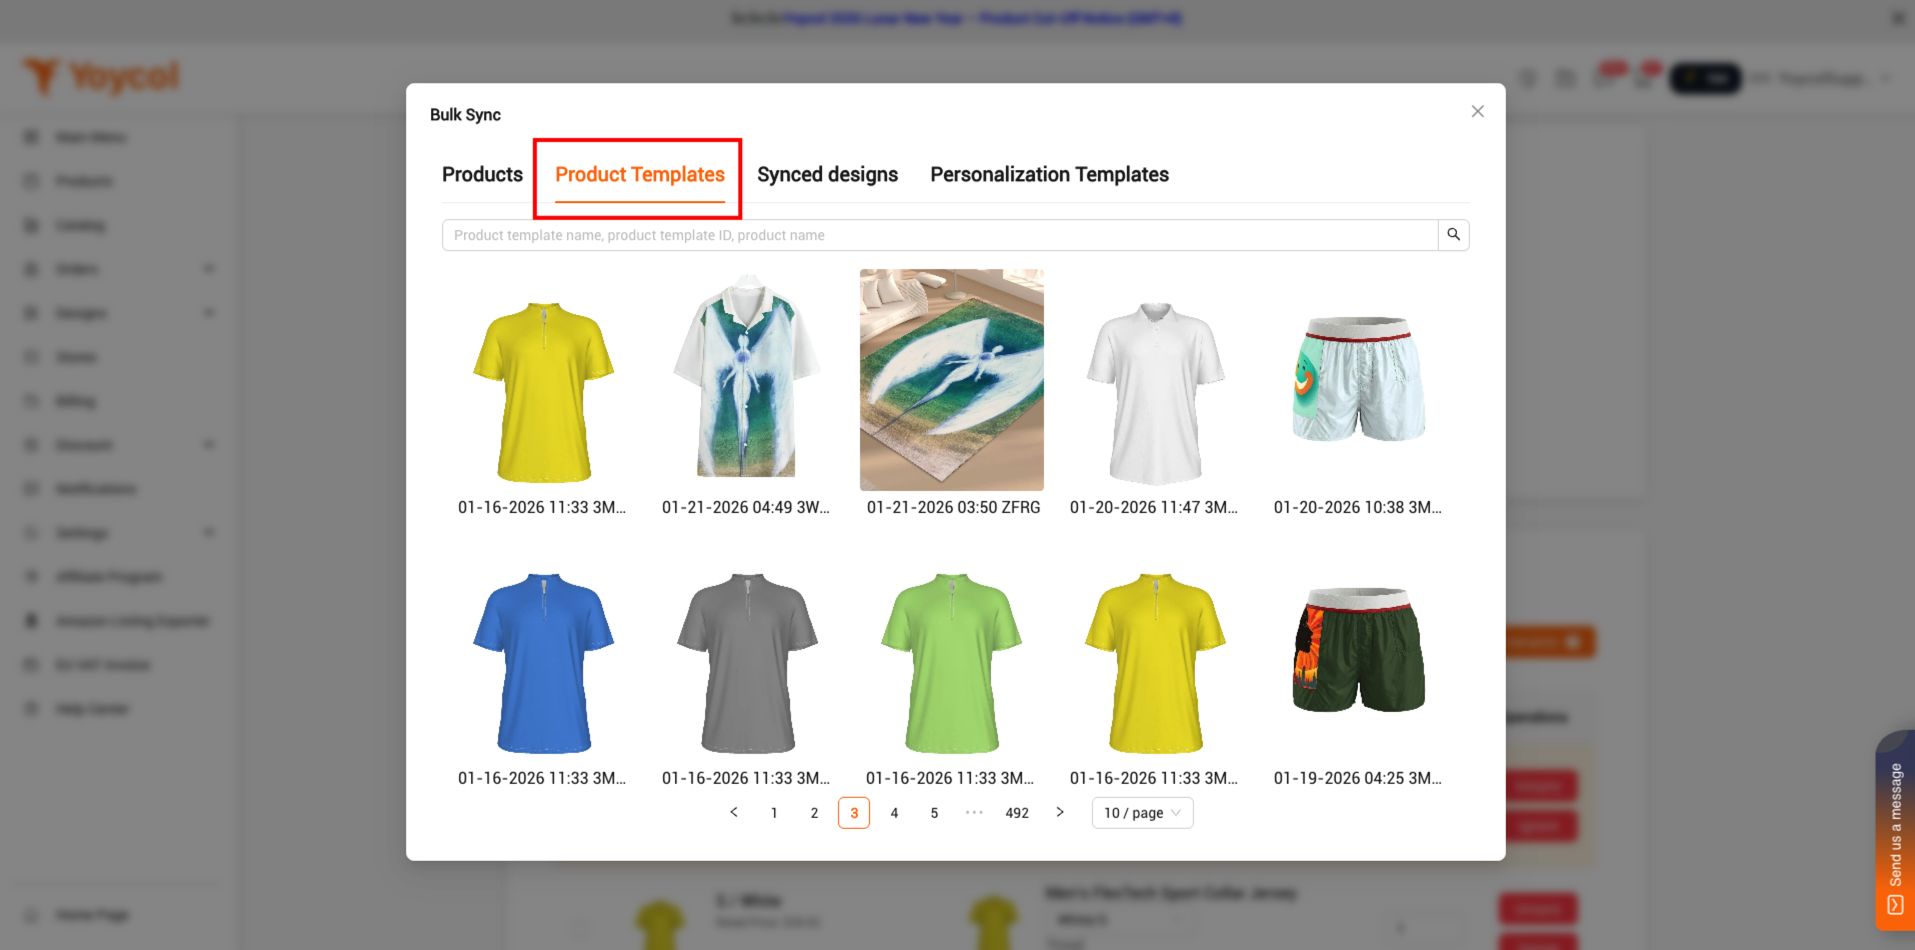
2)If it is a personalized product, switch to "Personalization Templates" tab, find the design you want.
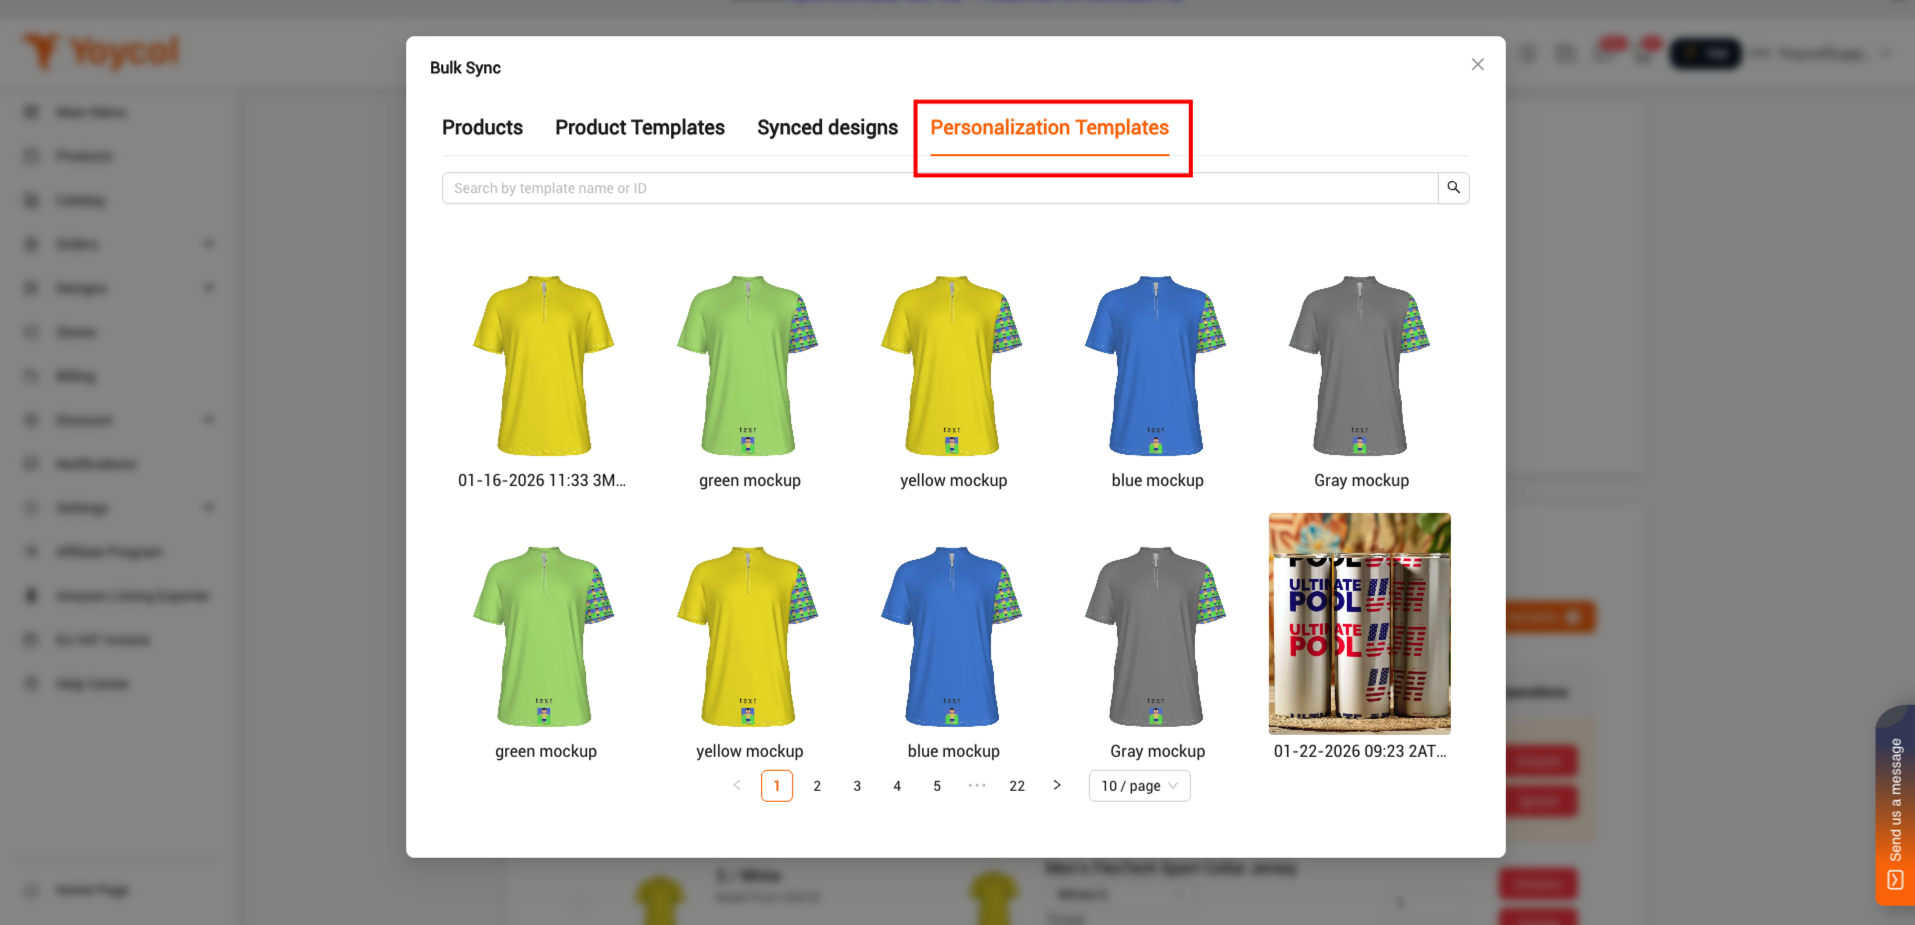
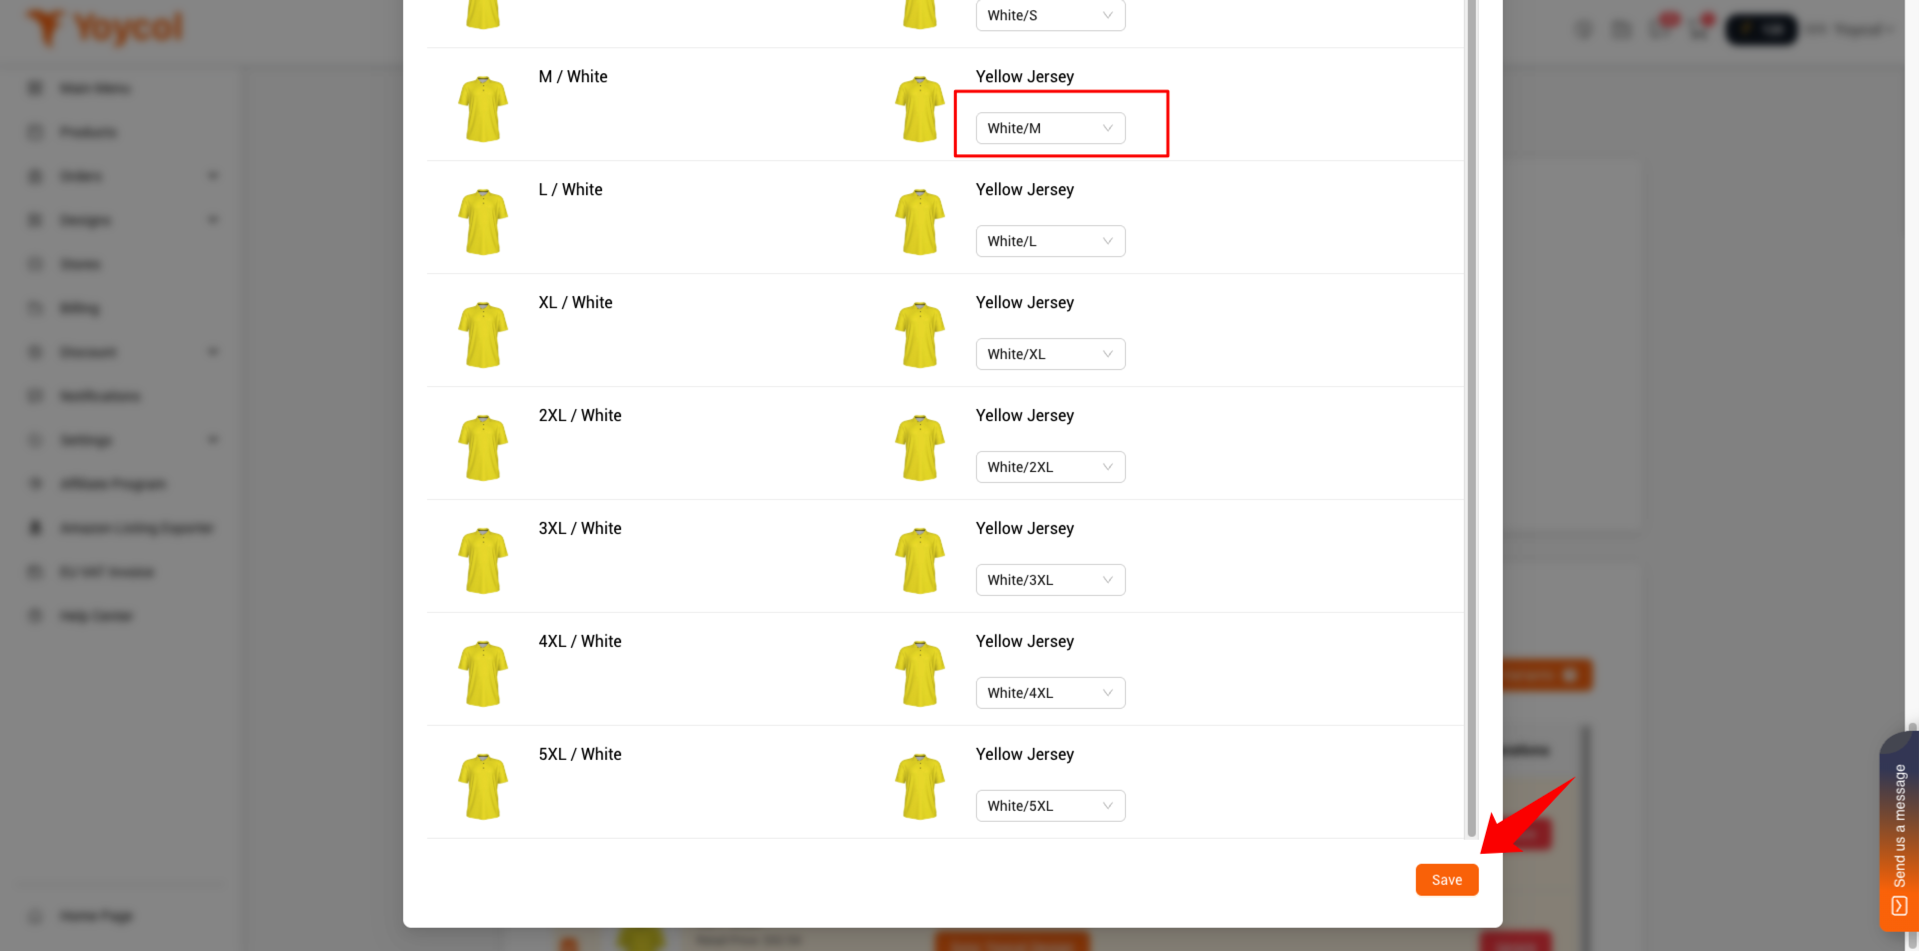
4.3 Select and review the variants, and click "Save".
5. Update your mockups
If you don’t want to update the mockups, you can skip this step.
Currently, updating mockups is only supported for Shopify stores.
For other channels, support will be added in the future. You can download the mockups and manually upload them in the channel’s backend.
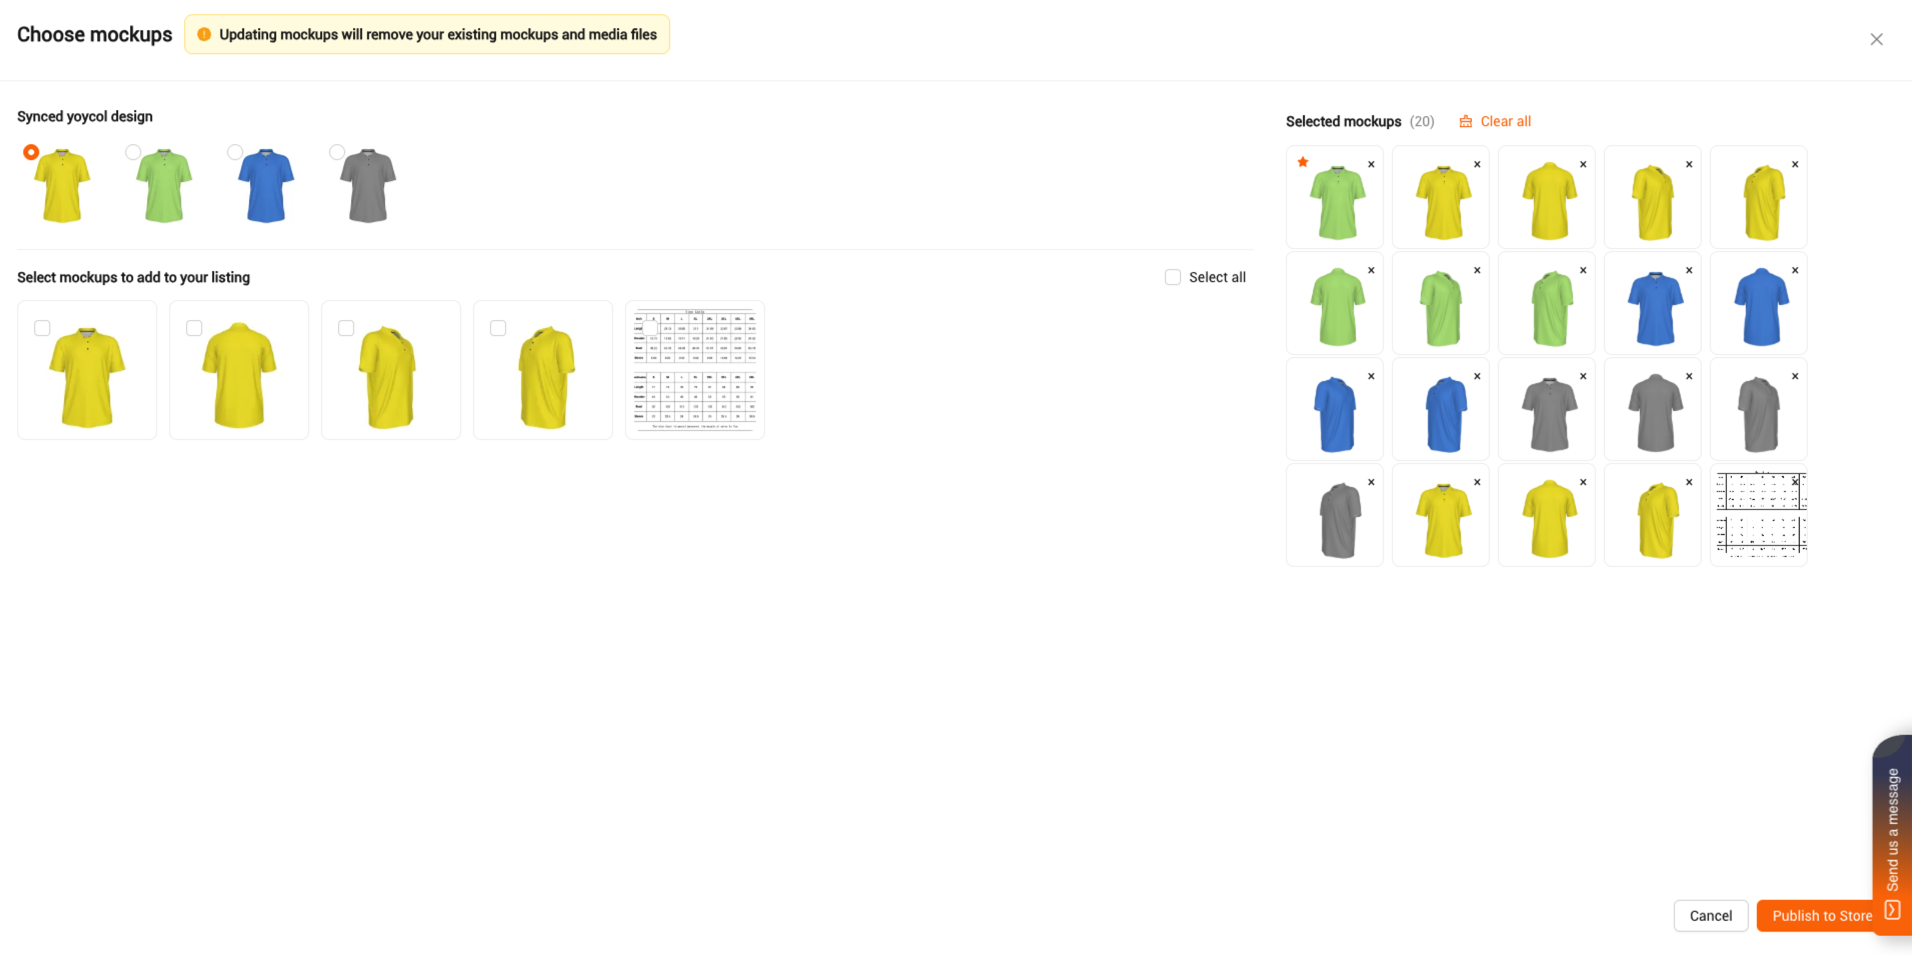
1) Click 'Edit Mockups'
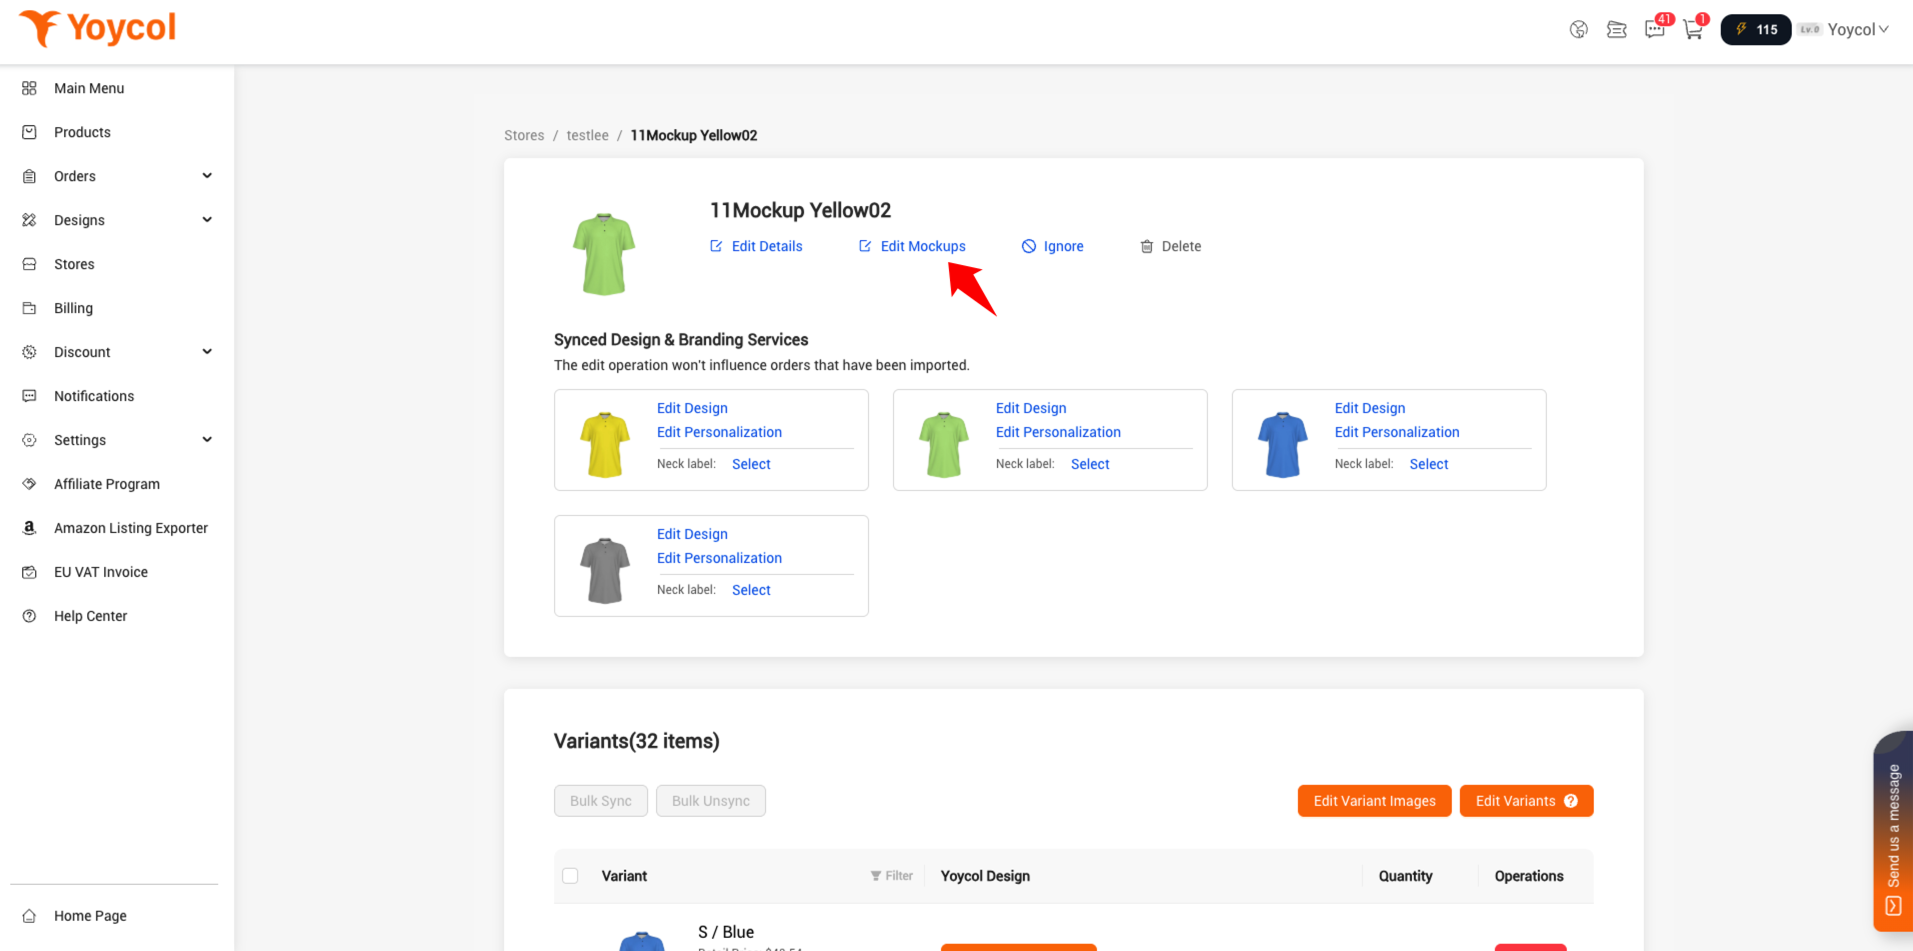
2) On the right , under 'Selected mockups', you can see the mockups that have already been added to Shopify.
On the left, you can also see all synced designs. Choose a design, then select the mockups to add them to the 'Selected Mockups' section on the right. Click ‘Publish to Store'.
6. Update variant image
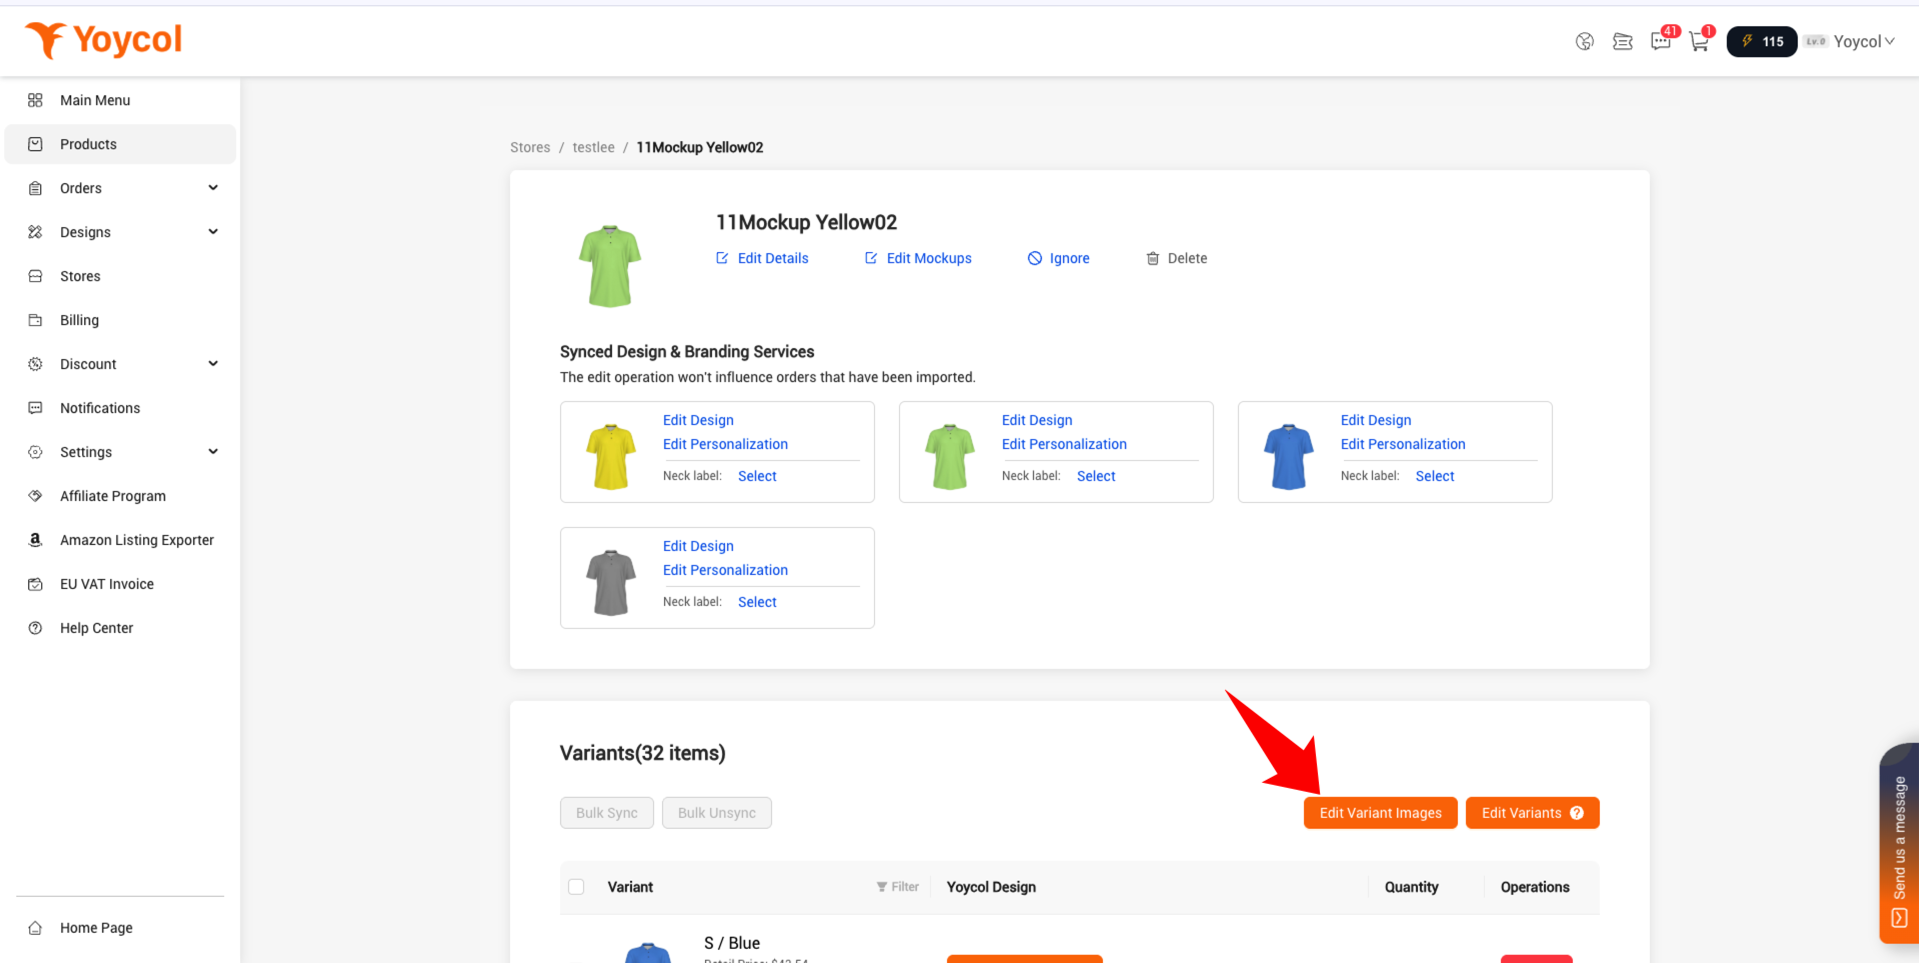
1) Click 'Edit Variant Images'
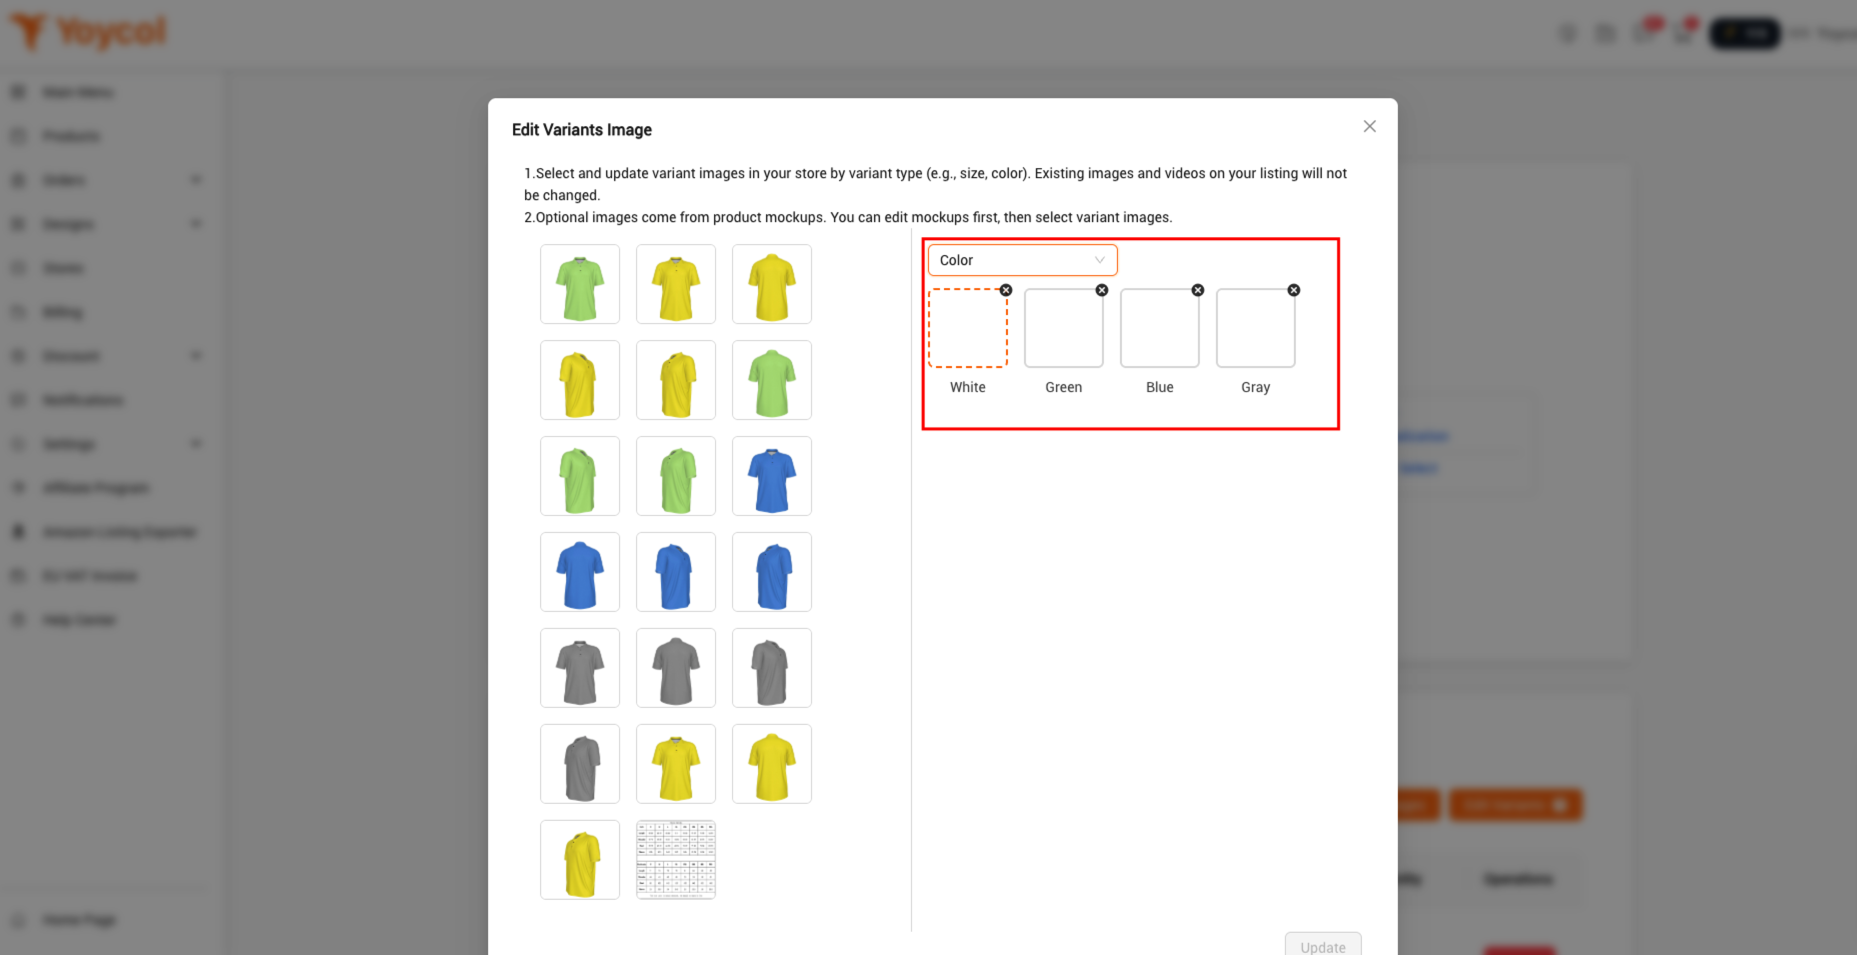
2) Select and update variant images to your Shopify store by variant type (e.g., size, color) and click 'Update'.
If you have other questions, welcome to contact us.