

AI Mockup User Guide
Overview
AI Mockup creates premium fashion product main images by combining three inputs:
- Product Image: the garment or product to preserve.
- Model Image: the model reference used for generation.
- Scene Image: the background and environment reference.
The generator creates a new commercial mockup image and saves the result in History.
Entry
Open a product detail page under Personal Center > Store Product List, then click AI Mockup.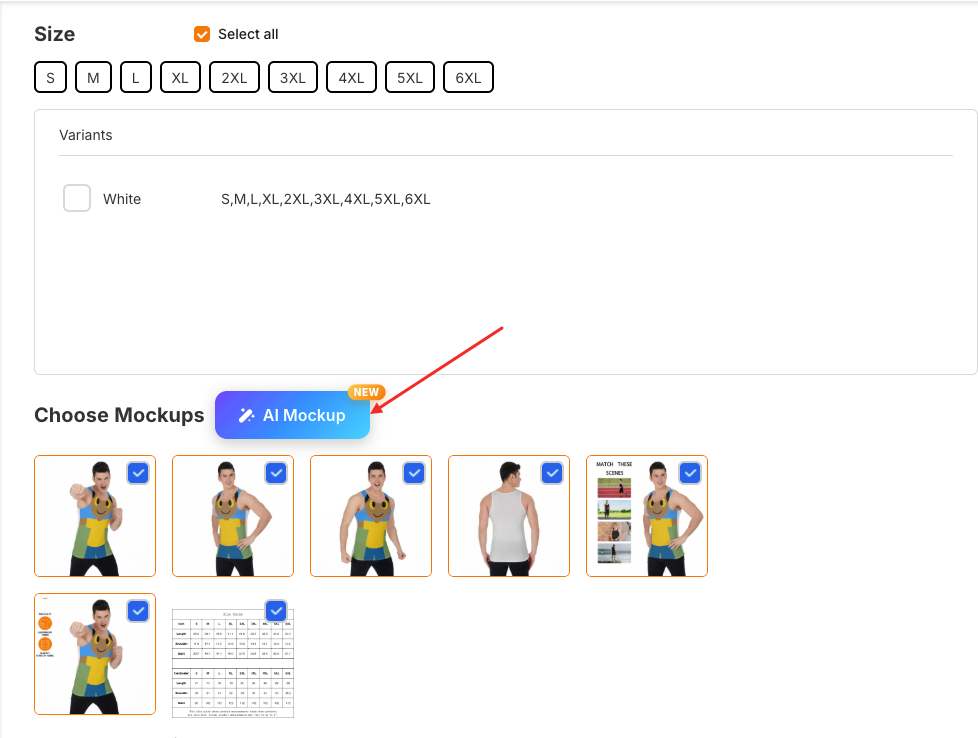
When the version selector appears, choose: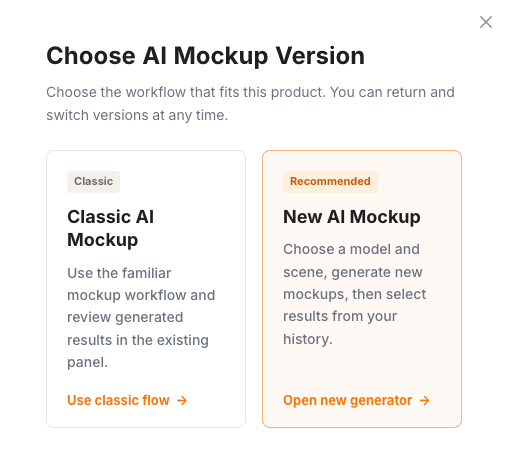
Classic AI Mockup: open the existing classic workflow.New AI Mockup: open the new generator with Product Image, Model Image, Scene Image, Preview, and History.
Prepare Inputs
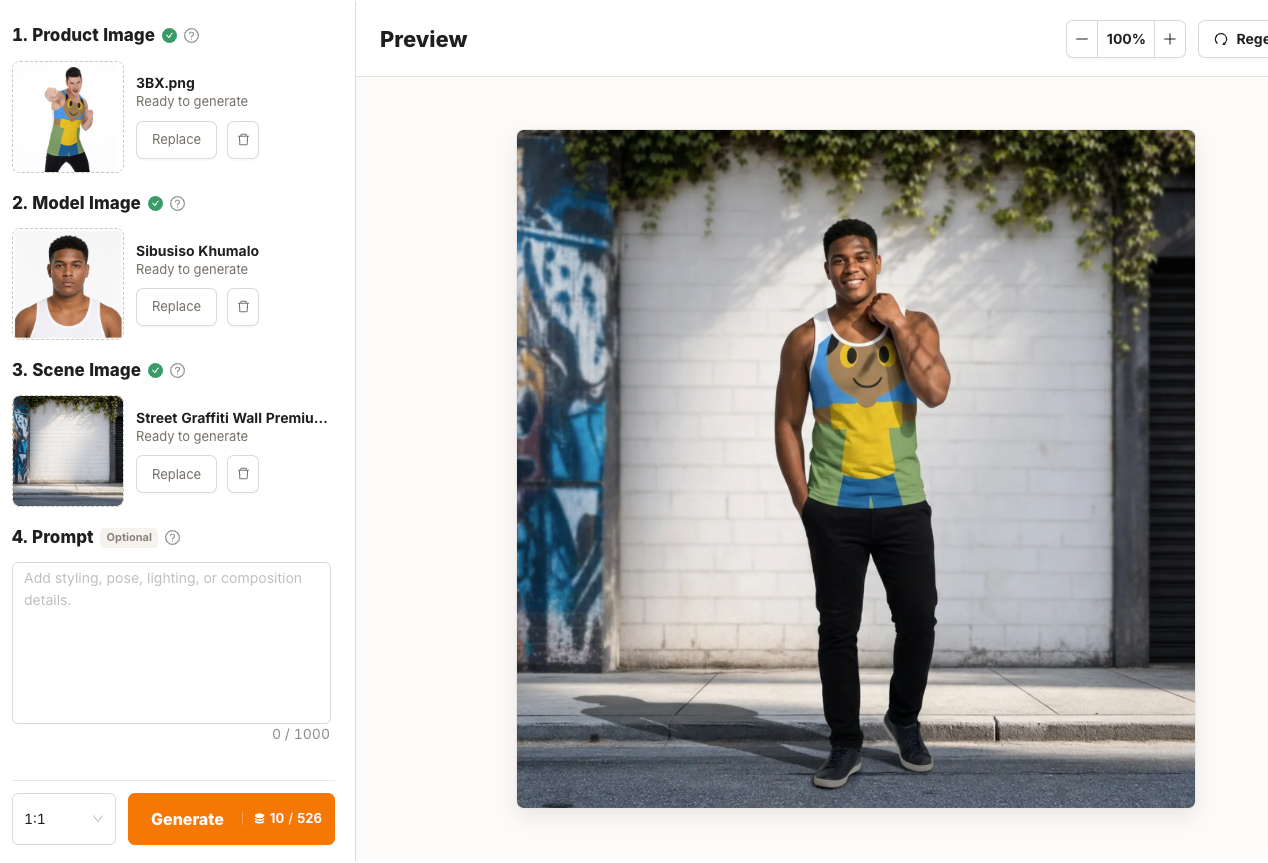
Product Image
The Product Image is usually filled from the first selected mockup in Choose Mockups.
Click Replace to choose a different product mockup image. The generated result will preserve the clothing category, color, print, silhouette, and visible design details from this image.
Model Image
Click Replace under Model Image to open Choose Model Image.
The selector defaults to Public Library. You can switch between:
Public Library: platform-provided public models.My Library: models you created or favorited.
Use the search box, region filter, and gender filter to find a model. Click a model card to select it.
Scene Image
Click Replace under Scene Image to open Choose Scene Image.
The selector defaults to Public Library. You can switch between:
Public Library: platform-provided public scenes.My Library: scenes you created or favorited.
Use the search box to find a scene. Click a scene card to select it.
Prompt
Prompt is optional. Use it to describe pose, styling, lighting, composition, or other creative requirements.
Generate a Mockup
- Confirm Product Image, Model Image, and Scene Image are all selected.
- Choose an aspect ratio.
- Check the AI points shown inside the
Generatebutton. - Click
Generate.
The Preview area shows a generation animation while the task is running. The result appears automatically after generation succeeds.
Regenerate
Regenerate uses the parameters from the currently selected generated history item. It is designed to recreate a result from the same product, model, scene, prompt, and aspect ratio instead of using newly selected inputs.
History
History shows generated tasks as image cards.
- Click a history card to preview it in the Preview area.
- Use the status filter to view all, success, generating, failed, or timeout records.
- Successful records can be selected.
- After selecting one or more successful records, click
Confirmin the bottom selection bar to send them back toChoose Mockups.
Tips
- Use a clean product image with the garment clearly visible.
- Choose a model with a pose and body type that fits the product.
- Choose a scene that matches the product style and target audience.
- Keep prompts short and specific when you need extra control.
- Confirm successful History items when you want to reuse generated results in the product mockup list.